


10
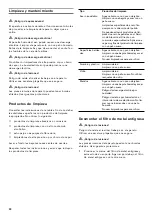
Cleaning the metal mesh grease
filters
m
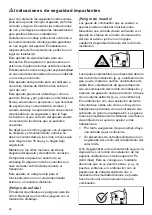
Risk of fire!
Grease deposits in the grease filter may catch fire.
Clean the grease filter at least every 2 months.
Never operate the appliance without the grease filter.
Notes
‒
Do not use any aggressive, acidic or alkaline
cleaning agents.
‒
When cleaning the metal mesh grease filters, also
clean the holder for the metal mesh grease filters in
the appliance using a damp cloth.
‒
The metal mesh grease filters can be cleaned in the
dishwasher or by hand.
In the dishwasher:
Note:
Slight discolouration may occur if the metal
grease filters are cleaned in the dishwasher. This has no
effect on the function of the metal grease filters.
▯
Do not clean heavily soiled metal grease filters
together with utensils.
▯
Remove any heavy soiling first by hand.
▯
Place the metal grease filters in the dishwasher
leaving plenty of space around them. The metal
grease filters must not be wedged in.
By hand:
▯
Soak the metal grease filters in hot soapy water.
▯
Clean the filters with a brush and then rinse them
thoroughly.
▯
Leave the metal grease filters to drain.
Note:
You can use a special degreaser to remove
stubborn dirt. This can be ordered via the online shop
(product no. 00311297). Spray the dirty metal grease
filters with the degreaser and leave it to work for up to
five minutes. Then rinse thoroughly. Observe the
instructions for use supplied with the cleaning product.
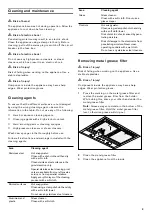
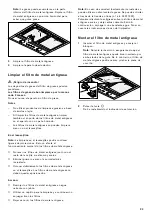
Installing the metal mesh grease filter
1
Install the metal grease filter and lock in place.
Note:
When installing the metal grease filter,
ensure that it is inserted correctly into the guide on
both sides. Otherwise, the metal grease filter can
fall and damage the cooktop.
2
Press the
œ
button.
The saturation indicator is reset.
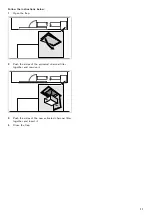
Changing the activated charcoal filter
(only in circulating-air mode)
m
Risk of injury!
Risk of falling while changing filter. Use a stable
stepladder.
In order to ensure adequate odour removal, you must
replace the activated charcoal filter regularly.
With normal levels of use (1 to 2 hours a day), the
activated charcoal filter must be replaced at least every
12 months.
Notes
‒
Activated charcoal filters can be obtained through
specialist retailers, from our after-sales service, or
from the online shop with the order number
AA200110. You need one activated charcoal filter
(AA200110) per filter module.
‒
The activated charcoal filters cannot be cleaned or
reactivated.
‒
Activated charcoal filters do not contain any harmful
substances and can be disposed of with your
normal household waste.
Summary of Contents for AC 402
Page 41: ...41 m 2 000 8 15 8 4 Pa 0 04 mbar...
Page 42: ...42 2 18 kW 12 kW...
Page 43: ...43 1 2012 19 E waste electrical and electronic equipment WEEE...
Page 44: ...44 online shop 1 1 2 2 3 3 1 1 2 2 3 3...
Page 45: ...45 1 2 2 1 2 3 1 2 3 1 2 2 6 1 1 2 3 2 6 6 1 1 2 3 2...
Page 46: ...46 12 4 m m m m m...
Page 47: ...47 m m 1 2 3 m 2...
Page 48: ...48 Online Shop 00311297 5 1 2 m 1 2 12 Online Shop AA200110 1 AA200110 1 2 3 4...
Page 49: ...49 m m LED 1 100 LED LED LED 4...
Page 50: ...50 1 2 3 AAA LR03 1 5 V 4 E FD E Nr FD Nr O GR 18 182...
Page 51: ...51 AC402 462 472 482 AA010810 AC402 462 472 482 AA200110...


