48
en
Installation
3
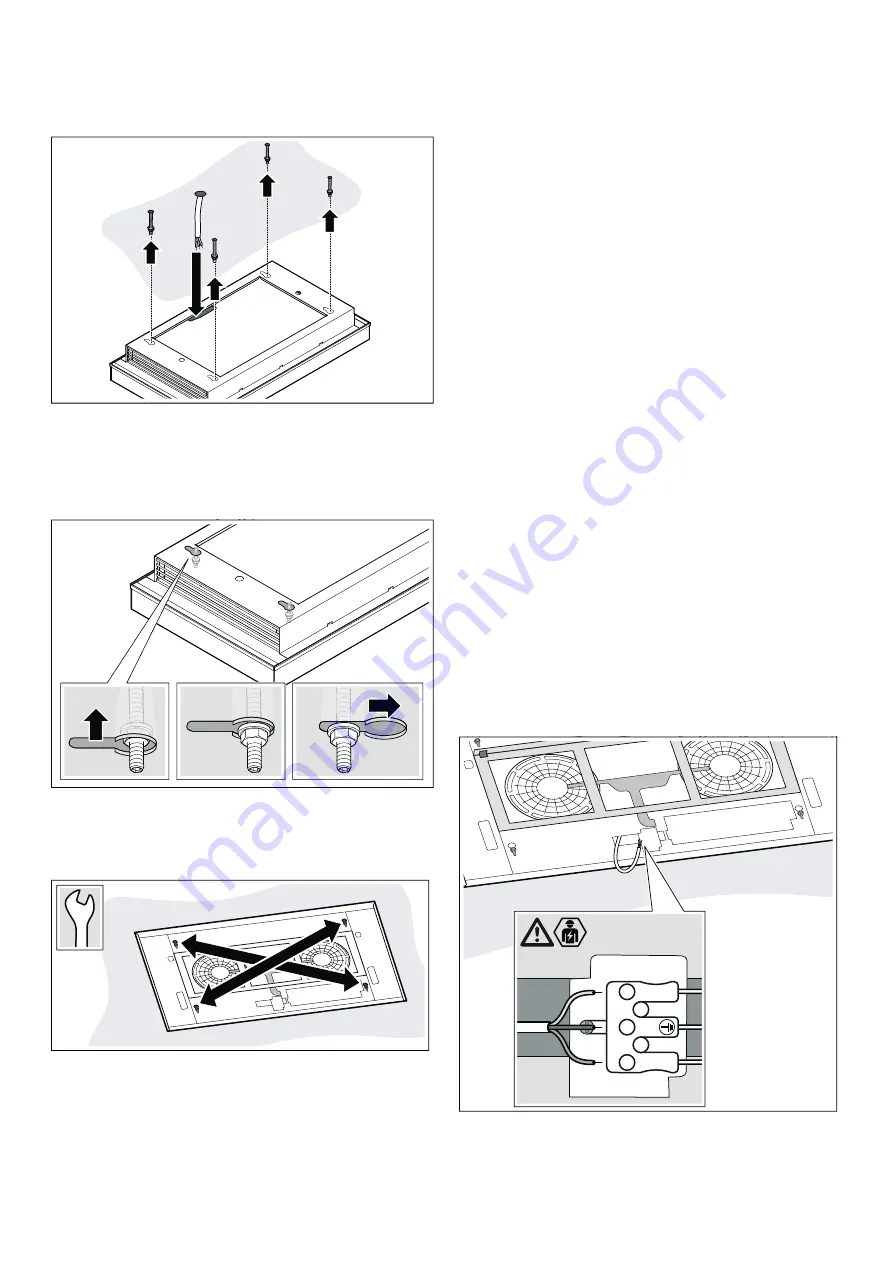
Guide the on-site cable through the opening and
hook the appliance onto the fastening screws on
the ceiling.
4
Push the appliance as far as it will go into the four
key hole openings using the guide sleeves.
5
Move the appliance and lower it further so that the
collar nuts are positioned on the edge of the guide
sleeves.
6
Carefully tighten diagonally opposite nuts until the
appliance is flush-mounted on the ceiling.
Note:
Tighten the nuts one at a time so that the
appliance is not wedged in the cut-out.
Connecting the appliance
Ensure that there is sufficient fuse protection for the
household wiring. The voltage and frequency of the
appliance must match the electrical wiring (see rating
plate).
The appliance corresponds to protection class 1
and
must only be operated with a protective earth
connection.
The appliance must be disconnected from the power
supply whenever installation work is being carried out.
When the appliance is installed, protection against
contact must be provided.
Only a licensed professional may connect the appliance.
They are subject to the requirements of the local
electricity provider.
m
Warning – Risk of electric shock!
It must always be possible to disconnect the appliance
from the power supply. If there is a fixed connection, an
all-pole isolating switch with a contact gap of at least
3 mm must be provided for the wiring. Only an
electrician may install the fixed connection.We
recommend installing a residual-current circuit breaker
(RCCB) in the appliance's power supply circuit.
Note:
To find out the correct fuse rating, see the total
connected load (in watts) on the appliance's rating
plate.
1
Guide the on-site cable carefully through the
opening in the appliance.
Notes
–
The bending radius of the on-site cable for
connecting the appliance must be complied
with.
–
The cable must remain doubly insulated. Strip it
as little as possible in front of the connecting
terminal.
2
Plug the on-site cable into the connecting terminal.
1
2
/
1
Summary of Contents for AC230101
Page 127: ......


