background image

en 

Troubleshooting

10

3.

Use a brush to clean the grease filters.

4.

Rinse the grease filters thoroughly.

5.

Allow the grease filters to drain.

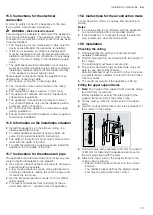
9.6 Cleaning grease filters in the
dishwasher

The grease filters filter the grease from the cooking va-
pour. Regularly cleaned grease filters guarantee a high
level of grease removal. We recommend cleaning the
grease filters every two months.

WARNING ‒ Risk of fire!

Fatty deposits in the grease filters may catch fire.

Clean the grease filters regularly.

ATTENTION!

The grease filters may become damaged if they are
squeezed.

Do not squeeze the grease filters.

Note: 

When cleaning the grease filter in the dish-

washer, light discolouration may occur. This discoloura-
tion has no effect on the performance of the metal
grease filters.

Requirement:

 The grease filters have been removed.

1.

Observe the information regarding the cleaning
agents.

2.

Place the grease filters loosely into the dishwasher.
Do not clean heavily soiled grease filters with
utensils.
Use special grease solvent for stubborn dirt. You
can obtain grease solvents from after-sales service
or the online shop.

3.

Start the dishwasher.
Select a temperature of no more than 70 °C.

4.

Allow the grease filters to drain.

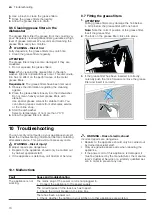
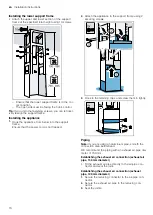
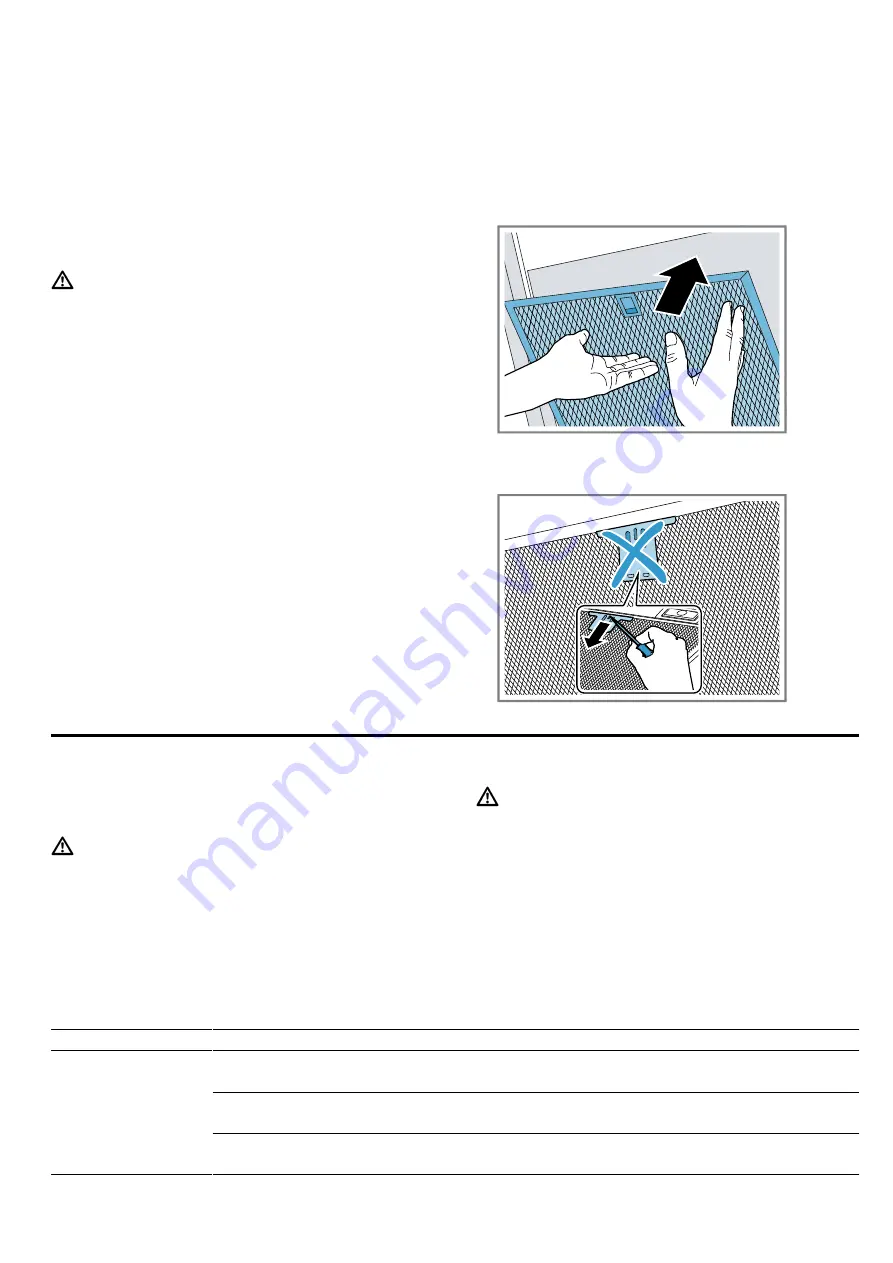
9.7 Fitting the grease filters

1. ATTENTION!

Falling grease filters may damage the hob below.

Grip below the grease filter with one hand.

Note: 

Note the correct position of the grease filter.

Insert the grease filter.

2.

The lock on the grease filter clicks into place.

3.

If the grease filter has been inserted incorrectly,
carefully push the lock forwards, remove the grease
filter and insert it correctly.

10  Troubleshooting

You can rectify minor faults on your appliance yourself.
Read the troubleshooting information before contacting
after-sales service. This will avoid unnecessary costs.

WARNING ‒ Risk of injury!

Improper repairs are dangerous.

Repairs to the appliance should only be carried out
by trained specialist staff.

If the appliance is defective, call Customer Service.

WARNING ‒ Risk of electric shock!

Incorrect repairs are dangerous.

Repairs to the appliance should only be carried out
by trained specialist staff.

Only use genuine spare parts when repairing the
appliance.

If the power cord of this appliance is damaged, it
must be replaced by the manufacturer, the manufac-
turer's Customer Service or a similarly qualified per-
son in order to prevent any risk.

10.1 Malfunctions

Fault

Cause and troubleshooting

The appliance is not
working.

The mains plug of the power cord is not plugged in.

Connect the appliance to the power supply.

The circuit breaker in the fuse box has tripped.

Check the circuit breaker in the fuse box.

There has been a power cut.

Check whether the lighting in your kitchen or other appliances are working.

Summary of Contents for AI240191

Page 1: ...en User manual and installation instructions AI240191 Extractor hood Gaggenau...

Page 2: ...domestic environment Up to an altitude of max 2000 m above sea level Do not use the appliance With an external timer 1 3 Restriction on user group This appliance may be used by children aged 8 or over...

Page 3: ...e is operated exclusively in circulat ing air mode WARNING Risk of fire Fatty deposits in the grease filters may catch fire Never operate the appliance without a grease filter Clean the grease filters...

Page 4: ...ac turer the manufacturer s Customer Service or a similarly qualified person in order to prevent any risk An ingress of moisture can cause an electric shock Before cleaning pull out the mains plug or...

Page 5: ...ighting if it is no longer required When the lighting is switched off it does not con sume any energy Clean or replace the filters at regular intervals The effectiveness of the filter is retained Put...

Page 6: ...atically switches to fan setting 3 6 5 Switching off intensive mode Press or 6 6 Switching on intermittent ventilation With intermittent ventilation the appliance switches the ventilation on and off a...

Page 7: ...the signal tone Requirement The appliance is switched off 1 To open the setting press and briefly 2 Press to switch off the audible signal 3 To save the setting briefly press and hold and 7 Home Conn...

Page 8: ...cted to the Internet your appliance will transmit the following types of data to the Home Connect server initial registration Unique appliance identification consisting of appli ance codes as well as...

Page 9: ...arefully clean the appliance interior 1 Observe the information regarding the cleaning agents 2 Clean as follows depending on the surface Clean stainless steel surfaces in the direction of the finish...

Page 10: ...lters may damage the hob below Grip below the grease filter with one hand Note Note the correct position of the grease filter Insert the grease filter 2 The lock on the grease filter clicks into place...

Page 11: ...acturer s warranty the use of Customer Service is free of charge Detailed information on the warranty period and terms of warranty in your country is available from our after sales service your retail...

Page 12: ...au com gb among the additional documents on the product page for your appliance 1 Only applies to Great Britain 2 4 GHz band 2400 2483 5 MHz Max 100 mW 5 GHz band 5150 5350 MHz 5470 5725 MHz Max 100 m...

Page 13: ...ble to assess the house s entire ventilation setup and will suggest the suitable ventilation measures to you Unrestricted operation is possible if the ap pliance is operated exclusively in circulat in...

Page 14: ...in the fuse box Call customer services Page 11 Incorrect repairs are dangerous Repairs to the appliance should only be carried out by trained specialist staff Only use genuine spare parts when repair...

Page 15: ...rs install the appliance in the middle of the hob 15 7 Instructions for the exhaust air pipe The appliance manufacturer does not provide any war ranty for faults attributable to the pipeline Use a sho...

Page 16: ...power cord is not trapped 2 Attach the appliance to the support frame using 2 securing screws 3 Hook in the retaining clips and screw them in tightly Piping Note If you are using an aluminium pipe sm...

Page 17: ...flue ducts remove the adhesive tape or the flue duct from the protective packaging 2 Remove any protective foil from both flue ducts 3 Note To prevent scratches lay soft towels over the edges of the...

Page 18: ......

Page 19: ......

Page 20: ...4 81739 M nchen GERMANY www gaggenau com 9001665997 9001665997 en 020420 Valid within Great Britain Imported to Great Britain by BSH Home Appliances Ltd Grand Union House Old Wolverton Road Wolverton...

Reviews: