background image

11

2


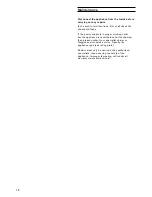
Take hold of the edge extraction segments at the 
side, pull them downand remove. 

3


Depress the handles on the grease filtersand fold 
down the grease filters. 

4


Clean the grease filters. 

5


Re-install the cleaned grease filters. 

6


Attach the edge extraction segments inreverse 
sequence. 

1

2

3

Cleaning the extractor hood

Clean the exterior of your extractor hood with a soft
cloth and mild detergent solution. Do not use any
strong, caustic or abrasive cleaning agents. Do not
use any abrasive sponges or brushes either.

Cleaning and care

Cleaning the grease filters

The grease filter saturation display 

F

flashes after

an operating time of 30 hours to you indicate to you
that you should clean the grease filter.  The grease
filters can of course be cleaned at any time, even if
the grease filter saturation display has not started
to flash.


The stainless steel grease filters can be

removed easily for cleaning:

1


Disconnect the power supply (switch off the

fuse).


7     

You can clean the stainless steel grease filters

in a dishwasher at a maximum temperature of
65°C, where it should be supported vertically
to allow food or rinsing residues to drain off.

If possible, the inner parts of the housing should be
wiped out in hot rinsing water when replacing the
filters.

Caution:

when cleaning the inside of the housing, beware of
protruding parts..


After having cleaned them, re-insert the grease
filters in the wall extractor in reverse order.

Important :

the handles of both grease filters must be visible
after assembly. 

Press the 

F

key to set the elapsed hours counter to

zero. Flashing of the indicating lamp goes off.

Summary of Contents for AW 250

Page 1: ...Wall ventilation hood AW 250 Gaggenau Operating Instructions...

Page 2: ......

Page 3: ...6 Accessories 7 Special accessories 7 Accessories for installation 7 Operation 8 Light 8 Fan levels 8 Special functions 10 Intensive time 10 Delayed shut off 10 Interval ventilation 10 Cleaning and ca...

Page 4: ...ircuits Isolate the appliance from the mains during every maintenance operation To do this remove the mains plug or actuate the corresponding fuse If the mains plug is not accessible the appliance mus...

Page 5: ...er Cleaning and care Before operating the appliance for the first time check that the mains connection is in proper working order This appliance is labelled in accordance with the European Directive 2...

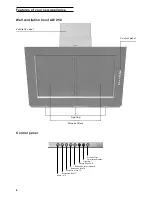
Page 6: ...our new appliance Control panel Ventilation duct Motor off Extraction level 1 Extraction level 2 Extraction level 3 Extraction level intensive Delayed shut off Lighting Grease filter saturation displa...

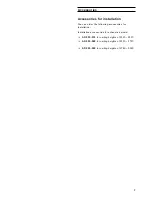
Page 7: ...der the following accessories for installation Installation accessories for exhaust air mode AD 250 012 for ceiling heights of 2240 2500 AD 250 022 for ceiling heights of 2500 2750 AD 250 032 for ceil...

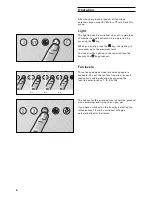
Page 8: ...l You can dim the lighting to the required level by keeping the key pressed Fan levels Three fan speeds and one intensive speed are available You set the fan level required for each respective cooking...

Page 9: ...back automatically to the previously selected fan level after 5 minutes If you would like to end the intensive level before the five minutes have elapsed press the 0 key Motor off or select a differe...

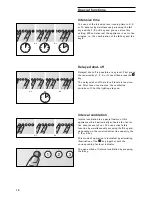
Page 10: ...ime for all levels is ten minu tes After these ten minutes the ventilation switches off but the lighting stays on Interval ventilation Interval ventilation is a special feature of this appliance which...

Page 11: ...se filter The grease filters can of course be cleaned at any time even if the grease filter saturation display has not started to flash The stainless steel grease filters can be removed easily for cle...

Page 12: ...proper working order but the appliance is nevertheless not functioning then please contact your specialist dealer or Gaggenau after sales service Specify the appliance type see rating plate Repairs m...

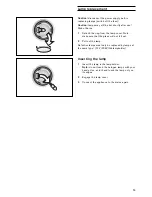
Page 13: ...ake sure that the glass will not fall out 2 Pull out the lamp Defective lamps must only be replaced by lamps of the same type 12 V 20 W G4 lampholder Inserting the lamp 1 Insert the lamp in the lampho...

Page 14: ......

Page 15: ......

Page 16: ...06067735_en 0609...

Reviews: