


en
Control element TwistPad
8
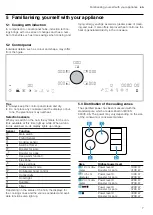
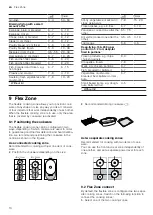
5.4 Cooking zone
Before you start cooking, check whether the size of the
cookware fits the cooking zone that you want to use for
cooking:
Area
Cooking zone type
Flex Zone
→
Single-circuit cooking zone
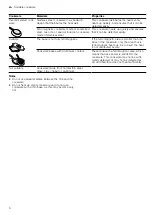
5.5 Residual heat indicator
The hob has a residual heat indicator for each cooking
zone. Do not touch the cooking zone if the residual
heat indicator is lit.
Display
Meaning
The cooking zone is hot.
The cooking zone is warm.
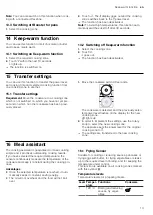
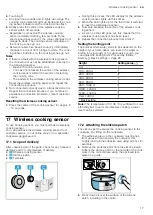
6 Control element TwistPad
The rotary knob used to select the cooking zones and
power levels can be removed. Since the rotary knob is
magnetic, it automatically centres itself in its special
programming zone.
6.1 Positioning and operating TwistPad
Position the rotary knob so that it is centred on the pro-
gramming zone in relation to the displays that limit this
zone.
To switch on a cooking zone, push the rotary knob at
the level of the required cooking zone. Turn the rotary
knob to select the power level.
Note:
The rotary knob still functions correctly even if
the knob is not precisely centred.
Always keep the rotary knob clean. Soiling may impair
the function.
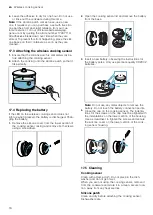
6.2 Instructions for use
¡
A strong magnet is located inside the rotary knob.
Keep the rotary knob away from magnetic data car-
riers such as credit cards and cards with magnetic
strips. It may damage them. The magnet may also
cause faults on televisions and screens.
¡
The rotary knob is magnetic. Metal particles stuck to
the bottom may scratch the surface of the hob. Al-
ways clean the twist knob thoroughly.
6.3 Removing TwistPad
You can remove the rotary knob from the cooking zone
during the cooking process.
If you remove the rotary knob, the Wipe protection
function is switched on for 10 minutes. If you do not re-
set the rotary knob to its position before this time
elapses, the hob switches off.
WARNING ‒ Risk of fire!
The hob may continue to heat up. If, during this 10
seconds, a metallic object is placed in the area of the
TwistPad, the cooking zone may continue to heat up.
▶
Always switch off the hob at the main switch.
7 Before using for the first time
Observe the following recommendations.
7.1 Setting Home Connect
When you first switch on the appliance, you are promp-
ted to set up your home network. The symbol lights
up for a few seconds on the display panel.
To begin setting up the connection, touch the sensor
and proceed in accordance with the information given
in the section entitled
→
. To exit initial set-up,
touch any sensor.
8 Basic operation
8.1 Switching on the hob
▶
Touch .
The symbols for the cooking zones and the cur-
rently available functions light up. lights up next to
the cooking zones. Set the rotary knob on the set-
tings range.
a
The hob is ready for use.


