


11
Getting to know your appliance
en
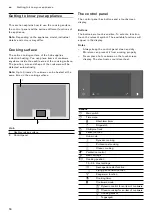
Touchscreen display
The touchscreen display gives you an overview of the
cookware on the cooking surface and the buttons for
activating the various functions.
When an item of cookware is set down on the cooking
surface, the cooking position display for this cookware
is shown on the display.
Overview of the menus
The intuitive menu structure helps you to find your way
around the control panel of your hob. You can find out
more about the most important menus in this section.
Main screen
The main display provides an overview of the indicators
for the cookware on the cooking surface. It displays the
cooking mode, power levels, and the timer functions
that are set for the cooking zones that are switched on.
Function bar
The function bar provides access to a number of
functions and other menus.
The following options are shown in the function bar:
▯
¯
Childproof lock
H
Pause function
▯
g
Cooking mode
▯
S
Ventilation control
▯
t
Basic settings
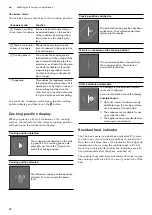
Info menu
The info menu provides you with information about the
appliance or the functions that are currently active.
To access the info menu, touch the
=
symbol on the
function bar. The sensor will show when the function is
available.
Notifications and alerts
Notifications let the user know that the appliance's
status has changed or tell them when they need to
confirm something.
To return to the main screen, touch the
G
symbol.
Note:
The top line of the display lights up orange.
The information makes you aware that a measure is
required.
Follow the instructions in the display and touch the
G
symbol to return to the main screen.
Note:
The top line of the display lights up blue.
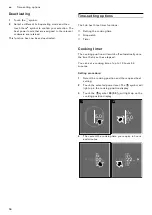
Cooking mode
The hob has various functions for the entire cooking
surface.
To access the hob mode menu, touch the
g
button on
the function bar.
Cooking mode
Function
¬
Professional cook-
ing
Allows the heat setting to be
selected based on the position of
the cookware on the cooking sur-
face, from right to left.
Ê
Classic cooking
Allows you to select the heat setting
for the cooking position.
Ë
Dynamic cooking
Allows the heat setting to be
selected based on the position of
the cookware on the cooking sur-
face, from front to back.
Summary of Contents for CX 482
Page 1: ...Instruction manual CX 482 Full surface induction cooktop...
Page 55: ......


