background image

en 

Cleaning and servicing

48

Notes

¡

Run the Machine Care programme
without any tableware in the dish-
washer.

¡

Only use suitable machine care
products specially designed for dish-
washers and not dishwasher deter-
gent. Observe the manufacturer's in-
structions.

¡

Make sure that there are no alu-
minium parts in the interior of the ap-
pliance.

¡

If you have not run Machine Care
after 3 washing cycles, the indicator
for Machine Care will go out auto-
matically.

¡

Follow the safety instructions and the
directions for use on the packagings
of the machine care products.

1.

Remove any coarse soiling in the in-
terior with a damp cloth.

2.

Clean filters.

3.

Add the machine care product to the
appliance.

4.

Press  ⁠.

5.

Press 

⁠.

a

The Machine Care programme is
run.

a

As soon as machine care has fin-
ished, the indicator for Machine Care
goes out.

Filter system

The filter system removes coarse soil-
ing from the dishwashing cycle.

1

2

3

1

Micro filter

2

Fine filter

3

Coarse filter

Cleaning filters

Soiling in the dishwashing water may
block the filters.

1.

After each wash check the filters for
residue.

2.

Turn the coarse filter anticlockwise

 and remove the filter system  ⁠.

Check that no foreign objects fall
into the sump.

1

2

3.

Pull down the micro filter to remove.

4.

Press the locking catches   to-
gether and lift the coarse filter out  ⁠.

Summary of Contents for DF 250

Page 1: ...User manual DF250 DF251 Dishwasher Gaggenau...

Page 2: ...tion for test institutes 22 Additional functions 22 Features 23 Top basket 23 Bottom basket 25 Cutlery basket 25 Cutlery drawer 25 Etagere 26 Folding prongs 27 Small items holder 27 Knife shelf 27 Bak...

Page 3: ...te Diagnostics 44 Energy manager 45 Data protection 46 Declaration of Conformity 46 Cleaning and servicing 47 Cleaning the tub 47 Self cleaning interior1 47 Cleaning products 47 Tips on appliance care...

Page 4: ...has been damaged in transit Intended use Please read the information on intended use to ensure you use the appliance correctly and safely Only use this appliance As specified in this instruction manua...

Page 5: ...ith alternating current only via a properly installed socket with earthing The protective conductor system of the domestic electrical installation must be properly installed Never equip the appliance...

Page 6: ...er Service or specialist outlets WARNING Risk of tipping Improper installation may cause the appliance to tip up Only install built under or integrable appliances under a continuous worktop that is se...

Page 7: ...liance door to load or unload tableware in order to prevent accidents e g through tripping Do not sit or stand on the appliance door when open Knives and utensils with sharp points can cause injuries...

Page 8: ...Never operate an appliance with a cracked or fractured sur face Never pull on the power cord to unplug the appliance Al ways unplug the appliance at the mains If the appliance or the power cord is dam...

Page 9: ...putting their lives at risk With redundant appliances unplug the power cord Then cut through the cord and damage the lock on the appliance door beyond repair so that the appliance door will no longer...

Page 10: ...ppliance when open WARNING Risk of suffocation Children may become trapped in the appliance and suffocate Use the childproof lock if fitted Never let children play with or operate the appliance Safety...

Page 11: ...ources e g radiators heat storage tanks ovens or other ap pliances that generate heat Modified or damaged water hoses may result in material damage and damage to the appliance Never kink crush modify...

Page 12: ...comes with a door lock Door lock The door lock is a mechanical safety system and makes it more difficult to open the appliance door You can activate or deactivate the door lock WARNING Risk of suffoca...

Page 13: ...reduced Sensors Page 13 AquaSensor1 The AquaSensor is an optical measur ing device light barrier which meas ures the turbidity of the washing water You can save water with the Aqua Sensor Use of the...

Page 14: ...Steam guard plate1 Rubber apron1 Mains cable Quick reference guide1 Installing and connecting the appliance You can position your built under or in tegrable appliance in a fitted kitchen between woode...

Page 15: ...e appliance to the drink ing water connection using the en closed parts Observe the Technical data Page 64 3 When doing so check that the drink ing water connection is not kinked crushed or twisted El...

Page 16: ...e yourself with the parts of your appliance Appliance You can find an overview of the parts of your appliance here 1 2 3 4 5 6 7 8 9 10 11 12 13 14 1 Rating plate Rating plate with E number and FD num...

Page 17: ...e they can fully dissolve 7 Top basket Top basket Page 23 8 Cutlery drawer1 Cutlery drawer Page 25 9 EmotionLight1 Interior lighting of the appliance Overview of basic settings Page 40 10 Etagere Etag...

Page 18: ...42 4 Display The display shows information about programmes basic settings or additional functions You can change the basic settings via the display and the setting buttons Changing basic settings Pag...

Page 19: ...Home Connect app the remote start display lights up 13 Display1 The display shows information about programmes basic settings or additional functions You can change the basic settings via the display...

Page 20: ...uch as water temperature or pipe pressure may result in deviations Programme Use Programme sequence Additional functions Auto 45 65 Tableware Cleaning mixed table ware and cutlery Level of soiling Rem...

Page 21: ...PreRinse Cleaning 50 C Intermediate rinse Rinsing 65 C Drying IntensiveZone Half Load HygienePlus Improved drying Additional functions Page 22 Glass 40 Tableware Cleaning delicate tableware cutlery t...

Page 22: ...omparability tests e g ac cording to EN60436 These are the conditions for conduct ing the tests however they are not the results or consumption values E mail enquiries to dishwasher test appliances co...

Page 23: ...ng time and energy consumption Improved drying For a better drying result the final rinse temperat ure is increased and the drying phase extended Especially suitable for drying plastic parts There is...

Page 24: ...lower the basket evenly to the right level Basket heights Page 28 Check that the basket is level on both sides 5 Slide the basket back in Adjusting top basket with pairs of rollers To wash large items...

Page 25: ...sorting it and with the sharp points downwards Cutlery drawer Arrange cutlery in the cutlery drawer Arrange cutlery with the points and sharp edges downwards You can reorganise the cutlery drawer to...

Page 26: ...Use the etagere and space underneath for small cups and glasses or for large items of cutlery e g wooden spoons or serving cutlery You can adjust the height of the etagere 1 If you do not need the eta...

Page 27: ...d the prongs fold them down 1 Push the lever forwards and fold down the prongs 1 2 2 To use the folding prongs again fold them back up a The folding prongs click in position Small items holder Use the...

Page 28: ...asket 2 Insert the baking sheet spray head in the holder and turn to the right a The baking sheet spray head clicks into position Removing baking sheet spray head If you no longer require the baking s...

Page 29: ...y until the display shows the required setting Note If you select Initial start up Home Connect here make further settings using the Home Connect app on your mobile device Language Initial start up Ti...

Page 30: ...ter hardness and the appropriate setting value Overview of water hardness set tings Page 30 2 To open the basic settings press for approx 3 seconds 3 Press repeatedly until the display shows Water har...

Page 31: ...ed deter gents with salt replacement sub stances According to manufactur ers combined detergents with salt replacement substances can gener ally only be used up to a water hard ness of 26 E without ad...

Page 32: ...7 5 0 05 9 5 6 7 5 0 05 above 10 5 5 7 5 0 05 The consumption values specified are laboratory measurements determined in accordance with the currently applic able standard and using the Eco 50 program...

Page 33: ...ds 2 Press repeatedly until the display shows Rinse aid dispenser 3 Press or repeatedly until the display shows the amount of rinse aid as 0 4 To save the settings press for approx 3 seconds a The rin...

Page 34: ...in1 5in1 addi tional components such as glass pro tection or stainless steel cleaner According to manufacturers combined detergents generally only function up to a water hardness of 26 E With a wa ter...

Page 35: ...f you are using powder or liquid de tergent follow the manufacturer s in structions and quantities for dosage in the detergent dispenser 20 ml 25 ml detergent is sufficient for normal soiling If table...

Page 36: ...eaning agents are not suitable for dishwashers in con junction with alu minium If you are using highly caustic alkaline or highly acidic cleaning agents in particular commercial or indus trial cleanin...

Page 37: ...ck it with tableware so as not to obstruct the lid of the detergent dispenser Removing tableware WARNING Risk of injury Hot tableware can cause burns to the skin When hot tableware is sensitive to sho...

Page 38: ...n Additional functions Page 22 a The additional function is set and the additional function button flashes Setting timer programming You can delay the start of the pro gramme by up to 24 hours 1 Press...

Page 39: ...o end a programme early or to switch from a programme that has already started you will need to terminate it first 1 Open the appliance door 2 Press for approx 3 seconds a The programme is terminated...

Page 40: ...dispenser 0 6 51 Set or switch off the amount of rinse aid to be dis pensed Setting the amount of rinse aid Page 33 Sensor setting Standard1 Sensitive Very sensitive Set the water sensor for identifyi...

Page 41: ...visible if the appliance is in stalled at eye level with the cabinet front fitted flush If the appliance door is not completely closed the spot of light will flash The programme has ended when the sp...

Page 42: ...hows Time setting 3 Press or repeatedly until the display shows the required time Holding down and will change the set values in 10 minute steps 4 To save the settings press for approx 3 seconds Home...

Page 43: ...net work Wi Fi for 2 minutes 3 Activate the WPS function on the router during this period a If the appliance is connected to the WLAN home network Wi Fi the dis play shows Network login success ful an...

Page 44: ...ce is not connected to the app check that the mobile device is in the WLAN home network Wi Fi and repeat the process 10 To exit login press Tip Terminate login by pressing for approx 3 seconds Home Co...

Page 45: ...p The connection to the energy man agement of your home system is ac tivated Follow the instruction manual of your home system 1 To open the basic settings press for approx 3 seconds 2 Press repeatedl...

Page 46: ...repares the Home Connect functions for use and is only required when you want to use the Home Connect functions for the first time Note Please note that the Home Con nect functions can only be utilise...

Page 47: ...Follow the tips on appliance care to make sure your appliance functions properly at all times Action Benefit Wipe the door seals the front of the dish washer and the control panel regularly using a da...

Page 48: ...ucts 1 Remove any coarse soiling in the in terior with a damp cloth 2 Clean filters 3 Add the machine care product to the appliance 4 Press 5 Press a The Machine Care programme is run a As soon as mac...

Page 49: ...lock wise Make sure that the arrow markings match up Cleaning spray arms Limescale and soiling in the dishwash ing water may block the nozzles and bearings on the spray arms Clean the spray arms regul...

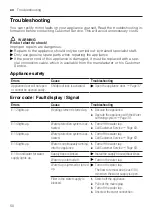
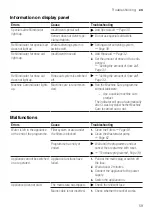
Page 50: ...lt display Signal Errors Cause Troubleshooting E 12 lights up Heating element is furred up 1 Descale the appliance 2 Operate the appliance with the Water softening system Page 30 E 14 lights up Water...

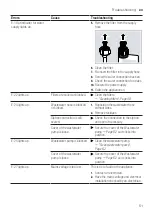
Page 51: ...ked 1 Reposition the wastewater hose without kinks 2 Remove residues Siphon connection is still sealed Check the connection to the siphon and open if necessary Cover of the wastewater pump is loose Se...

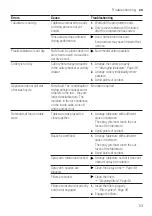
Page 52: ...code Washing results Errors Cause Troubleshooting Tableware is not dry No rinse aid used or dosage set too low 1 Add Rinse aid Page 32 2 Set the amount of rinse aid to be dis pensed Setting the amoun...

Page 53: ...after wash cycle Not a fault The condensation drying principle causes water droplets in the tub they are indeed desirable here The moisture in the air condenses on the inside walls runs off and is pu...

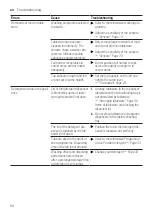
Page 54: ...the left and right to the same level Top basket Page 23 Detergent residue in the appli ance Lid of the detergent dispenser is blocked by items of table ware parts and will not open 1 Arrange tablewar...

Page 55: ...m Page 30 In most cases you will need to in crease the setting 2 Change your detergent if required Special salt dispenser is not screwed tight Screw the special salt dispenser tight Stubborn white coa...

Page 56: ...o substances contained in ve getables cabbage celery potatoes noodles etc or tap water manganese Clean the appliance You can remove deposits with Mech anical cleaning Page 47 or a ma chine cleaning pr...

Page 57: ...o rinse aid has been added Adding rinse aid Page 32 Detergent residue is present in the final rinse Lid of the de tergent dispenser is blocked by tableware items and will not open fully 1 Arrange tabl...

Page 58: ...er for rinse aid Immediately add rinse aid to the dis penser Adding rinse aid Page 32 Rinse aid has been spilled Remove the rinse aid with a cloth Detergent or appliance care product used causes exces...

Page 59: ...achine care is recommen ded Run the Machine Care programme without tableware Use a special machine care product The indicator will go out automatically after 3 wash cycles whether Machine Care is carr...

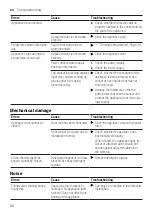
Page 60: ...a socket or hose holder that has not been removed Arrange the tableware so that no parts project beyond the basket and prevent the appliance door from clos ing properly Mechanical damage Errors Cause...

Page 61: ...are Arrange tableware so that the spray arms do not strike tableware With a small load the water jets directly strike against the tub Distribute the tableware evenly Load the appliance with more table...

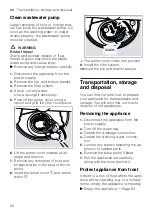
Page 62: ...ts of food and foreign bodies in the area of the im peller 8 Insert the pump cover and press down 1 2 a The pump cover clicks into position 9 Install the filter system 10 Insert the top and bottom bas...

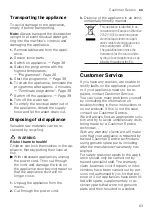
Page 63: ...envir onmentally friendly manner This appliance is labelled in ac cordance with European Directive 2012 19 EU concerning used electrical and electronic appli ances waste electrical and elec tronic equ...

Page 64: ...y AQUA STOP guarantee1 In addition to warranty claims against the seller under the purchase agree ment and in addition to our manufac turer s warranty we will provide a re placement under the followin...

Page 65: ...rate Min 10 l min Water temperature Cold water Hot water max 60 C Capacity 12 15 place settings More information about your model can be found online at https www bsh group com energylabel1 This web a...

Page 66: ......

Page 67: ......

Page 68: ...Gaggenau Hausger te GmbH Carl Wery Stra e 34 81739 M nchen GERMANY www gaggenau com 9001444003 9001444003 en 990910...

Reviews: