background image

en

18

Washing dishes

Reduce costs!

If only a small number of
dishes have been loaded into
the dishwasher, selecting a
programme that operates at
the next lowest temperature
will usually suffice.

Programme specifications

The programme specifications can be
found in the summary of instructions.
Programme specifications refer to normal
conditions. Greater deviations may occur
due to:

varying amounts of dishes
water supply temperature
water pipe pressure
ambient temperature
mains voltage tolerances
and the tolerances specific
to the appliance (e.g. temperature,
amount of water, etc.)

The water consumption values refer
to a set water hardness value of 2.

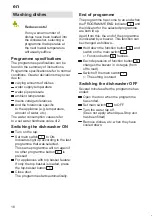
Switching the dishwasher ON

Turn on the tap.
Set main switch 

1

 to ON.

Indicators light up according to the last
programme that was selected.
This same programme will run again if
no other programme button 

8

 is

pressed
For appliances with top basket feature:
If only the top basket is loaded, press
the top-basket button 

3

.

Close door.
The programme starts automatically.

End of programme

The programme has come to an end when
the PROGRAMME END indicator 

4

 and

the indicator for the selected programme
are both lit up.
Apart from this, the end of the programme
is indicated by a buzzer. This function can
be changed as follows:–

Hold down the function button   and
switch on the main switch 

1

.

 Function button   flashes.

Each depression of function button  C
changes the buzzer in 4 stages (from
off to loud).
Switch off the main switch 

1

.

 The setting is stored.

Switching the dishwasher OFF

Several minutes after the programme has
ended:

Open the door when the programme
has ended.
Set main switch 

1

 to OFF.

Turn the water tap off.
(Does not apply when Aqua-Stop unit
has been fitted)
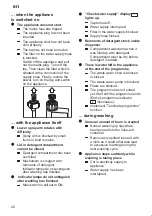
Remove dishes, etc. when they have
cooled down.

Summary of Contents for GI 203-160

Page 1: ......

Page 2: ......

Page 3: ...ng in the Salt 8 Adding rinse aid 9 Not suitable for the dishwasher 10 Arranging crockery glasses etc in the dishwasher 11 Detergents 14 Programme overview 17 Washing dishes 18 Maintenance and care 19...

Page 4: ...n installed correctly Electrical connection conditions must correspond with the specifications on the rating plate of the dishwasher If the dishwasher is to be installed in a high sided unit ensure th...

Page 5: ...xiation Keep infants away from the open dishwasher It could contain residue of the cleaning agent If the appliance is installed at eye level ensure when opening and closing the door that children are...

Page 6: ...ndicator 8 Programme buttons on applicable models Appliance interior 20 Upper basket with additional cup rack 21 Additional cutlery basket for the top basket 22 Top spray arm 23 Bottom spray arm 24 Di...

Page 7: ...programme button B and switch on the main switch 1 then release the buttons The display 5 flashes and buttons A and B illuminate Hardness value 2 was set at the factory To change the setting Press pro...

Page 8: ...he compartment lid back on without tilting the lid The LOW SALT indicator 5 on the front panel will light up initially but will extinguish again after a short period when the salt solution has become...

Page 9: ...nap closed To prevent excessive foam formation during the next rinse cycle remove any rinse aid which has run over with a cloth Adjusting the amount of rinse aid The amount of rinse aid added to the w...

Page 10: ...d as dishwasher proof Damage to glassware and other dishes Possible causes type of glass or manufacturing process chemical composition of detergent water temperature and duration of dishwasher program...

Page 11: ...hould be at a slant so that water can run off D they are stacked securely and cannot tip over D they do not prevent the spray arms from rotating while washing takes place Very small items should not b...

Page 12: ...t other items to be washed Long items serving cutlery salad servers or knives should be placed on the shelf so that they do not obstruct the rotation of the spray arms The shelf can be folded back whe...

Page 13: ...pper edge otherwise the basket will not drop smoothly and may damage the utensils To raise the basket take hold of the basket on the upper edge and pull upwards Before you re insert the basket ensure...

Page 14: ...nor chlorine When a phosphate free detergent is used in conjunction with hard water there is a greater possibility that white marks will be left behind on crockery and glasses etc These can be avoided...

Page 15: ...s manufacturers the cleaning efficiency of the detergent may not be fully utilised by short programmes It is recommended to use washing powder for these programmes When you select the INTENSIVE progra...

Page 16: ...desired effect with automatic programmes Products which eliminate the need for regeneration salt can only be used within a certain water hardness range If you wish to use these combined products plea...

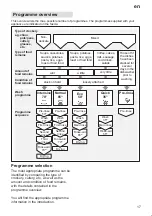
Page 17: ...le very little stuck on hard loosely attached Normal 65 Intensive 70 Eco 50 Quick 35 Pre rinse Drying Rinse aid 70 Second rinse First rinse Wash 65 Pre rinse Main rinse Rinse aid 55 Wash 35 Rinse off...

Page 18: ...selected This same programme will run again if no other programme button 8 is pressed For appliances with top basket feature If only the top basket is loaded press the top basket button 3 Close door T...

Page 19: ...door If it is necessary to change the programme after this the programme cycle that has already begun e g washing will still carry on to the end Maintenance and care A regular inspection and maintena...

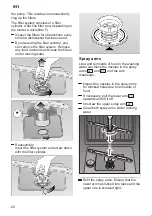
Page 20: ...ilters under running water Reassembly Insert the filter system and screw down with the filter cylinder Spray arms Lime and remnants of food in the washing water can block the nozzles in the spray arms...

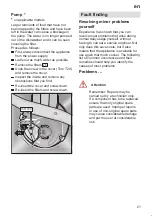
Page 21: ...Re insert the filters and screw down Torx T20 2 1 Fault finding Resolving minor problems yourself Experience has shown that you can resolve most problems that arise during normal daily usage yourself...

Page 22: ...inguish after washing has finished Main switch is still set to ON Check water supply display 7 lights up Tap turned off Water supply interrupted Filter in the water supply blocked Supply hose kinked R...

Page 23: ...White stains are left on crockery glasses have a milky appearance Not enough detergent was added to input compartment Amount of rinse aid was set too low Although water is quite hard no salt has been...

Page 24: ...ll find details of the conditions for the comparison tests on the additional Notes on comparison tests sheet The consumption values for the relevant programmes are given in the introduction General Bu...

Page 25: ...spigot of the siphon Ensure that the drainage hose is not kinked crushed or twisted ensure that there is no sealing cover which prevents the waster water from flowing away Fresh water connection Usin...

Page 26: ...reezing temperatures If the appliance is installed in a location where there is a risk of freezing temperatures e g in a holiday home all water must be completely drained out of the interior see Trans...

Page 27: ...f polypropylene PP Disposal of redundant appliances Make redundant appliances unusable to prevent subsequent accidents Dispose of the appliance in an environmentally friendly manner Warning Children c...

Page 28: ...en 28 en Subjekt to modification...

Page 29: ......

Page 30: ...1 1 1 0 1 1 1 0 4 0 2 0 2 0 0 2 0 4 2 0 2 0 2 0 2 0 3 4 1 2 0 2 2 4 2 0 4 0 2 2 2 2 0...

Reviews: