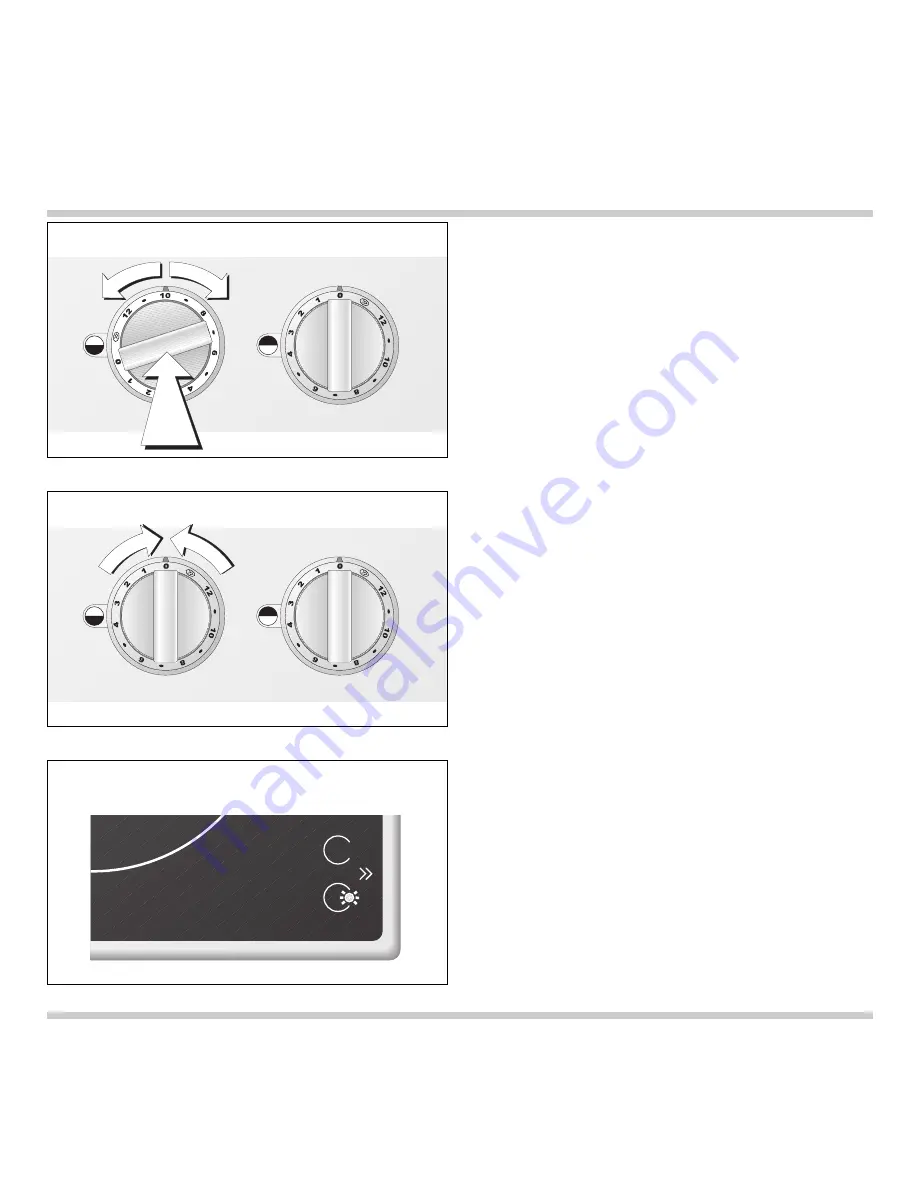
background image

Switching on

Press down the control knob and turn it left or right
to the required position (1 -12). The luminous disc
behind the control knob and the indicator light on
the display panel light up, as long as the cooking
zone is switched on.
During operation, a noise may be heard depending
on the material of the pot, the amount of the
contents and the selected cooking level. This is
normal. The cooling fan of the induction unit may go
on and off during operation. 

Switching off

Fully turn the control knob to the OFF position. 
The luminous disc goes off.
Please note: the induction cooking zone does not
emit any warmth after being switched off.

Indicator light

The indicator light on the display panel lights, as
long as the cooking zone is switched on.  

Pot recognition

The indicator light on the display panel flashes and
the cooking zone does not operate, if no pan or an
unsuitable receptacle (too small, non-magnetic) has
been placed on the cooking zone.

Residual heat display

Although induction-cooking plates do not reach the
same high temperatures as traditional cooking 
plates, they can remain hot after cooking when
used over long periods of time through contact with
the heated receptacle. This is why the hob has a 
residual heat display. After switching off the 
indicator light will flash, as long as the cooking 
zone has not cooled down sufficiently to be touched
safely. 

Note: 

the duration of the residual heat display is

based on the length of the operation and the 
cooking power level. The residual heat display may
still flash for some time despite cooling down, 
depending on the food and the size of the cooking
receptacle.     

Switching on

Switching off

3. Operation

6

Indicator light / Pot recognition /
Residual heat display

Summary of Contents for VI 421

Page 1: ...Operating and assembly instructions VI 421 Induction cooktop...

Page 2: ...Page 6 Indicator light Pot recognition Residual heat display Page 6 Booster function Page 7 Visual signals Page 8 Holiday safeguard Page 8 4 Settings table Page 9 5 Suitable cooking receptacles and h...

Page 3: ...rsonal safety and the lasting value of your appliance Keep the instruction manual near your appliance for further reference You will find notes on Page 4 that you ought to observe before operating the...

Page 4: ...he cabinet underneath closer than 5 cm to the air intake Remove any cooking foil film Operation of the appliance must be discontinued immediately if improper use produces cracks breaks or flaws on the...

Page 5: ...o prepare meals only Do not use the appliance to heat up the room in which it is installed The air inlets in the cabinet should not be covered in any way Do not use the cooking surface to store items...

Page 6: ...on cooking zone 21 cm 2200 W with booster 3300 W 3 Display panel 4 Control knob for front cooking zone 5 Control knob for rear cooking zone You can order the following special accessory VV 400 000 Con...

Page 7: ...on The indicator light on the display panel flashes and the cooking zone does not operate if no pan or an unsuitable receptacle too small non magnetic has been placed on the cooking zone Residual heat...

Page 8: ...l 12 Activating the booster function Press down the control knob and turn it left to the booster symbol The indicator light and the booster indicator on the display panel light up as long as the boost...

Page 9: ...ormal 8 luminous disc behind indicator light operating mode the control knob on the cooker appliance is OFF appliance is ON pot recognized normal use appliance is ON no pot recognized appliance is OFF...

Page 10: ...g 2 4 mins 3 5 15 30 mins Rice pudding 500 ml 1 liter milk 125 g 250 g 3 5 mins 2 4 25 35 mins Potatoes boiled in their skins with 1 3 cups water 750 g 1 5 kg 3 5 mins 6 8 30 35 mins Boiled potatoes...

Page 11: ...y Induction To see if your receptacles are suitable make sure that they are attracted to a magnet Receptacles made of enamelled steel cast iron or special stainless steel receptacles designed for cook...

Page 12: ...lly aggressive cleaners for example oven cleaner Do not use any nitro polishing agents for cleaning Do not use any abrasive sponges either Food with a high sugar content e g boiled over milk jam can d...

Page 13: ...Specify the appliance type The serial number and type of the appliance can be found on the quality control slip which is included with these instructions Repairs may only be carried out by authorised...

Page 14: ...ing cables do not come into contact with hot cooking surfaces The installation technician is responsible for the correct functioning of the appliance at the place of installation He must instruct the...

Page 15: ...ll the 35 mm holes to secure the control knobs in the cabinet front If the cabinet front is thicker than 26 mm the front must be routed from the back to max 26 mm on an area of 80 x 310 mm It is possi...

Page 16: ...ont insert control knobs into the holes secure from the rear with the nuts Take care to install control knobs in the correct order left for front cooking zone right for rear cooking zone Secure the co...

Page 17: ...the control panel the plugs must lock into place Insert the hob with the control panel on the front into the cut out and align it Note do not stick the hob onto the worktop with silicone Secure the a...

Page 18: ...GAGGENAU HAUSGER TE GMBH CARL WERY STR 34 D 81739 M NCHEN Y 089 45 90 03 FAX 089 45 90 23 47 www gaggenau com...

Reviews: