background image

8

en-us

    Before you begin

Before you begin

Before you begin

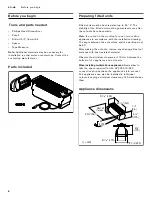
Tools and parts needed

Phillips Head Screwdriver

Pencil

Drill with ¼" (6 mm) bit

Jigsaw

Tape Measure

Note: 

Additional materials may be necessary for 

installation in solid surface countertops. Contact the 
countertop manufacturer.

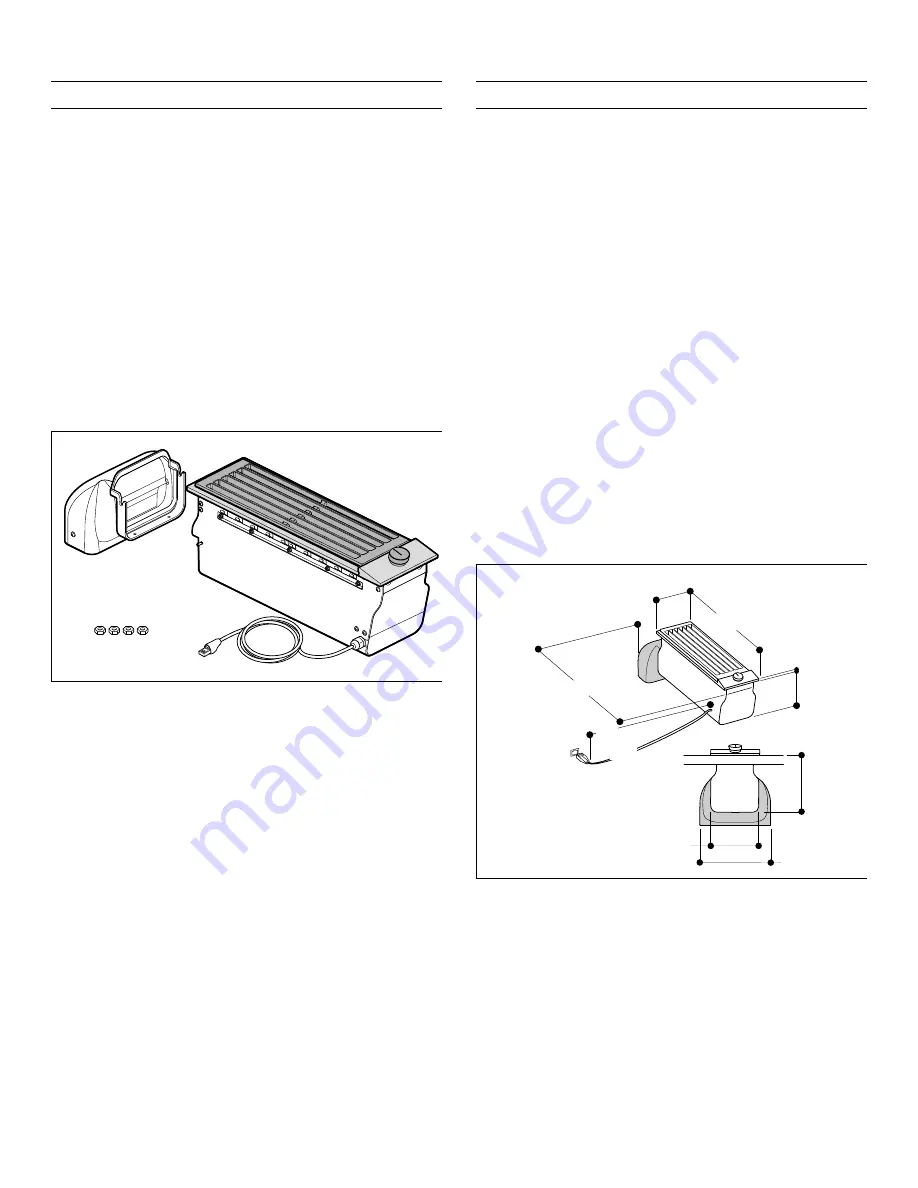
Parts included

Preparing fitted units

Fitted units must be heat-resistant up to 90 °C. The 
stability of the fitted unit must be guaranteed even after 
the cut-outs have been made.

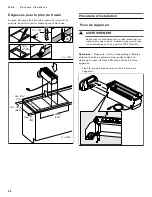
Make the cut-out in the worktop for one or more Vario 
appliances in accordance with the installation drawing. 
The angle between the cut surface and the worktop must 
be 90°.

After making the cut-outs, remove any shavings. Seal cut 
surfaces with heat-resistant material.

Observe the minimum clearance of 10 mm between the 
bottom of the appliance and unit parts.

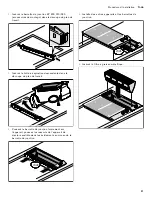
When installing multiple Vario appliances: 

Remember to 

take the space required for the VV 200 010/020 
connection strip between the appliances into account. 
The appliances can also be installed in individual 
cutouts, keeping a minimum clearance of 40 mm between 
them.

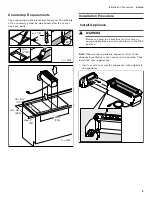
Appliance dimensions

'1

IODWGXFW

é

èʌ¼ʓʘ 

ç¼ʓʘ

ʎ¼ʚ

ʌ¼ʓʘ

èè¼ʓʘ 

èè¼ʓʘ

ʎ¼ʚ

 PP

Summary of Contents for VL 200 120

Page 1: ...DJJHQDX Installation instructions2 Notice de montage12 Instrucciones de instalaci n23 VL 200 120 Downdraft ventilation A rateur de plan de cuisson Extractor de superficie...

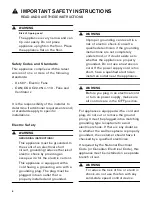
Page 2: ...op Requirements 9 Installation Procedure 9 Install Appliance 9 Connecting device 11 Removing appliance 11 Customer service 11 9 Safety Definitions SafetyDefinitions9 WARNING This indicates that death...

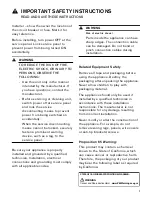
Page 3: ...uld be done by an authorized servicer 9 WARNING WARNING TO REDUCE THE RISK OF FIRE ELECTRIC SHOCK OR INJURY TO PERSONS OBSERVE THE FOLLOWING Installation work and electrical wiring must be done by qua...

Page 4: ...ase deposits in the grease filter can catch fire Never work with a naked flame near the appliance e g flamb ing Install the unit near a heat producing appliance for solid fuels e g wood or coal only i...

Page 5: ...ocal interlocking etc 9 WARNING Avoid carbon monoxide poisoning Provide adequate air intake so combustion gases are not drawn back into the room An air intake exhaust air wall box by itself is no guar...

Page 6: ...utlet that is properly installed and grounded 9 WARNING Improper grounding can result in a risk of electric shock Consult a qualified electrician if the grounding instructions are not completely under...

Page 7: ...onnections and grounding must comply with all applicable codes 9 WARNING Risk of electric shock Parts inside the appliance can have sharp edges The connection cable can be damaged Do not bend or pinch...

Page 8: ...Make the cut out in the worktop for one or more Vario appliances in accordance with the installation drawing The angle between the cut surface and the worktop must be 90 After making the cut outs rem...

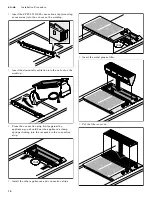
Page 9: ...ocedure InstallationProcedureInstall Appliance 9 WARNING Before you plug in an electrical cord or turn on power supply make sure all controls are in the OFF position Note Observe the installation sequ...

Page 10: ...the downdraft ventilation into the cut out on the worktop 4 Press the connection strip firmly against the appliance you should hear the appliance s clamp springs clicking into the recesses in the con...

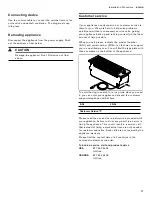
Page 11: ...product number E Nr and serial number FD Nr so that we can support you in a qualified manner You will find the type plate with these numbers on the bottom of the appliance To avoid having to search fo...

Page 12: ...ur le plan de travail 20 Proc dure d installation 20 Pose de l appareil 20 Branchement de l appareil 22 D pose de l appareil 22 Service apr s vente 22 9 D finitions de s curit D finitionsdes curit 9 A...

Page 13: ...par un technicien agr 9 AVERTISSEMENT ATTENTION AFIN DE R DUIRE LES RISQUES D INCENDIE DE CHOC LECTRIQUE OU DE BLESSURES CORPORELLES VEUILLEZ SUIVRE LES INSTRUCTIONS SUIVANTES Les travaux d installati...

Page 14: ...RTISSEMENT Risque d incendie Les d p ts se trouvant dans le filtre graisse peuvent s enflammer Ne jamais cuisiner proximit de l appareil avec une flamme ouverte par exemple pour faire flamber Installe...

Page 15: ...bo tiers muraux d admission d vacuation d air fix es au mur ou gr ce d autres mesures techniques telles qu un verrouillage r ciproque etc 9 AVERTISSEMENT vitez l intoxication au monoxyde de carbone Pr...

Page 16: ...s et ou normes additionnelles s appliquent pour des installations sp cifiques S curit lectrique 9 AVERTISSEMENT INSTRUCTIONS DE MISE LA TERRE Cet appareil doit tre mis la terre En cas de court circuit...

Page 17: ...mplacement du disjoncteur ou du fusible Identifier sa position pour pouvoir le retrouver facilement Avant l installation mettre l appareil hors service au panneau de service Verrouiller le panneau d e...

Page 18: ...en qualifi conform ment aux pr sentes instructions d installation Le fabricant ne peut pas tre tenu responsable de tous dommages caus s par une installation inad quate Ne jamais modifier ni alt rer la...

Page 19: ...pour un ou plusieurs appareils Vario dans le plan de travail conform ment au croquis d installation L angle du chant de la d coupe par rapport au plan de travail doit tre de 90 degr s Enlevez les cop...

Page 20: ...llationPose de l appareil 9 AVERTISSEMENT Avant tout raccordement de cordon lectrique ou toute mise sous tension assurez vous que toutes les commandes sont en position OFF d arr t Remarque Respectez l...

Page 21: ...la hotte aspiration descendante dans la d coupe du plan de travail 4 Poussez la barrette de jonction fermement sur l appareil poussez les ressorts de l appareil de mani re audible dans les videments...

Page 22: ...r les visites inutiles de techniciens Lors de votre appel indiquez le num ro du produit n E et le num ro de s rie n FD afin que nous puissions vous donner une r ponse pr cise La plaquette d identifica...

Page 23: ...del aparato 30 Requisitos de la superficie de trabajo 31 Procedimiento de instalaci n 31 Montaje del aparato 31 Conexi n del aparato 33 Desmontaje del aparato 33 Servicio de atenci n al cliente 33 9 D...

Page 24: ...e autorizado 9 ADVERTENCIA ADVERTENCIA PARA REDUCIR EL RIESGO DE INCENDIO CHOQUE EL CTRICO O LESIONES A LAS PERSONAS OBSERVE LAS SIGUIENTES RECOMENDACIONES El trabajo de instalaci n y el cableado el c...

Page 25: ...durante la instalaci n Utilizar siempre guantes de protecci n durante la instalaci n del aparato 9 ADVERTENCIA Peligro de incendio Los dep sitos de grasa en el filtro de grasa se pueden incendiar Nun...

Page 26: ...en modo de aire de escape simult neamente con un quemador diferente que tambi n usa la misma chimenea como calentadores a gas aceite o carb n calentadores de flujo continuo calentadores de agua se de...

Page 27: ...La unidad es pesada y se requieren al menos dos personas o un equipo adecuado para trasladarla Las superficies ocultas pueden tener bordes filosos Proceda con cuidado al intentar tomar el electrodom...

Page 28: ...ma de corriente cerca del aparato 9 ADVERTENCIA Antes de enchufar un cable el ctrico o activar el suministro el ctrico asegurarse de que todos los controles est n en la posici n OFF Para los electrodo...

Page 29: ...el equipo pueden tener bordes filosos Puede da arse el cable de conexi n No retorcer ni constre ir el cable durante la instalaci n Seguridad del equipo relacionado Retire toda la cinta y el embalaje a...

Page 30: ...rantizada incluso tras el trabajo de corte Realizar el corte para uno o m s aparatos Vario en la cubierta seg n el esquema de instalaci n El ngulo de la superficie de corte respecto a la cubierta debe...

Page 31: ...laci n Procedimientodeinstalaci nMontaje del aparato 9 ADVERTENCIA Antes de enchufar un cable el ctrico o activar el suministro el ctrico asegurarse de que todos los controles est n en la posici n OFF...

Page 32: ...laci n para la placa de cocci n en la cavidad de la cubierta 4 Presionar la junta de uni n con fuerza contra el aparato hasta que los muelles antitracci n del aparato encajen de forma audible en las c...

Page 33: ...indique la referencia del producto N E y el n mero de fabricaci n N FD para que podamos ofrecerle un servicio cualificado La placa de identificaci n con los n meros correspondientes los encontrar en l...

Page 34: ......

Page 35: ......

Page 36: ...DJJHQDX 6 RPH SSOLDQFH RUSRUDWLRQ 0DLQ 6WUHHW 6XLWH UYLQH ZZZ JDJJHQDX FRP XV 6 RPH SSOLDQFHV DJJHQDX DXVJHUlWH PE DUO HU 6WUD H 0 QFKHQ 50 1 9001408965 9001408965 981207 en us fr ca es mx...

Reviews: