16
en-us
Cleaning and maintenance
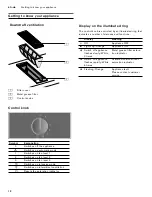
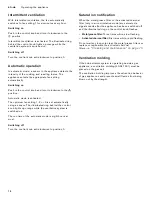
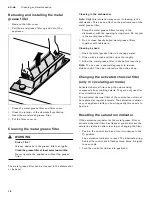
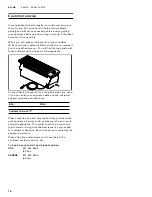
Removing and installing the metal
grease filter
1.
Remove the filter cover.
2.
Pull the metal grease filter up and out of the
appliance.
3.
Clean the metal grease filter and filter cover.
4.
Clean the interior of the downdraft ventilation.
5.
Insert the metal mesh grease filter.
6.
Put the filter cover on.
Cleaning the metal grease filter
9
WARNING
Risk of fire!
Grease deposits in the grease filter can ignite.
Clean the grease filter at least every two months.
Never operate the appliance without the grease
filter.
The metal grease filter can be cleaned in the dishwasher
or by hand.
Cleaning in the dishwasher
Note:
Slight discoloration may occur if cleaning in the
dishwasher. This has no effect on the performance of the
metal grease filter.
1.
Place the metal grease filters loosely in the
dishwasher with the opening facing down. Do not jam
in the metal grease filters.
2.
Do not clean heavily soiled metal grease filters
together with tableware.
Cleaning by hand
1.
Soak the metal grease filter in hot soapy water.
2.
Clean with a brush and then rinse thoroughly.
3.
Allow the metal grease filter to dry before inserting.
Note:
You can use a special degreaser to remove
stubborn dirt. It can be ordered via the online shop.
Changing the activated charcoal filter
(only in circulating-air mode)
Activated charcoal filters trap the odor-causing
compounds from cooking smells. They are only used for
air-recirculation mode.
The activated charcoal filter of the remote fan unit must
be replaced at regular intervals. The saturation indicator
on your appliance tells you how frequently this needs to
be done.
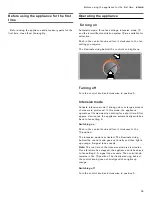
Resetting the saturation indicator
If the saturation indicator for the metal grease filter or
activated charcoal filter has flashed, you must reset the
saturation indicator after cleaning or changing the filter.
1.
Push in the control knob and turn it clockwise to the
œ
position.
The saturation indicator is reset. The illuminated ring
behind the control knob flashes three times. A signal
tone sounds.
2.
Turn the control knob back to position 0.
Summary of Contents for VL 200 120
Page 55: ......

