background image

9.  Once the desired res

It has been achieved, 

close the steam knob, by turning it clockwise, 

to stop dispensing steam and remove the jug.

Note. 

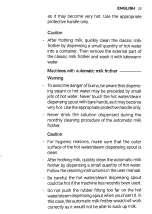
After frothing the milk, to make the froth 

more compact, it is advisable to lightly tap the 

jug on a flat surface and leave it to rest for at 

least 30 seconds. The milk will become more 

homogeneous.

Warning! 

It is important to froth only the milk 

you need. The remaining hot milk in the jug 
should not be reused; it would damage the 
quality of the froth and above all the taste of 
the cappuccino. It should therefore be 

sed in 

other ways.

10

.

  Press the steam b

니竹

on (Fig.1-3).

Po

rthe frothed milk into the coffee. Decorate 

as desired with cinnamon, cocoa, ruitmeg.

To prepare another coffee immediately, lower the 

boiler temperature by dispensing hot water from the 
coffee brew unit (Fig.1-8). Follow the instructions 
in the paragraph "How to lower the temperature"; 
otherwise, the coffee may taste b

rnt.

Warning! 

The steam wand may be very hot dur­

ing and after use. To avoid burns, move it only 
by placing your fingers on the rubber tip fitted 
on the steam wand.

Warning! 

If coffee is brewed without reducing 

the temperature by dispensing water, you may 

get burnt!

Dispensing hot water —

1.  Uirn the machine on and wait a few minutes 

until the correct coffee temperature indicator 
light (Fig.1-5) turns on.

2.  Place a cup under the professional wand.

3.  Slowly turn the steam knob (Fig. 1 -7) counter­

clockwise and press the brew button (Fig.1-1) 
and the steam button (Fig.1-3) at the same time 
to allow for hot water to be dispensed.

4

.

  Once the desired amount of hot water has 

been dispensed, stop dispensing by pressing 

the brew button (Fig.1-1) and the st

m b

tton

(Fig.1-3) again and turn the steam knob 
clockwise.

To prepare another coffee immediately, lower 
the boiler temperature by dispensing hot water 
from the coffee brew unit (Fig.1-8). Follow the 

instructions given in the paragraph "How to lower 

the boiler temperature", otherwise the coffee may 
taste burnt.

Note. 

The dispensing operation should last no 

longer than 60 seconds.

ENGLISH 

29

Warning! 

The steam wand may be very hot dur­

ing and after use. To avoid bums, move it only 
by placing your fingers on the rubber tip fitted 
on the steam wand.

How to lower the boiler 

temperature---------------

1.  Do not insert the filter holder.

2.  Place an empty cup on the grill.

3.  Press the brew button (Fig.1-1) and fill the cup 

with water.

4

.

  Press the brew button again (Fig.1-1).

The machine is now ready to brew another coffee.

Cleaning and 
maintenance--------------

Regular cleaning and maintenance keep the 
machine in perfect conditions and ensure perfect 
coffee flavour, a constant coffee flow and excellent 
milk froth for a long period of time.

Cleaning the steam wand ---------

After each milk frothing:

1.  Clean the steam wand with a damp cloth. To 

clean it more thoroughly, you can unscrew the 
nozzle (Fig.13) and wash it with running water.

2.  Open the steam knob, allowing the steam to 

escape for one or two seconds to clear the 

nozzle hole (Fig.1-23).

Summary of Contents for CLASSIC RI9380

Page 1: ...MILANO 妄 국거 ENGLISH CLASSIC RI9380 SIN035R 사용설명서 Operating instructions C ...

Page 2: ... 斗 ...

Page 3: ......

Page 4: ......

Page 5: ......

Page 6: ... 또는 투샷용 바스켓 그림 5 10 스탠다드 바스켓 전통적인 필터 투샷용 그림 7 10 스탠다드바스켓 전통적인 필터 원샷용 1회 분량포드 그림 6 10 처음 설치 10 작동준비와예열하기 10 처음 추출하거나 2주 이상 장기간 사용하지 않은 후 작동하기 10 포타필터 예열하기 10 커피추출하기 11 POD커표 추출 12 카푸치노 만들기 12 스팀 추출 12 보일러 추출온도설정 13 청소 및유지관리 14 스팀봉청소 14 포타필터와바스켓청소 14 잔받침대와물받이통청소 14 물통 청소 14 브루잉 그룹 청소 14 장기간미사용후청소 14 스케일 제거 15 작동이 도 지 않을 때 16 6 ...

Page 7: ...한 용도로 사용하고 그 외는 사용하지 마세요 13 고온스팀을 사용시 특별히 주의하세요 14 본 사용설명서를 잘 보관하세요 소주의 본 가전제품은 가정용입니다 청소 및 유지 관리 이외의 서비스는 공식 서비스센터에서 하세요 머신을 물 안에 담그지 마세요 화재 전기 감전을 방지하기 위하여 머신을 분해하지 마세요 사용자가 임의로 기기내 부의 부품을 수리 및 개조할 수 없습니다 수리는 공식 서비스센터에서만 할 수 있습 니 다 1 제품에 표시된 전압과 사용하는 전압과 일치하는지 확인하세요 2 미지근하거나 뜨거운 물을 물통에 보충 하지 마세요 차가운 물만 사용하세요 3 사용시 가전제품의 뜨거운 부분으로부터 손과 코드를 멀리 하세요 4 연마용 세제 또는 거친 청소도구로 절대 청소하지 마세요 물에 젖은 부드러운 천 으로 간단...

Page 8: ...분리 수거에 대한 해당 국가의 규정을 준수하십시오 올바른 폐기 방법을 준수하여 자연 환경을 보호하고 인체에 대한 피해를 방지 하시기 바랍니다 보증 및 지원 서비스 또는 지원을 받으려면 현지 판매점이나 공인 서비스 센터에 문의하 십시오 상세한 연락처는 별도로 제공된 보증 책자에 포함되어 있거나 www gaggia com 또는 www gaggia it에서 확인할 수 있습니다 꼭알아두기 커피 머신을 처음으로 사용하는 경우에는 별도로 제공된 안전 매뉴얼을 미리 주의 깊게 읽으시기 바랍니다 그리고 나중에 참조할 수 있도록 잘 보관하 시기 바랍니다 ...

Page 9: ... 월씬 뛰어난 맛을 경험 할 수 있습니다 3 에스프레소 커피용으로 분쇄된 커피가루 를 사용하세요 구매시 반드시 확인하세요 12 물 탱크커버 13 물탱크 탈착형 14 스팀봉 고온주의 15 크레마필터바스켓 원샷및 투샷용 크레마필 터 Crema Perfett 와 함께 사용해야만 합니 다 그림 1 16 16 크레마필터 17 포타필터 18 스탠다드바스켓2샷용 19 스탠다드바스켓1샷용 4 칼날형 그라인더는 커피 먼지 발생과 불 규칙적인 분쇄입자가 될 수 있으므로 에 스프레소머신에는 적합하지 않습니 다 5 정통 에스프레소 커피에는 11크레마 로 명 칭하는 연한 갈색의 미세한 거품이 있습 니 다 6 에스프레소 커피를 추출하는 즉시 바로 드세요 7 에스프레소는 2온스 또는 2와 1 2온스의 데미타스컵으로 드세요 4 또는 6...

Page 10: ...은 전압이 맞는 벽면 콘센트에 삽입합니다 ON OFF 버튼 그림 1 2 을 누르십시오 전원 표 시등이 켜집니다 그림 1 4 작동준비와 예열하기 경고 예열아되기 전에 추출버튼을 작동 하면 안 됩 니다 추출버튼에 불이 들어온 후 작동 해 주십시오 1 포타필터를 삽입하지 않은 상태에서 추출그룹 그림 1 8 아래에 빈 잔을 놀으십시오 추출버튼에 불이 들어 오면 추출 버튼 그림 1 1 을 누르십시오 펌프가 작동하는 소리가 들리고 몇 초 후 추 출그룹 그림 1 8 에서 물이 나오기 시작합니다 2 잔을 재운 후 약 150cc 추출 버튼 그림 VI 을 다시 누르십시오 참고 기포 가 있는 경우에는 펌프 자동 프라이머 가 잠시 작동하지 않을 수 있습니다 추출 그룹 그림 1 8 에서 물이 나오지 않는 경우에는 다음과 같이 하십...

Page 11: ...니다 커피를 처음 추출하는 경우 필터 홀더 그림 1 17 를 먼저 예열해야 합니다 1 아래쪽에서추출 그룹 그림 1 8 안으로포타필터 그림 1 17 를 삽입하십시오 이때 포타필터 핸들에 있는 기준 표시와 커피 머신의 전면 패널 그림 3 에 있는 아이콘을 정렬합니다 T 아이콘 그림 4 의 제자리에 고정될 때까지 왼쪽 에서 오른쪽으로 포타필터를 돌리십시오 2 포타필터 그림 1 17 아래에 큰 잔을 놓온 후 추출버튼 램프가 켜지면 추 출 버튼 그림 1 1 을 누르십시오 3 잔에물이찬 후 약 150cc 추출버튼을다시누 르고 필터 홀더를 삽입한 커피 머신이 적절한 온 도에 도달할 때까지 몇 분 동안 기다리십시오 참고 포타필터에 분쇄된 커피를 채우기 전에는 포타필터에 남아 있는 물을 없도록 해주세요 연속 추출 하기 4 ...

Page 12: ...봉을 머신 바깥쪽으로 이동시켜 사용하시기 바랍니다 이때 다음과 같이 하십시오 1 분쇄된 커피를 사용하여 에스프레소 커피 추 출 단락에서 설명하는 것과 같이 큰 카푸치노 잔 안에 에스프레소 커피를 넣습니다 2 스팀 버튼 그림 1 3 을 누릅니다 3 15 20초 후 스팀 온도 표시등 그림 1 6 이 켜졌 을 때 4 스팀노브을 시계 반대 방향으로 조금 돌려서 봉에 응축된 부분을 제거한 후 스팀노브을 다시 닫습니다 5 스팀피처에차가운 우유를반 정도채운후 스팀봉 아래에 놓습니다 6 스팀노즐을 우유표면바로 아래에놓습니다 너무 깊이 삽입하면 우유 거품이 생기지 않습니다 스팀 노즐을 스팀피처를 기울여 가장자리에 가깝운 위치로 유지하면서 강한 와류를 생성하는 것이 중요합니다 그림 8 1 7 스팀 노브 그림 1 7 를 시계 ...

Page 13: ...뜨 겁습니다 화상을 방지하기 위해 스팀 봉에 장착 된 고무 팁만 손가락으로 잡아서 이동시 킵 니 다 경고 물을 배출하여 온도를 낮추지 않은 상태에 서 커피를 추출하면 화상을 입을 수도 있습니다 온수 추출 1 커피 머신을 켠 후 추출버튼 그 림 1 5 이 켜질 때까지 몇 분동안 기다리십시오 2 스팀봉 아래에잔을 놀으십시오 3 스팀 노브 그림 1 7 를 시계 반대 방향으로 천 천히 돌린 후 뜨거운 물이 추출될 수 있도록 추 출 버튼 그림 1 1 과 스팀 버튼 그림 1 3 을 동시 에 누르십시오 4 원하는 분량의 뜨거운 물이 배출되었으면 추출 버튼 그림 1 1 과 스팀 버튼 그림 1 3 을 다시 눌 러서 배출을 중지시키십시오 그리고 스팀 노브 를 시계 방향으로 돌리십시오 커피를 연속 추출할 경우 커피 추출 그롭 ...

Page 14: ...드시 포타필터 잔의 온도가 완전히 내려간 이후에만 교체해야 합니다 포타필터 홀더에서 필 터 바스켓을 탈착한 후 따뜻한 물로 세적합니다 커피가 추출이 잘 되지 않는다면 끓는 물에 10분 동안 필터바스켓 을 담그십시오 그 후 흐르는 물로 행구십시오 필터를 보다 철저하게 청소 하려면 가찌아포타필터 청소제 알약 를사용하시기 바랍니다 잔 받침대와 물받이 통 청소 물받이통 12 과 컵받침대 5 를 분리하고 따뜻한 비눗물로 세척하세요 연마제는 사용하지 마세요 그림6 참조 5 추출그룹내부의필터홀더 가스켓 을 청소하고 깨끗히 하세요 6 사용정도에 따라 추출그룹의 샤워 디스크를 풀어 정기적으로 청소하세요 7 만일 머신을 장시간 사용하지 않았다면 스팀노브를 반시계방향으로 돌리고 스팀 버튼을 눌러 보일러에 있는 물을 추출하세요 ...

Page 15: ...구고 식수를 다시 채우세요 10 스팀노즐 8 아래에용기통을 놓으세요 스팀 온수노즐다이 얼 7 을 반시계방향으 천천히 돌려 여세요 경고 디스케일링 세정액 또는 마신에서 나온 어떠한 액체도 절대 마시지 마세요 디스케일링 세정액 대용으로 식초는 절대 사 용하지 마세요 1 필터홀더를머신에끼우고 왼쪽에서오른 쪽으로 돌려 단단히 조여주세요 2 물통을 빼내고 물을비워주세요 3 디스케일링 세정액의 반을 물통에 부은 다음 식수를 MAX수위까지 재우세요 4 필요A 스팀노즐을분리하세요 5 전원스위치 1 를눌러머신을 켜세요 온수추출하기 편을 참조하여 스팀노즐 에서 2컵 각15 해 컵 분의 온수량을 추출하고 전원스위치를 눌러 끄세요 6 머신의전원이꺼진상태에세5 20분 Zt 두세요 7 전원스위치 1 를 눌러 머신을 켜세요 온수추출하...

Page 16: ... 크레마필터가 필터홀더에 장착되지 않았다 추출헤드의 가스켓이 오염 되었거나 마모되었다 필터홀더 테두리에 묻은 커피가루를 청소하지 않았다 크레마가 너무 적다 크레마필터가 필터홀더에 끼워져 있지 않다 커피입자가 너무 굵다 탬퍼로 커피를 제대로 압축하지 않았다 커피가 너무 오래되거나 건조되었다 커피 온도가 너무 낮다 머신과 필터홀더가 제대로 예열되지 않았다 6분 커피입자가 너무 굵다 차가운 커피잔에 추출되었다 항상 데워진 컵에 커피를 추출하도록 권장합니다 우유거품이 충분치 않다 스팀노즐 또는 공기유입구가 막혔다 우유가 너무 뜨겁다 차가운 우유를 사용하세요 포타필터에서 커피가 분출 됩니다 스탠다드 바스켓과 크레마 필터가 같이 장착되었습니다 크레마 필터를 빼주세요 기기 외장과 배출호스가 뜨겁습니다 스팀 버튼이 꺼져 ...

Page 17: ...사용할 경우 보증기간은 반으로 단축 적용됩니다 고장이 아닌 경우 서비스를 요청하시면 유상서비스 처리가 되므로 사용설명서를 잘 읽어주십시오 가정용 커피머신의 경우 택배 또는 접수 후 내방해주시는 방법으로 점검 및 A S 서비스가 진행 되오니 머신의 패키지박스를 별도로 보관해두시기를 것을 권장드립니다 유상 서비스 품질보증기간은 구입 후 1년간입니다 품질보증기간 이내라 하더라도 아래 사항에 해당되는 경우는 유상서비스 처리가 됩니다 제품보증기간이 경과한 후 발생한 성능불량 및 고장 소비자의 고의 및 과실 식수가 아닌 기타액체 및 커피원두가 아닌 이물질을 머신에 투입한 경우 등 또는 잘못된 수리 개조하여 고장 발생시 잘못된 청소로 인하여 발생한 성능불량 및 고장 발생시 사용전원의 이상 및 전기용량을 틀리게 사용하거나...

Page 18: ...nes Contents IMPORTANT SAFETY INFORMATION7 Warning 7 Caution 8 Machines with classic milk frother 10 Machines with automatic milk frother 11 Electromagnetic fields EMF 12 Recycling 12 Warranty and support 12 DESCRIPTION13 THINGS TO KNOW13 INTRODUCTION14 FILTERS SUPPUED14 Crema perfetta filter for 1 or 2 cups Fig 5 14 Traditional filter for 2 cups Fig 7 14 Traditional filter for 1 cup single dose p...

Page 19: ...le or worktop and do not let it to니ch hot surfaces To avoid the danger of electric shock never immerse the machine mains phjg or power cord in water or any other liquid Do not pour liquids on the power cord connector To avoid the danger of burns keep body parts away from hot water jets proceed by the machine Do not to니ch hot s니rfaces Use handles and knobs Switch offthe machine with the main switch...

Page 20: ...ance shall not be made by children unless they are older than 8 and s니pervised Keep the machine and its cord o니t of the reach of children aged less than 8 years Children should be s니pervised to ensure that they do not play with the machine Be caref니II when you dispense hot water Dispensing may be preceded by small jets of hot water Wait 니ntil the end of the dispensing cycle before you remove the h...

Page 21: ...is may ca니se damage to the water tank and the machine Never 니se so니ring pads abrasive cleaning agents or aggressive liq니ids s니ch as petrol or acetone to clean the machine Simply 니se a soft cloth dampened with water Descale yo니r machine regularly Not doing this will make yo니r appliance stop working properly In this case repair is not covered by yo니r warranty Do not keep the machine at temperatures ...

Page 22: ...r holder in the dishwasher and do not 니se washing up liq니id or a cleaning agent to clean it This may cause the pressurized filter holder to malfunction and may have a negative effect on the coffee taste Do not dry the brew gro니p with a cloth to prevent fibers from collecting inside the brew g o니p Never drink the solution dispensed ckjring the descaling process Do not remove the press니rized filter ...

Page 23: ...y become very hot Use the appropriate protective handle only Never drink the solution dispensed d니ring the monthly cleaning procedure of the automatic milk frother Caution For hygienic reasons make s니re that the o니ter s니rface of the hot water steam dispensing spcnjt is clean After frothing milk quickly clean the a니tomatic milk frother by dispensing a small q니antity of hot water Follow the cleaning...

Page 24: ...mal ho니sehold waste 2012 19 EU Follow your country s rules for the separate collection of electrical and electronic prod니cts Correct disposal helps prevent negative consequences for the environment and human health Warranty and support For service or support contact your local dealer or an authorized service center Contact details are included in the warranty booklet supplied separately or visit w...

Page 25: ... Each type of roasting is characterised by a mixture of beans roasted at a certain temperature and with a certain type of aroma There are decaffeinated coffees containing only 2 caffeine Try different types of coffee with your espresso machine You will probably discover a better aroma than the one previously used 3 Pump espresso machines require a finely ground blend Be sure to p니rchase the desire...

Page 26: ...or light turns on Fig 1 4 Loading the circuit Warning Do not activate the brew button without loading the circuit first 1 Place an empty cup under the brew 니nit Fig 1 8 without inserting the filter holder and press the brew button Fig 1 1 You will hear the sound of the pump being activated and after a few seconds the water will start to come out ofthe brew 니 nit Fig 1 8 2 After filling the cup abo...

Page 27: ... the brew unit Fig 1 8 from the bottom aligning the reference mark on the filter holder handle with the icon on the front panel of the machine Fig 3 Turn the filter holder from left to right until it locks into place on the icon Fig 4 2 Place a large cup 니nder the filter holder Fig 1 17 and press the brew button Fig 1 1 3 After the cup of water has been filled about 150cc press the brew button aga...

Page 28: ...int continue as follows 1 Prepare the espresso in a large capp니ccino cup as indicated in the paragraph Brewing an espresso using ground coffee 2 Press the steam button Fig 1 3 3 After 15 20 seconds and when the steam temperature indicator light Fig 1 6 t니ms on 4 Turn the steam hot water knob slightly ccMjnter clockwise to eliminate any condensation from the wand then close the knob again 5 Place t...

Page 29: ...n the steam knob Fig 1 7 counter clockwise and press the brew button Fig 1 1 and the steam button Fig 1 3 at the same time to allow for hot water to be dispensed 4 Once the desired amount of hot water has been dispensed stop dispensing by pressing the brew button Fig 1 1 and the st的m b니tton Fig 1 3 again and turn the steam knob clockwise To prepare another coffee immediately lower the boiler tempe...

Page 30: ...rly remove any resid니al coffee g o니nds from the screen Fig 16 니sing a br니sh and wash with hot waterfollowing the instructions given in the section How to lower the temperature Cleaning after a long period of inactivity When the machine is not 니sed for a long time more than two weeks follow the instructions given in the section When using for the first time or after a period of inactivity of more t...

Page 31: ...Fig 1 1 and the steam button Fig 1 3 10 Dispense the whole watertank content through the steam wand To stop dispensing press the brew button Fig 1 1 and the steam button Fig 1 3 again and close the knob by turning it clockwise 11 Fill the water tank with fresh drinking water 12 Place a suitable container under the filter holder 13 Press the brew button Fig 1 1 and dispense all the water in the tan...

Page 32: ...e filter holder The espresso is not creamy enough The coffee has not been ground too coarsely The coffee has been pressed with the tamper The coffee is not too old or dry Thetraditional filter has been used with the frothingjet device Fig 1 16 The coffee is too cold The machine has been heated The coffee has not been ground too coarsely The coffee has been brewed in cold cups It is recommended to ...

Page 33: ...주 코디아 〇 이앤티 경기도 수원시 장안구 파장천로 100 Tel 1644 7085 내선3 Fax 070 8233 2776 www gaggia korea com 수입원 주 코디아 이앤티 GAGGIA MILANO 품질개선과 성능향상을 위해 본 사용설명서의 내용 사진 사양은 예고없이 변경될 수 있습니다 Gaggia s p A www gaggia itwww gaggia com ...

Reviews: