background image

12

English

Machine overview (fig.2)

1

Control panel

16

Coffee residues drawer

2

Adjustable coffee dispensing spout

17

Coffee pucks container

3

Water tank lid

18

Drip tray

4

Coffee bean container lid

19

Drip tray grid

5

Pre-ground coffee compartment

20

Espresso tray

6

Main power button

21

Hot water dispensing spout

7

Power cord socket

22

Milk container

8

Drip tray release buttons

23

Milk dispensing unit

9

Espresso tray insertion slot

24

Milk dispensing unit lid

10

Full drip tray indicator

25

Milk dispensing spout

11

Water tank

26

Water hardness tester

12

Coffee grinder adjustment knob

27

Grinder adjustment key and pre-ground coffee

measuring spoon

13

Coffee bean container

28

Lubricant

14

Brew group

29

Power cord

15

Service door

4219-465-03661 MAN. GAG.MAGENTA PRESTIGE 120V EN-FR Rev 01.indd   12

21/01/2021   12:18:19

Summary of Contents for MAGENTA PRESTIGE

Page 1: ...ENGLISH FRANÇAIS RI8702 SUP 051U GAGGIA MAGENTA PRESTIGE Operating instructions Mode d emploi 4219 465 03661 MAN GAG MAGENTA PRESTIGE 120V EN FR Rev 01 indd 1 21 01 2021 12 17 57 ...

Page 2: ...23 22 24 25 L 14 15 13 3 28 1 27 16 26 10 17 18 11 20 19 2 29 9 8 5 4 7 6 21 12 02 4219 465 03661 MAN GAG MAGENTA PRESTIGE 120V EN FR Rev 01 indd 2 21 01 2021 12 18 01 ...

Page 3: ...ermi di voler cambiare la lingua in Italiano In the next steps we will set the correct water hardness level 1 sec 1 min 03 09 15 12 16 18 17 19 20 10 11 13 14 05 04 06 07 08 23 26 23 25 22 21 24 4219 465 03661 MAN GAG MAGENTA PRESTIGE 120V EN FR Rev 01 indd 3 21 01 2021 12 18 14 ...

Page 4: ...r plug or after the appliance malfunctions or has been damaged in any manner Return appliance to the nearest authorized service facility for examination repair or adjustment 7 The use of accessory attachments not recommended by the appliance manufacturer may result in fire electric shock or injury to persons 8 Do not use outdoors 9 Do not let cord hang over edge of table or counter or touch hot su...

Page 5: ... bottled water Periodic descaling is still recommended every 2 3 months 6 Do not use caramelized or flavored coffee beans INSTRUCTIONS FOR THE POWER SUPPLY CORD A A short power supply cord or detachable power supply cord is to be provided to reduce risks resulting from becoming entangled in or tripping over a longer cord B Longer detachable power supply cords or extension cords are available and m...

Page 6: ...Before you clean the machine Pull at the plug not at the power cord Do not touch the mains plug with wet hands Do not use the machine if the mains plug the power cord or the machine itself is damaged Do not make any modifications to the machine or its power cord Only have repairs carried out by a service center authorized by Gaggia to avoid a hazard The machine should not be used by children young...

Page 7: ...r can become contaminated Use fresh water every time you use the machine Never use any accessories or parts from other manufacturers or that Gaggia does not specifically recommend If you use such accessories or parts your warranty becomes invalid Regular cleaning and maintenance prolongs the lifetime of your machine and ensures optimum quality and taste of your coffee The machine is exposed contin...

Page 8: ...ean the classic milk frother by dispensing a small quantity of hot water into a container Then remove the external part of the classic milk frother and wash it with lukewarm water Machines with automatic milk frother cappucinatore Capp in Cup system Warning To avoid the danger of burns be aware that dispensing steam or hot water may be preceded by small jets of hot water Never touch the hot water ...

Page 9: ... country s rules for the separate collection of electrical and electronic products Correct disposal helps prevent negative consequences for the environment and human health Warranty and support For service or support contact your local dealer or an authorized service center Contact details are included in the warranty booklet supplied separately or visit www gaggia com or www gaggia it 4219 465 03...

Page 10: ...ories to ensure its correct operation As real coffee is used during testing some residue may be found in your machine However this does not compromise the integrity of the product Please be assured that this is a brand new machine In this user manual you will find all the information you need to install use clean and descale your machine Before using it for the first time please read carefully the...

Page 11: ...e 21 Removing the milk carafe 21 Dispensing frothed milk based coffee beverages 21 Dispensing hot water 22 Customising beverages and saving settings MEMO 23 Beverage customisation 23 Adjusting the grind settings 24 Cleaning and maintenance 25 Cleaning table 25 Cleaning the milk carafe 26 Cleaning the brew group 27 Lubricating the brew group 30 Descaling 31 Descaling procedure 31 What to do if the ...

Page 12: ...pout 7 Power cord socket 22 Milk container 8 Drip tray release buttons 23 Milk dispensing unit 9 Espresso tray insertion slot 24 Milk dispensing unit lid 10 Full drip tray indicator 25 Milk dispensing spout 11 Water tank 26 Water hardness tester 12 Coffee grinder adjustment knob 27 Grinder adjustment key and pre ground coffee measuring spoon 13 Coffee bean container 28 Lubricant 14 Brew group 29 P...

Page 13: ...LEAN SET clean setting button To open the cleaning and setting menu 6 START STOP START STOP button To start stop dispensing of the selected beverage or to start stop the procedure indicated on the display Note HOME HOME and CLEAN SET clean setting also work as ESC buttons You can exit the screens by pressing one of the two buttons to go back to the main menu This will not be possible if you have a...

Page 14: ...t scroll through the different pages and select a ESPRESSO LUNGO 2 Press the button until is selected without adding pre ground coffee LUNGO LUNGO 3 Press the START STOP START STOP button to start dispensing The machine will dispense hot water 4 Empty the container and make sure that the hot water dispensing spout is installed 5 Place the container under the hot water dispensing spout and select H...

Page 15: ...ny squares turn red 3 Use the green and buttons to select the water hardness according to the table below Confirm the setting by pressing Small red squares Value to set Water hardness INTENZA 1 very soft water A 2 soft water A 3 hard water B 4 very hard water C INTENZA water filter We recommend the use of INTENZA water filter to limit limescale formation This ensures a longer operating life of you...

Page 16: ...cedure press the START STOP START STOP button again Remove the INTENZA water filter from the water Set the machine according to the detected water hardness see the Measuring water hardness section On the filter base please set one of the following A soft water 1 or 2 small squares B hard water standard 3 small squares C very hard water 4 small squares Replacing the INTENZA water filter When the IN...

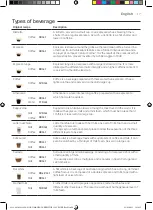
Page 17: ... the most loved in the world It is made with espresso milk and a milk foam which must be no less than 1 cm thick It is served in a large cup Milk Coffee 120 ml 40 ml Latte macchiato Latte macchiato is made with hot milk one part of milk foam and a small quantity of espresso It is served in a tall transparent glass to allow the separation of the three different layers to be seen Milk Coffee 240 ml ...

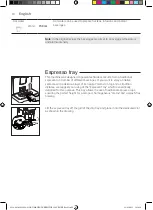
Page 18: ...purpose This tray allows the use of traditional espresso cups ensuring the perfect height for a compact homogeneous crema and a splash free brewing Lift the espresso tray off the grill of the drip tray and place it into the dedicated slot as shown in the drawing Hot water Hot water can be used to prepare hot teas infusions and instant beverages Water 150 ml Note In the original recipes the beverag...

Page 19: ...pare two cups simultaneously besides AMERICANO using the button 4 Finally press the START STOP START STOP button to start brewing Note you can interrupt the brewing at any time by pressing the START STOP START STOP button If you wish to customise the settings of a specific beverage please refer to the Beverage Customisation section Brewing coffee using pre ground coffee Use the measuring scoop pro...

Page 20: ...pressing the START STOP START STOP button Preparation of frothed milk based and coffee beverages Warning before selecting a milk frothed milk or coffee based beverage make sure that the milk carafe is installed and the milk dispensing spout is open If the milk carafe is not correctly installed the milk dispensing spout may spray steam or hot milk Filling the milk carafe Note Before using the milk ...

Page 21: ...naturally released from the insert in the drip tray Then remove the carafe Dispensing frothed milk based coffee beverages Tip use only cold milk at a temperature of 5 C approx and with at least a 3 protein content so as to obtain a perfect milk foam You can use either whole milk or semi skimmed milk Also you can use skimmed soy or lactose free milk 1 Pull out the milk dispensing spout to the right...

Page 22: ...ter dispensing spout wait until the preparation has ended 1 Insert the hot water dispensing spout 2 Press the HOME HOME button browse the various screens using the green button and select hot water 3 Press the HOT WATER button Finally press the START STOP START STOP button to start dispensing Note you can interrupt the brewing at any time by pressing the START STOP START STOP button If you wish to...

Page 23: ... quantity will be displayed 5 Press the TEMP button repeatedly to adjust the temperature of the beverage among the following options low medium high 6 Press to brew two cups or for a single cup The picture of the beverage in the middle of the display will indicate the number of cups selected Note this function is not available for beverages with milk AMERICANO and HOT WATER 7 To change the aroma i...

Page 24: ...guarantees a perfect and homogeneous grinding for the preparation of every cup of coffee The aroma is thus preserved ensuring the perfect flavour every time Warning to avoid damages to the coffee grinder do not rotate the grinder adjustment knob more than one notch at a time 1 Open the lid of the coffee bean container 2 Press and turn the grinder adjustment knob placed inside the coffee bean conta...

Page 25: ...ribed in Cleaning the milk carafe section For this cleaning cycle use the Philips Milk Circuit Cleaner Disassemble the milk carafe and clean all its parts under running water Brew group Weekly Remove the brew group and clean it under running water Depending on usage See the Cleaning and lubricating the brew group section Monthly Clean the brew group with Gaggia coffee oil remover to remove any oil...

Page 26: ...ilk carafe quick clean and deep clean Both programmes can be selected with the CLEAN SET clean setting button Press the CLEANING button upon selection Quick clean is also recommended after dispensing milk based beverages For both programmes follow the instructions shown on the display Quick clean programme The quick clean programme includes the milk circuit cleaning with hot water Deep clean progr...

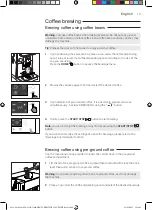
Page 27: ...the milk tub from the holder fig 24 Press the release buttons on the Pannarello and remove the Pannarello from the rubber holder fig 25 Pull out the connector from the Pannarello fig 26 5 Wash all components under running water 6 After cleaning reassemble all the components by following the same procedure in reverse order Cleaning the brew group Warning do not wash the brew group in the dishwasher...

Page 28: ...w group dry in the air Note to avoid the build up of fibres inside do not dry the brew group with cloth Reinserting the brew group 1 Before reinserting the brew group back into the machine make sure that the two yellow reference marks on the side match If this is not the case perform the following steps Make sure that the lever is in contact with the base of the brew group 5 Remove the coffee resi...

Page 29: ...spout 2 Press the CLEAN SET clean setting button and select the CLEAN button shown on the display 3 Select CLEANING THE BREW GROUP and press the button then press START STOP START STOP to start the cleaning procedure 4 Follow the instructions shown on the display to clean the brew group correctly 5 The procedure will take approximately 5 minutes START STOP START STOP can be used to pause and resum...

Page 30: ...urn off the appliance and disconnect the power cord 2 Remove the brew group and rinse it using lukewarm water see the Cleaning the brew group under running water section 3 Apply a thin layer of the lubricant supplied around the insertion pin on the lower part of the brew group 4 Apply a thin layer of lubricant to the guides on both sides see figure 5 Reinsert the brew group see the Reinserting the...

Page 31: ...nto the water tank and fill the tank with water up to the CALC CLEAN level Place it back into the machine 5 Fill the milk carafe halfway with water and insert it in the machine 6 Place a large container 1 5l under the milk and coffee dispensing spouts 7 Follow the instructions shown on the display to launch the descaling procedure This procedure lasts approximately 25 minutes and consists of a des...

Page 32: ...ure has not been completed it will be necessary to carry out another descaling procedure as soon as possible Different settings By pressing the CLEAN SET clean setting button and selecting SETTINGS on the display you can reset or modify some of the machine settings including Language Water filter Stand by Time Measurement units Water hardness Beverage counter Button sound Default settings Language...

Page 33: ... WATER HARDNESS BEVERAGE COUNTER BUTTON SOUND UNITS Beverage counter It is possible to display the number of cups of each beverage that have been dispensed since the first operation of the machine These data cannot be reset Factory settings It is possible to reset the machine to default factory settings The machine will require a double confirmation before proceeding Water hardness When WATER HARD...

Page 34: ...witch off the machine Remove the brew group and clean it thoroughly Refer to the Cleaning the brew group section The brew group is not positioned correctly Switch off the machine Remove the brew group and reinsert it Ensure that the brew group is in the correct position before inserting it Refer to the Reinserting the brew group section 05 A problem occurred in the water circuit There is air in th...

Page 35: ...le counter does not reset In this case the display shows the icon even if the container is not full The coffee pucks container has been placed back too quickly Always wait about 5 seconds when you replace the coffee pucks container This way the counter will reset to zero The machine requests to empty the coffee pucks container even if it is not full The machine has not reset the counter last time ...

Page 36: ...fee outlet duct is clogged Clean the coffee outlet duct with a teaspoon as described in the Cleaning the brew group under running water section Coffee is not hot enough The set temperature is too low Check the menu settings Set the menu temperature to MAX The machine grinds the coffee beans but the coffee does not come out The coffee grinder is set to a too fine grinding Adjust the coffee grinder ...

Page 37: ...not inserted onto the INTENZA filter Check the packaging and insert the seal onto the INTENZA filter The INTENZA filter cannot be activated Another filter is already active The machine indicates the filter usage in percentage However if you want to activate a new filter before the one currently in use has expired the latter must be deactivated first and as described in section Replacing INTENZA wa...

Page 38: ... the service door Housing material Thermoplastic type Dimensions 224 x 357 x 435 mm Weight 7 7 kg Power cord length 1200 mm Control panel Front panel Water tank 1 8 litres Removable type Coffee bean container capacity 250 g Coffee pucks container capacity 15 Pump pressure 15 bar Boiler Stainless steel boiler Safety devices Thermal Fuse Coffee range available in beans and powder 100 Arabica Intense...

Page 39: ...après un mauvais fonctionnement de l appareil ou son endommagement de n importe quelle manière Renvoyer l appareil au centre d assistance agréé le plus proche pour tout contrôle réparation et réglage 7 L utilisation d accessoires non recommandés par le constructeur de l appareil pourrait engendrer des incendies des chocs électriques et des blessures 8 Ne pas utiliser à l extérieur 9 Ne pas laisser...

Page 40: ...s apparaissant sur la plaque signalétique 2 Ne jamais mettre de l eau tiède ou chaude dans le réservoir mais toujours de l eau froide 3 Ne pas toucher les surfaces chaudes de l appareil pendant le fonctionnement et en écarter le cordon électrique 4 Ne pas utiliser d alcool éthylique de solvants d essences de poudre à récurer et ou d objets abrasifs pour le nettoyage de la machine 5 Utiliser de l e...

Page 41: ...d utilisation d un long cordon d alimentation détachable ou d une rallonge 1 La tension électrique de fonctionnement marquée sur le cordon d alimentation détachable ou sur la rallonge doit être au moins égale à celle de l appareil 2 Si la fiche de l appareil a une connexion de terre la rallonge devrait être une rallonge de terre à 3 fils et 3 La rallonge ne devra pas encombrer le plan de travail o...

Page 42: ...de nettoyer la machine Tirez sur la prise et non sur le cordon d alimentation Ne touchez pas la prise secteur avec les mains humides N utilisez jamais l appareil si la fiche le cordon d alimentation ou l appareil lui même est endommagé Évitez d effectuer toute modification de la machine ou de son cordon d alimentation Effectuez uniquement les réparations auprès d un centre de service autorisé par ...

Page 43: ...le système de chauffe peut geler et provoquer des dommages Veillez à ne pas laisser d eau dans le réservoir lorsque la machine est inutilisée pendant une période prolongée Il est possible que l eau soit contaminée Utilisez de l eau fraîche à chaque utilisation de la machine N utilisez jamais d accessoires ou de pièces d un autre fabricant ou n ayant pas été spécifiquement recommandés par Gaggia Vo...

Page 44: ...ès chaud Utilisez uniquement le manche protecteur adéquat Attention Après la production de mousse de lait nettoyez rapidement le mousseur à lait classique en versant une petite quantité d eau chaude dans un récipient Retirez ensuite la partie extérieure du mousseur à lait classique et lavez la à l eau tiède Machines avec mousseur à lait automatique cappucinatore système Capp in Cup Avertissement P...

Page 45: ... de garantie fourni séparamment ou sur les sites www gaggia com ou www gaggia it Attention Pour des raisons d hygiène vérifiez que la surface extérieure de la buse de distribution d eau chaude de vapeur est propre Après la production de mousse de lait nettoyez rapidement le mousseur à lait automatique en versant une petite quantité d eau chaude Respectez les instructions de nettoyage du manuel d u...

Page 46: ...aute qualité et le bon fonctionnement du produit Certains essais sont faits avec du café il est donc possible que quelques résidus soient restés à l intérieur Ceci ne compromet pas l intégrité du produit il s agit d une machine complètement neuve Ce manuel fournit toutes les informations nécessaires pour l installation l utilisation le nettoyage et le détartrage de votre machine Avant de l utilise...

Page 47: ...carafe à lait 57 Distribution des boissons à base de café et de lait émulsionné 57 Distribution d eau chaude 58 Personnalisation des boissons et mémorisation des réglages MEMO 59 Personnalisation des boissons 59 Réglage du degré de mouture 60 Nettoyage et entretien 61 Tableau du nettoyage 61 Nettoyage de la carafe à lait 62 Nettoyage du groupe de distribution 63 Lubrification du groupe de distribu...

Page 48: ...entation 22 Réservoir à lait 8 Boutons de décrochage du bac d égouttement 23 Unité de distribution du lait 9 Fente pour l insertion de l Expresso tray 24 Couvercle de l unité de distribution du lait 10 Indicateur bac d égouttement plein 25 Buse de distribution du lait 11 Réservoir à eau 26 Testeur de la dureté de l eau 12 Bouton de réglage du moulin à café 27 Mesure à café prémoulu et clé de régla...

Page 49: ... SET clean setting Pour accéder au menu du nettoyage et des réglages 6 Touche START STOP START STOP Pour commencer arrêter la distribution de la boisson sélectionnée ou pour lancer arrêter la procédure affichée Remarque Les touches HOME HOME CLEAN SET clean setting sont aussi des touches ESC Il suffit d appuyer sur une de ces deux touches pour quitter les pages écrans et revenir au menu initial co...

Page 50: ...XPRESSO ALLONGÉ 2 Appuyer sur la touche jusqu à ce que l option est sélectionnée sans ajouter de café prémoulu LUNGO LUNGO 3 Appuyer sur la touche START STOP START STOP pour commencer la distribution la machine va distribuer de l eau chaude 4 Vider le réservoir et s assurer que la buse de distribution de l eau chaude est installée 5 Mettre le réservoir sous la buse de distribution de l eau chaude ...

Page 51: ...leau ci dessous appuyer ensuite sur la touche pour confirmer Nombre de carrés rouges Valeur à régler Dureté de l eau INTENZA 1 eau très douce A 2 eau douce A 3 eau dure B 4 eau très dure C Filtre à eau INTENZA Pour limiter la formation de calcaire il est conseillé d installer le filtre à eau INTENZA Grâce à ce filtre la durée de vie de la machine sera plus longue et l arôme du café sera meilleur p...

Page 52: ...re à eau INTENZA de l eau le régler d après la dureté de l eau mesurée voir le chapitre Mesure de la dureté de l eau et sélectionner à la base du filtre A eau douce correspond à 1 ou 2 carrés B eau dure standard correspond à 3 carrés C eau très dure correspond à 4 carrés Remplacement du filtre à eau INTENZA Lorsque le filtre à eau INTENZA est épuisé un message d avertissement est affiché 1 Pour re...

Page 53: ...des boissons chaudes les plus appréciées au monde Il est préparé avec un café expresso du lait et de la mousse de lait qui doit être d au moins 1 cm Il est servi dans une grande tasse Lait Café 120 ml 40 ml Latte macchiato Le latte macchiato est une boisson qui se prépare avec du lait chaud une part de mousse de lait et une petite quantité d expresso Il est servi dans un verre haut et transparent ...

Page 54: ...e le dessin Distribution du café Distribution de café avec du café en grains Attention Utiliser uniquement du café en grains pour café expresso Ne pas mettre de café moulu de café non torréfié ni de café lyophilisé ou soluble dans le réservoir à café en grains car ils risqueraient d endommager la machine Conseil Pour obtenir un café plus chaud préchauffer les tasses avec de l eau chaude 1 Placer l...

Page 55: ...ution à tout moment en appuyant sur la touche START STOP START STOP Distribution du café avec du café prémoulu Utiliser la mesure fournie en dotation pour verser la dose correcte dans le compartiment du café prémoulu 1 Ouvrir le couvercle du compartiment du café prémoulu et ajouter une mesure à ras de bord de café prémoulu Attention Ne pas verser de substances autres que du café prémoulu pour ne p...

Page 56: ...perger de la vapeur ou du lait chaud 2 Verser le lait dans la carafe le lait doit être compris entre le niveau minimum MIN et le niveau maximum MAX indiqués sur la carafe Repositionner le couvercle Remplissage de la carafe à lait Remarque Avant d utiliser la carafe à lait procéder à un nettoyage soigné comme indiqué au chapitre Nettoyage de la carafe à lait La carafe à lait peut être remplie avant...

Page 57: ...a et du lait sans lactose 1 Extraire la buse de distribution du lait vers la droite jusqu au symbole Remarque si la buse de distribution du lait n est pas complètement sortie il est possible que le lait ne soit pas correctement émulsionné 2 Positionner une tasse sous la buse de distribution du lait ouverte 3 Appuyer sur la touche HOME HOME et choisir la boisson que l on désire dans le menu Appuyer...

Page 58: ...ttention au début de la préparation la buse de distribution d eau chaude risque d éjecter de la vapeur et de l eau chaude Avant de retirer la buse de distribution d eau chaude attendre la fin de la préparation 1 Introduire la buse de distribution d eau chaude 2 Appuyer sur la touche HOME HOME faire défiler les différentes pages écrans au moyen de la touche verte et sélectionner l eau chaude 3 Appu...

Page 59: ...firmer et revenir à la page écran précédente où la nouvelle quantité réglée sera affichée 5 Appuyer plusieurs fois de suite sur la touche TEMP pour modifier la température de la boisson en choisissant une des options suivantes basse moyenne haute 6 Appuyer sur la touche pour préparer deux tasses ou sur la touche pour préparer une seule tasse L image de la boisson au centre de l afficheur indiquera...

Page 60: ... en céramique garantit une mouture parfaite et homogène pour la préparation de chaque tasse de café L arôme sera ainsi préservé ce qui garantit un goût toujours parfait Attention Pour éviter d abîmer le moulin à café ne pas tourner le bouton de sélection de la mouture de plus d un cran à la fois 1 Ouvrir le couvercle du réservoir à café en grains 2 Appuyer sur le bouton de réglage de la mouture si...

Page 61: ...e cycle de nettoyage utiliser le produit spécifique pour le nettoyage du circuit du lait Milk Circuit Cleaner de Philips Démonter la carafe à lait et nettoyer toutes les pièces sous l eau courante Groupe de distribution Une fois par semaine Retirer le groupe de distribution et le laver à l eau courante Selon le type d utilisation Voir le chapitre Nettoyage et lubrification du groupe de distributio...

Page 62: ...e profond Les deux programmes peuvent être sélectionnés au moyen de la touche CLEAN SET clean setting en appuyant ensuite sur la touche NETTOYAGE Le nettoyage rapide est également proposé à la fin de la distribution des boissons à base de lait Suivre les instructions sur l afficheur pour les deux programmes Programme pour le nettoyage rapide Le programme pour le nettoyage rapide prévoit le nettoya...

Page 63: ...it du support fig 24 Appuyer sur les touches de décrochage situés sur le Pannarello et le retirer du support en caoutchouc fig 25 Extraire le raccord du Pannarello fig 26 5 Laver tous les composants à l eau courante 6 Une fois le nettoyage terminé reposer tous les composants en effectuant la même procédure dans l ordre inverse Nettoyage du groupe de distribution Attention Ne pas laver le groupe de...

Page 64: ...groupe de distribution à l air libre Remarque Ne pas sécher le groupe de distribution avec des chiffons pour éviter l accumulation de fibres à l intérieur Remise en place du groupe de distribution 1 Avant de remettre le groupe de distribution dans la machine s assurer que les deux repères jaunes sur le côté coïncident Dans le cas contraire effectuer l étape suivante Vérifier que le levier est en c...

Page 65: ...afé 2 Appuyer sur la touche CLEAN SET clean setting et sélectionner la touche NETTOYAGE affichée 3 Sélectionner NETTOYAGE DU GROUPE DE DISTRIBUTION et appuyer sur la touche et ensuite sur la touche START STOP START STOP pour lancer la procédure de nettoyage 4 Suivre les instructions affichées pour nettoyer correctement le groupe de distribution 5 La procédure va durer 5 minutes environ pour l inte...

Page 66: ...alimentation 2 Retirer le groupe de distribution et le rincer à l eau tiède voir le chapitre Nettoyage du groupe de distribution à l eau courante 3 Appliquer une fine couche du lubrifiant fourni de série autour du pivot d introduction située dans la partie inférieure du groupe de distribution 4 Appliquer une fine couche de lubrifiant sur les glissières des deux côtés voir la figure 5 Remettre le g...

Page 67: ... le réservoir à eau et ajouter de l eau jusqu au niveau de CALC CLEAN Réinstaller le réservoir dans la machine 5 Remplir d eau la moitié de la carafe à lait et l introduire dans la machine 6 Positionner un grand récipient 1 5l sous les buses de distribution du lait et du café 7 Suivre les instructions affichées pour lancer la procédure de détartrage Cette procédure dure environ 25 minutes et compr...

Page 68: ...e Si la procédure n a pas été terminée dès que possible il faudra effectuer une nouvelle procédure de détartrage Autres réglages Appuyer sur la touche CLEAN SET clean setting et sélectionner l option RÉGLAGES sur l afficheur pour rétablir ou modifier certains paramètres de la machine tels que Langue Filtre à eau Délai avant la mise en veille Unité de mesure Dureté de l eau Compteur de boissons Son...

Page 69: ...NG WATER HARDNESS BEVERAGE COUNTER BUTTON SOUND UNITS Compteur de boissons Pour chacune des boissons il est possible d afficher le nombre de tasses qui ont été distribuées depuis la première mise en service de la machine Ces données ne peuvent pas être remises à zéro Réglages prédéfinis Il est possible de reconfigurer la machine avec les valeurs réglées en usine La machine demandera une double con...

Page 70: ...brifié Éteindre la machine Retirer le groupe de distribution et le nettoyer soigneusement Consulter le chapitre Nettoyage du groupe de distribution Le groupe de distribution n est pas placé correctement Éteindre la machine Retirer le groupe de distribution et le remettre en place S assurer que le groupe de distribution se trouve dans la position correcte avant de le remettre en place Consulter le ...

Page 71: ...éro Dans ce cas l afficheur visualise l icône même si le réservoir n est pas plein Le réservoir à marc de café a été remis en place trop rapidement Toujours attendre environ 5 secondes avant de remettre en place le réservoir à marc de café Ceci permet au compteur de revenir à zéro La machine demande de vider le réservoir à marc de café même si le réservoir n est pas plein La machine n a pas remis ...

Page 72: ...tiquement La conduite de sortie du café est bloquée Nettoyer la conduite de sortie du café avec une petite cuillère comme décrit dans le chapitre Nettoyage du groupe de distribution à l eau courante Le café n est pas assez chaud La température réglée est trop basse Vérifier les réglages du menu Régler la température du menu sur MAX La machine moud le café en grains mais celui ci n est pas distribu...

Page 73: ...tchouc dans le filtre INTENZA Vérifier l emballage et installer le joint dans le filtre INTENZA Il n est pas possible d activer le filtre INTENZA Un filtre est déjà installé et activé La machine signale le pourcentage d utilisation du filtre Si l on souhaite quand même activer un nouveau filtre avant l échéance de celui qui est actuellement utilisé ce dernier doit d abord être désactivé suivant la...

Page 74: ...eur du volet d entretien Matériau du corps Thermoplastique Dimensions 224 x 357 x 435 mm Poids 7 7 kg Longueur du câble 1200 mm Bandeau de commande En façade Réservoir à eau 1 8 litres Amovible Capacité du réservoir à café en grains 250 g Capacité du réservoir à marc de café 15 Pression de la pompe 15 bars Chaudière Chaudière Inox Dispositifs de sécurité Coupe circuit thermique Gamme des cafés dis...

Page 75: ...4219 465 03661 MAN GAG MAGENTA PRESTIGE 120V EN FR Rev 01 indd 75 21 01 2021 12 20 24 ...

Page 76: ...istrativa Administrative Office ViaTorretta 240 40041 Gaggio Montano Bologna Italia 39 0534 771111 Fax 39 0534 31025 Sede Legale Registered Office Piazza A Diaz 1 20123 Milano Italia Capitale Sociale Euro 104 000 i v REA MI1387376 R I Cod Fisc 02069680367 Part IVA IT 13054780153 www gaggia it www gaggia com 4219 465 03661 MAN GAG MAGENTA PRESTIGE 120V EN FR Rev 01 indd 76 21 01 2021 12 20 24 ...

Reviews: