11
VoIP Telephone.
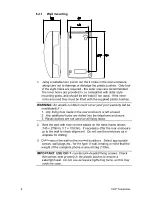
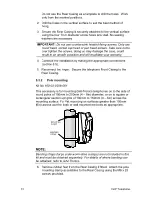
2. Ensuring that the glands are at the bottom, pass a proprietary
banding strap round each of the pole mounting clamps and the
support pole. Tighten to a torque of 4.5Nm (3.3lb-ft) max.
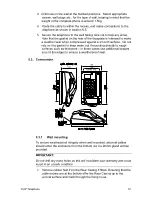
3. Continue the installation by making the appropriate connections
(section 6.5) and re-fitting the face plate.
4. Re-tighten the straps firmly and trim off any excess band material.
For security the driving head of the band may also be sawn off.
5.2.3 Flush
mounting
Titan telephones supplied for flush mounting have a slightly different
faceplate to those supplied with a rear enclosure – in particular the fixing
holes are in different positions and there are no corner cut-outs (for door
hinges). These models are usually described as “Titan fp” and the
supplied mounting kit contains round-headed screws and no glands.
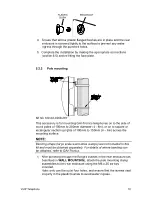
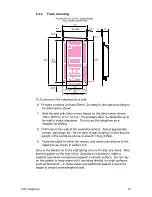
To flush-mount the telephone to a wall:
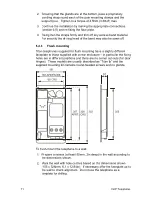
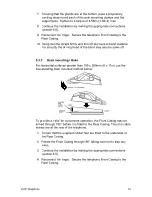
1. Prepare a recess (at least 50mm, 2in deep) in the wall according to
the dimensions shown.
2. Mark the wall with hole centres based on the dimensions shown
(155 x 326mm, 6.1 x 12.84in). If necessary offer the faceplate up to
the wall to check alignment. Do not use the telephone as a
template for drilling.
Summary of Contents for Titan
Page 29: ...29 VoIP Telephone 9 CE Declaration...
Page 31: ...31 VoIP Telephone...


