background image


Page 7                                                                                             Galaxy Floor Sanding Machines, Operator’s Manual 


• 

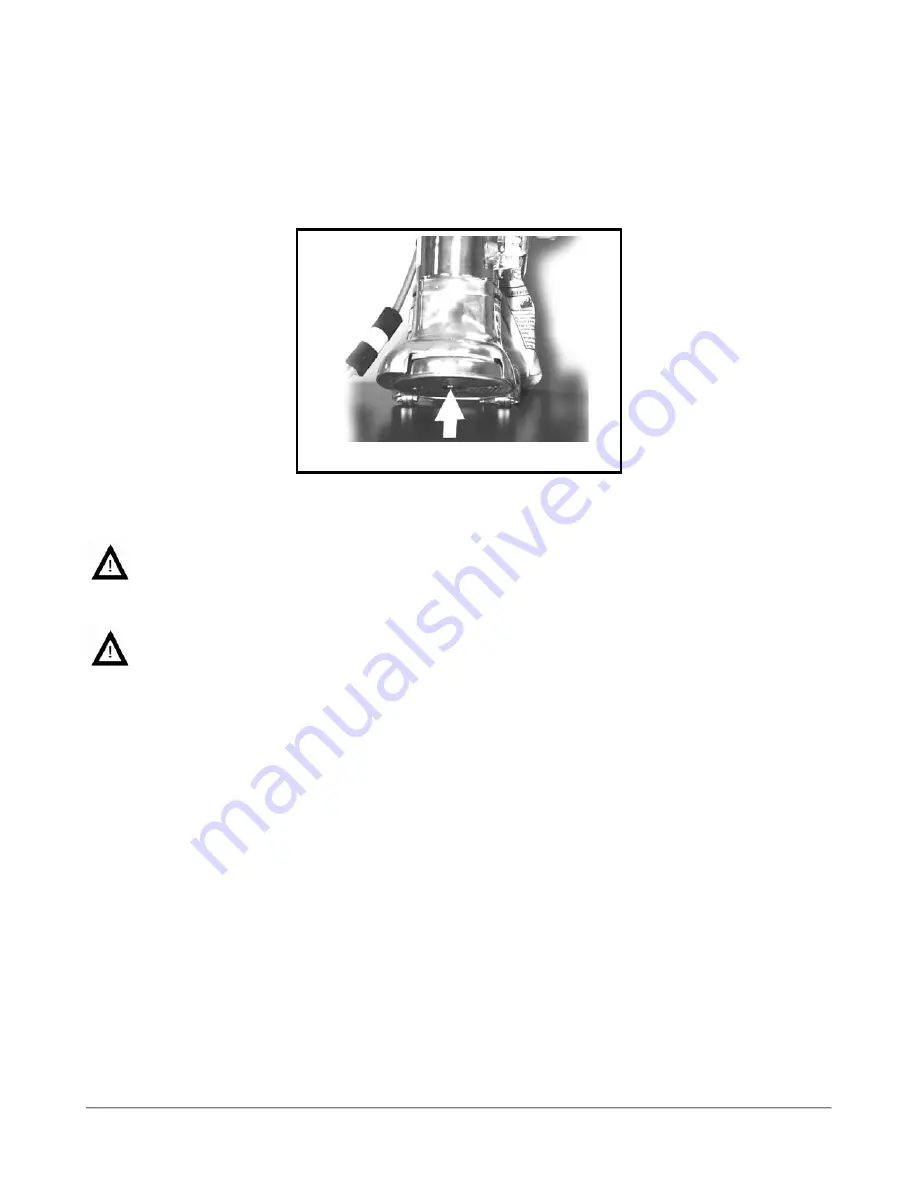
Tilt the machine back by holding both handles so the sandpaper disc does not touch the floor. 

• 

Put the power switch to the “ON” position. 

• 

Keep the machine moving slightly from side to side as you lower the sandpaper disc to the 
floor surface. Keep the machine moving as you sand the floor. 

• 

Do not press down or apply weight to the machine. Its weight is sufficient for all types of 
sanding. 


MAINTENANCE 


Warning: 

Only trained people should do routine maintenance. Repairs should only be done 

at authorized service centers. 


Warning: 

Always turn the power switch to the “OFF” position and disconnect the machine’s 

electrical plug prior to doing any maintenance. 
 

The Dust Control System 


If you do not remove the dust from the dust bag when it is 1/3 full it can decrease the efficiency of the 
dust control system. Always remove the dust each time you finish using the machine. 
 

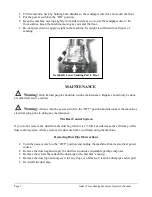
Removing Dust Pipe Obstructions 


• 

Turn the power switch to the “OFF” position and unplug the machine from its electrical power 
source. 

• 

Remove the dust bag and empty the dust in an outside containable garbage disposer. 

• 

Remove the screws that attach the dust pipe to the machine’s casing. 

• 

Remove the dust pipe and inspect it for any clogs or obstacles. Clean the dust pipe and its port. 

• 

Re-install the dust pipe. 


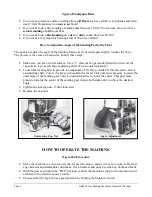
Gradually Lower Sanding Pad to Floor 

Summary of Contents for Elite 3

Page 1: ...Elite 3 Edger Operator Maintenance Instructions ...

Page 2: ... Holder 4 The Special Wrench 4 The Dust Bag 5 How to Prepare the Machine for Operation How to Install Sandpaper Discs 5 Types of Sandpaper Discs 6 How to Adjust the Angle of the Sanding Pad to the Floor 6 How to Operate the Machine Operation Procedure 6 7 Maintenance The Dust Control System Removing Dust Pipe Obstructions 7 8 How to Check and Replace Carbon Brushes 8 How to Replace the Compact Flo...

Page 3: ...t use this machine near highly FLAMMABLE materials such as solvents thinners gasoline etc Always work in a well ventilated area Warning This machine sands floors and it creates ignitable dust that can lead to FIRE and EXPLOSIONS Always avoid sources of ignition such as flames cigarettes etc Work in well ventilated conditions to control the volume of dust in the air Always safely dispose of dust Al...

Page 4: ...nnected to the extension Warning Never use this machine outside in anything but completely dry conditions Never run the supplied extension cord over any moist areas such as outdoor grass without using a ground fault interrupter GFI If the machine gets wet do not connect it to an electrical power source until it is completely dry Warning This floor sanding machine can cause dust to be airborne Alwa...

Page 5: ...N starts the machine Turning it to OFF stops the machine The Hi Low Switch is on the top left hand side of the machine Turn it to High and the machine runs at maximum speed Turn it to Low and the machine runs at a lower speed Use the high speed setting for faster wood removal Use the low speed setting for finish cuts and custom work The On Off Switch ...

Page 6: ...f surfaces and along baseboards The Sandpaper Disc Holder is on the bottom of the sanding pad It consists of a center bolt and beveled washer and connects the sandpaper disc to the sanding pad The Special Wrench is held in the clamp on the back of the machine It is used for changing the sandpaper discs The Disc Guard The Sandpaper Disc Holder The Special Wrench ...

Page 7: ...E THE MACHINE FOR OPERATION Warning Always make sure the power switch is in the OFF position and the machine is unplugged from the electrical source prior to doing any maintenance How To Install Sandpaper Discs Always use the right sized sandpaper discs This unit requires 7 diameter paper with a 7 8 center hole To replace the sandpaper disc follow these steps Take off the special wrench that is cl...

Page 8: ... the cap nuts on top of each caster adjusting shaft Turn counterclockwise Loosen the locking nuts to provide for adjustment Fit a flat screwdriver into the screw slot of an adjusting shaft Turn it clockwise to heighten the caster This puts more pressure towards the outer edge of the sanding pad Turn it counterclockwise to lower the caster This puts more pressure towards the center of the sanding p...

Page 9: ...Always turn the power switch to the OFF position and disconnect the machine s electrical plug prior to doing any maintenance The Dust Control System If you do not remove the dust from the dust bag when it is 1 3 full it can decrease the efficiency of the dust control system Always remove the dust each time you finish using the machine Removing Dust Pipe Obstructions Turn the power switch to the OF...

Page 10: ...r on the exposed metal tab Push and release it to remove the Brush Holder Spring Pull on the copper shunt wire and the carbon brush will come out Inspect it If it is over in length and its wear is even it does not need to be replaced Wipe it with a clean dry cloth and push it back in Push the Brush Holder Spring in and release it It should stay locked in If the carbon brush is less than in length ...

Page 11: ...anging the Drive Belt Follow the Five Sequences of Steps These Special Tools Are Required Contact Your Dealer 1 Remove the Sandpaper Disc 2 Remove the Sanding Pad Insert a screwdriver down and in between two vacuum fan blades This will be used to prevent spin and create resistance while you unscrew the Sanding Pad with the Disc Removal Bar Part 697 With one hand on the screwdriver and the other on...

Page 12: ...2 Allen screws Hand tighten the large Locking Nut back on You will use it as a rim to pry up the Belt Housing Plate With two large screwdrivers placed at about 180 degrees apart and inserted under the rim of the Locking Nut gently push down with both hands This acts as a lever The Belt Housing Plate will come up Removing the Sanding Pad Using the Disc Removal Bar Screw Driver Unscrewing the large ...

Page 13: ...ockwise Remove the belt To install the new belt wrap it around the pinion pulley Make sure the teeth mesh with the grooves Slide the pinion back onto the armature shaft while sliding the belt onto the drive pulley Make sure the teeth mesh with the grooves Retighten the pinion pulley To put all the parts back together reverse the procedure Vacuum Fan Blades Drive Pinion Removing Pinion Pulley ...

Page 14: ...e 12 Galaxy Floor Sanding Machines Operator s Manual Galaxy Elite 3 Wiring Diagram Warning Only people authorized by Galaxy Floor Sanding Machines should do repairs Electricity can injure and even kill you ...

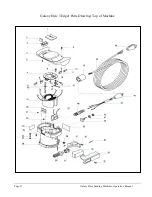
Page 15: ...Page 13 Galaxy Floor Sanding Machines Operator s Manual Galaxy Elite 3 Edger Parts Drawing Top of Machine ...

Page 16: ...Page 14 Galaxy Floor Sanding Machines Operator s Manual Galaxy Elite 3 Edger Parts Drawing Bottom of Machine ...

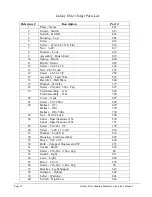
Page 17: ...Flat 117 18 Screw 10 24 x 3 Soc Cap 625 19 Field Assembly 115v Field Assembly 230v 626 726 20 Cover Vent 627 21 Screw 6 32 Flat 628 22 Ballast 115v Ballast 230v Ballast 230v 50hz 629 729 730 23 Nut 10 32 Lock 205 24 Label Specifications 115v Label Specifications 230v 630 731 25 Screw 10 24 x 3 8 170 26 Screw 20 x 1 S S 632 27 Washer Lock S S 633 28 Housing Field Assembly 602 29 Rivet 5 32 x 5 8 63...

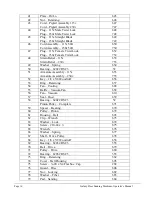
Page 18: ...2 51 Armature Assembly 115v Armature Assembly 230v 655 755 52 Key 1 8 x 5 8 Woodruff 656 53 Ring Retaining 657 54 Fan Cooling 609 55 Baffle Vacuum Fan 658 56 Fan Vacuum 610 57 Seal Dust 659 58 Bearing 6202 2RS C3 52 Pinion Pulley Complete 671 59 Spacer Bearing 670 60 Pulley Pinion 672 61 Housing Belt 603 62 Clip Wrench 673 63 Washer Lock 674 64 Screw 10 24 x 675 65 Wrench 676 66 Washer Spring 677 ...

Page 19: ... Caster Swivel 690 90 Bearing Swivel 629 2RSL 692 91 Yoke Caster 608 92 Spacer Wheel 693 93 Bearing Wheel 608 8mm 2RSL 694 94 Wheel 695 95 Spacer Wheel 693 96 Wheel 695 97 Bearing Wheel 608 8mm 2RSL 694 98 Spacer Wheel 693 99 Pin Wheel 696 Disc Removal Bar see page 9 697 Locking Nut Remover see page 9 698 For parts or further assistance contact the manufacturer Galaxy Floor Sanding Machines 84 Nor...

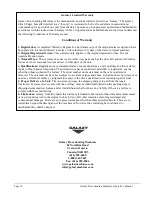
Page 20: ...does not cover reasonable wear and tear to other parts of the unit 4 Qualifications Regardless of any statement Galaxy cannot determine a unit s qualification for warranty repair without physical inspection The unit must not have been altered modified or repaired by anyone other than those authorized by Galaxy The serial number on the unit must not have been altered or removed The unit must not ha...

Reviews: