


Chapter 2: Hardware Installation
BBU Installation
2-15
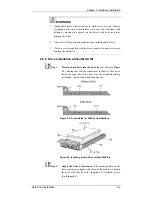
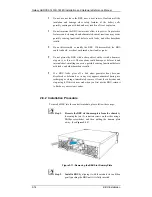
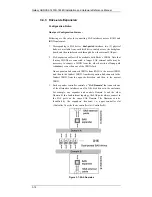
Step 3.
Secure the BBU to the subsystem
by fastening the two
(2) retention screws on the BBU. (See
Figure 2-12
)
Figure 2-12: Installing the BBU
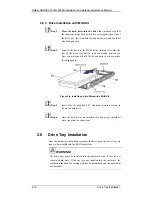
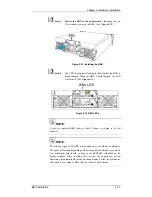
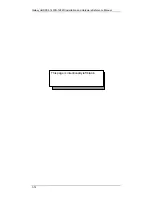
Step 4.
The LED should start flashing to indicate that the BBU is
being charged. When the BBU is fully charged, the LED
will turn off. (See
Figure 2-13
)
Figure 2-13: BBU LEDs
NOTE:
A new or replaced BBU takes at least 12 hours to charge to its full
capacity.
NOTE:
The life expectancy of a BBU is more than one year. However, batteries’
life span can fluctuate depending on how many times batteries are charged.
An installation date record is kept in the EEPROM embedded in the
battery module. When reaching the one-year life expectancy, system
firmware will automatically notify an administrator. Follow the procedures
in Section 5.4 to replace a BBU that is not able to hold charge.


