background image


TEL:


+44 (0) 121 608 4433


FAX:


+44 (0) 121 608 4477


www.

galsys

.co.uk


galleonsupport

.com


SIGNALCLOCK V2 Manual


PRE-INSTALLATION 

IMPORTANT INFORMATION 

Please remove the plastic sheet from the front of the display before powering the clock on. 
Removing this sheet after the clock has been powered up can result in damage to the hardware 
due to static build-up. 

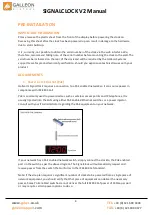
It is, currently, not possible to obtain the serial number of the clock via the web interface. We, 
therefore, recommend taking note of the serial number before mounting the clock to the wall. The 
serial number is located on the rear of the clock and will be required by the Galleon Systems 
support team for product/warranty verification, should you experience technical issues with your 
product. 

REQUIREMENTS 

1.


Power over Ethernet (PoE) 

Galleon’s 

SignalClock requires a connection to a PoE enabled network so it can source power in 

compliance with IEEE 802.3af. 

PoE is commonly used to power devices such as wireless access points and IP telephones. It is 
usually injected into the LAN using either PoE enabled Ethernet switches or a power injector. 
Consult with your IT Administrator regarding the PoE equipment on your network. 


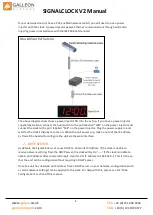
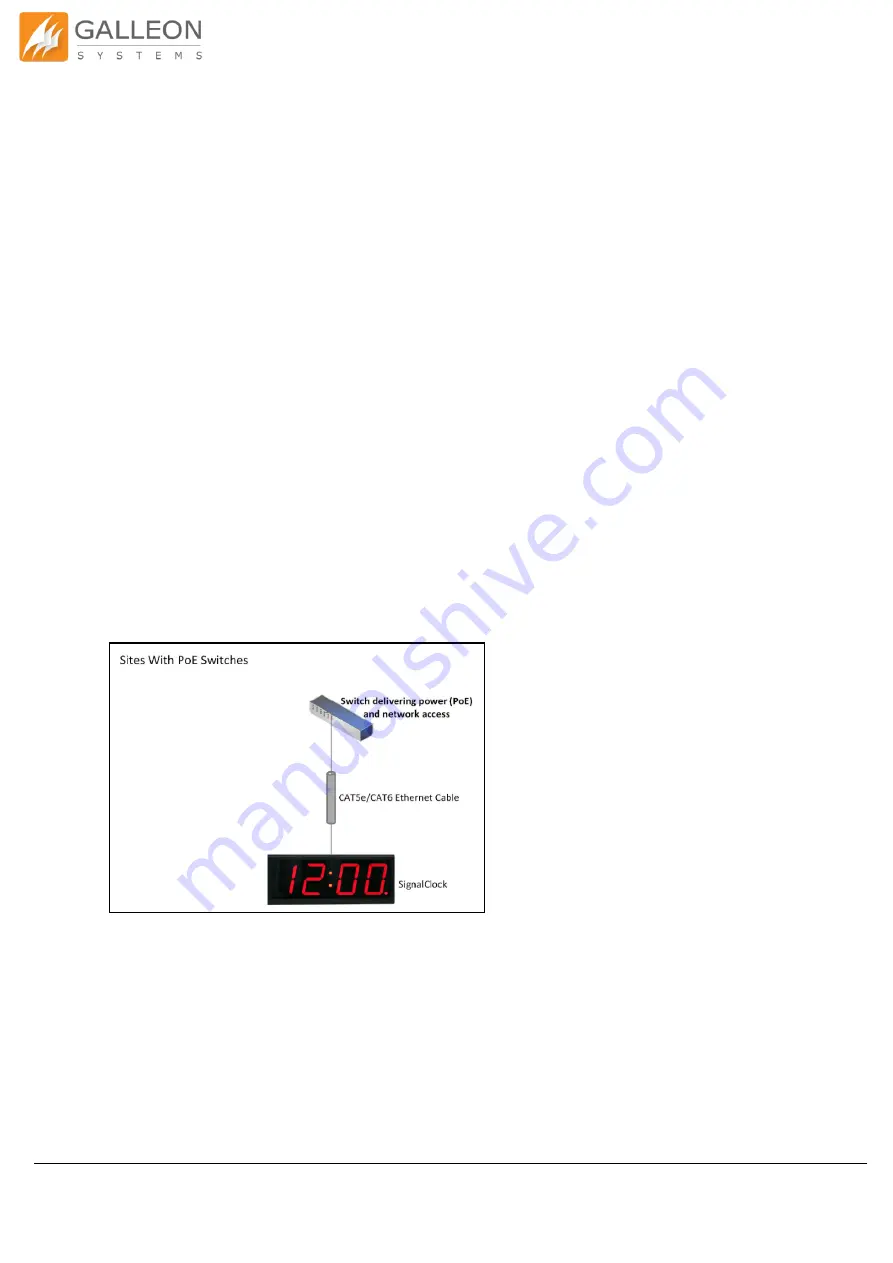
If your network has a PoE enabled network switch, simply connect the clock to the PoE enabled 
port on the switch as per the above diagram. The SignalClock will automatically request and 
receive power from the switch that conforms to the IEEE 802.3af standard. 

Note: If the site plan requires a significant number of clocks to be powered from a single piece of 
network equipment, you should verify that that piece of equipment can deliver the necessary 
power. Some PoE enabled switches cannot deliver the full IEEE 802.3af power of 550ma


per port 

or may require certain power options to do so.

Summary of Contents for SignalClock Series

Page 1: ...1 TEL 44 0 121 608 4433 FAX 44 0 121 608 4477 www galsys co uk galleonsupport com SIGNALCLOCK V2 Manual Installation and User Guide Firmware Version 1 21 05 2019...

Page 2: ...ernet PoE 4 2 DHCP Server 5 Installation 6 Mounting the 6 digit Model 6 Mounting the 4 digit Model 6 Web Configuration 7 Logging onto the Unit 7 Home 8 Network Settings 9 Time Server Address 10 Displa...

Page 3: ...ation Uses Power over Ethernet PoE for easy installation and operation Synchronises via the Network Time Protocol NTP for accurate time Available in 4 digit and 6 digit versions Displays accurate time...

Page 4: ...Galleon s SignalClock requires a connection to a PoE enabled network so it can source power in compliance with IEEE 802 3af PoE is commonly used to power devices such as wireless access points and IP...

Page 5: ...jector Plug the power supply in and wait for the clock s display to come on When the unit powers up make a note of the IP address as this will be needed to configure the unit via the web interface 2 D...

Page 6: ...ocations for the screws 3 Drill the holes and insert wall plugs into the wall to prevent the screws from coming loose 4 Fit the screws into the plugs 5 When the clock is ready connect the Ethernet cab...

Page 7: ...Microsoft Edge or Internet Explorer enter the IP address of the clock into the browser s address bar If you are unsure of the IP address disconnect and reconnect the power to the clock and watch the c...

Page 8: ...te A date and timestamp of when the clock last received a response from an NTP server The IP address of the NTP server used for the last update The MAC address of the clock The Flash Display button ca...

Page 9: ...ost Configuration Protocol DHCP which will make the clock request network settings from a DHCP server OR Choose STATIC and manually enter the network settings for the clock ensure the IP address is no...

Page 10: ...r you should be aware that these servers usually use rate limiting to prevent Denial of Service DoS attacks and misuse Pointing multiple clocks to or having multiple NTP requests to a public time serv...

Page 11: ...upport com SIGNALCLOCK V2 Manual DISPLAY FORMAT Use this page to set either 12 hour or 24 hour display modes 12 hour mode features a dot in the top left corner of the screen to indicate whether the cu...

Page 12: ...allows you to add an offset so that the clock displays the correct time for your time zone Simply choose whether the offset is plus or minus to UTC and specify the hours and or the minutes of the off...

Page 13: ...tings determine when DST starts and ends When DST starts the clock will go forward one hour and return to normal time once DST ends Note The DST end time does not take daylight saving into account For...

Page 14: ...e The latest firmware can be downloaded from here https support galsys co uk index php Knowledgebase List Index 19 digital clocks To upgrade the firmware on the clock simply click Browse and locate th...

Page 15: ...cters and special characters can be used We also recommend noting down the web interface password and keeping it in a secure location If you forget the password for the clock you will need to remove t...

Page 16: ...t has power and network access The clock will countdown from ten Ensure you keep the reset button pressed down for the duration of the countdown or the reset will be cancelled Once the reset procedure...

Page 17: ...e redirected to the Home page Navigate to the Network Settings page if you wish to configure static network settings Select STATIC and type in the network settings Now click Apply Changes 6 Navigate t...

Page 18: ...ight Saving Time settings on these pages CLOCK FLASHES NO SYNC ONCE EVERY 60 SECONDS The time server is either improperly configured or unreachable If you have pointed your clock to a public time serv...

Page 19: ...the date the unit is shipped from Galleon Systems For extended warranties please contact our sales team In accordance with the terms of the warranty Galleon Systems liability is limited to repairing...

Reviews: