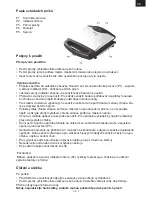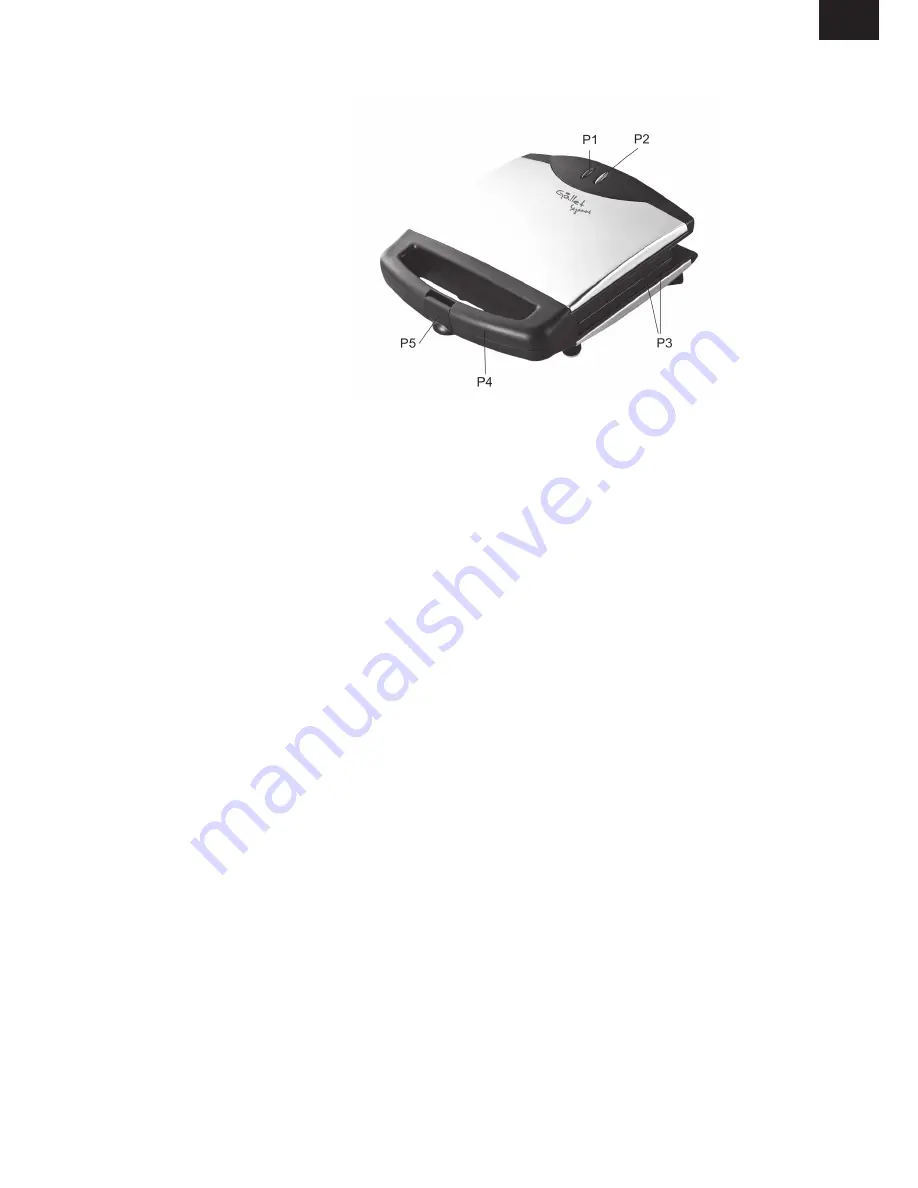
Description of the controls
P1. Power light (red)
P2. Heating ligth (green)
P3. Cooking plates
P4. Handle
P5. Hinge for blocking
Instructions for Use
Before you start:
Before first use clean the surface of the cooking plates with a damp cloth and then wipe again
with dry cloth.
Oil th ecooking plates with olive oil, butter, margarine or any cooking fat.
Cook 1 or 2 sandwiches, please do not eat these first pieces of sandwich you made.
Using the unit
Insert the plug into a suitable mains power socket. Both indicator lights will come on.
Prepare the sandwich while waiting for the toaster to heat up.
After 4 to 6 minutes the sandwich maker will be ready as indicated by the green light (P2)
going offf.
For golden brown toasted sandwiches, place the buttered sides of the bread onto the cooking
plates.
Open the sandwich maker and place in the sandwich. Be careful of the hot surfaces.
Close both halves of the sandwich maker without placing too much force on the sandwich.
If too much force is required to close the sandwich maker, the clip may come loose or break
during toasting.
Keep the sandwich maker closed during toasting.
Cooking time will depend on the type of bread used and personal preferences.
After toasting is complete open the toaster maker and remove sandwich with a plastic or wo
-
oden untensil. Never use a metal or sharp object as this wil damage the non-stick coating on
the cooking plates.
After use remove the plug from the power socket outlet.
Note:
During cooking the green indicator (P2) of temperature is periodically switching ON and OFF to
keep the correct temperature of the appliance.
Cleaning and Maintenance
Unplug the unit and wait until it cools down completely before cleaning or storing.
Wipe the interior as well as the side of the cooking plates with an absorbent tissue, paper
towel or soft cloth.
Never use an abrasive to clean the appliance. Clean after each use to prevent any caking of
fillings.
Do not immerse the appliance or the cord in water or any other liquid.
The appliance can storage in the vertical position.
•
•
•
•
•
•
•
•
•
•
•
•
•
•
•
•
ENG - 11
ENG

