background image

Acquaer Ltd. 


www.gamagarden.eu


H-

4900, Fehérgyarmat, Szatmári út 11.


19 


Unscrew the spark plug and pour a tablespoon of fresh engine oil into the cylinder through the spark plug hole. Pull the starter 
cord slowly several times to distribute the oil in the engine. Replace the spark plug, but do not connect the spark plug lead.   


Clean the cultivator.   


Store the machine in a clean, dry place.   


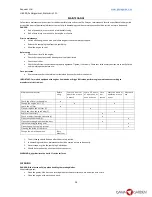
TROUBLESHOOTING   

PROBLEM 

CAUSE 

ACTION 

The engine cannot be stared. 

No petrol in the tank. 

Fill the tank with clean, fresh unleaded 
petrol. 

Old petrol. 

Drain cut the old fuel and fill the tank with 
clean, fresh unleaded petrol. 

Incorrect choke settings. 

Close the choke. 

The spark plug lead is not connected to the 
spark plug. 

Connect the ignition cable to the spark 
plug. 

The spark plug is dirty or damaged, or the 
wrong electrode gap is set. 

Clean the spark plug and check the 
electrode gap. Replace, if necessary. 

The engine does not run smoothly. 

The spark plug lead is not connected 
correctly to the spark plug. 

Connect the spark plug lead to the spark 
plug. 

Old petrol. Water or contamination in the 
fuel system. 

Drain cut the old fuel and fill the tank with 
clean, fresh unleaded petrol. 

Contaminated air filter. 

Clean or replace the air filter. 

The rotating blades do not rotate. 

The rotating blades are blocked by stones, 
clods of earth or the like. 

Shut off the engine and disconnect the 
ignition cable from the spark plug. Clean 
the rotating blades. 

Incorrectly adjusted clutch cable. 

Take the appliance to an authorized service 
center. 

The clutch is worn. 

Take the appliance to an authorized service 
center. 

Heavy vibrations. 

The rotating blades are damaged or not 
properly secured. 

Shut off the engine immediately and 
disconnect the spark plug lead from the 
spark plug. Replace damaged components. 

Loose screw connections. 

Shut off the engine immediately and 
disconnect the spark plug lead from the 
spark plug. Tighten or replace the bolted 
joints. 


IMPORTANT: Contact your dealer if you cannot rectify the problem by using the troubleshooting chart.   

We reserve the right to change the technical data without prior notice.   
 

Guarantee terms 

Please carefully retain the guarantee card completed by the seller, or the proof of purchase.   

Pre-conditions for the 12-month guarantee entitlement: 

Summary of Contents for GT 250C

Page 1: ...Acquaer Ltd www gamagarden eu H 4900 Feh rgyarmat Szatm ri t 11 GT 250C Tiller Instruction manual...

Page 2: ...OF CONTENTS TECHNICAL DATA 4 DESCRIPTION 5 ASSEMBLY 6 USE 9 PREPARATIONS 9 STOPPING THE ENGINE 10 CULTIVATING 11 SURFACE WORKING 12 TRANSPORT 12 MAINTENANCE 14 CLEANING 14 CHANGING THE OIL 15 AIR FIL...

Page 3: ...urn off the engine before filling with fuel Only fill with fuel outdoors never indoors Keep away from sparks or naked flames and do not smoke nearby Keep your hair clothing hands jewellery and other f...

Page 4: ...y Keep other people especially children and pets at a safe distance from the work area Never use the machine without the guards fitted Switch off the engine release the spark plug lead from the spark...

Page 5: ...LwA 100 dB A 92 dB A Sound pressure level LpA 88 dB A K 1 5 80 dB A K 1 5 Vibration m s 2 7 K 1 5 2 6 K 1 5 Air filter Oil impregnated foam Oil impregnated foam Weight 48 kg 46 8 kg Ignition system Ty...

Page 6: ...5 DESCRIPTION 1 Crossbar 10 Wheel 2 Rubber grip 11 Side disc 3 Clutch lever 12 Rotating blade attachment 4 Upper handle 13 Gearbox 5 Clutch cable 14 Protective guard 6 Handle tube 15 Engine 7 Handle...

Page 7: ...the handle bracket pos 4 fig 2 and click the handle bracket into position on the front of the gearbox with the support plate upwards pos 3 fig 2 2 Align the hole in the handle bracket with the holes i...

Page 8: ...the holes in the crossbar and the cable bracket 5 Secure both ends of the crossbar and cable bracket with 2 screws M5 x 25 and 2 screws M5 pos 2 fig 5 Assembling the handle The handle can be adjusted...

Page 9: ...nd left sides of the machine are specified as viewed from the driving position behind the handle NOTE The letters L left and R right on the rotating blades specify the assembly position Assembly of th...

Page 10: ...surface Oil level inspection 1 Switch off the motor 2 Unscrew and pull out the dipstick 3 Wipe off the dipstick with a cloth 4 Refit the dipstick without tightening 5 Pull out the dipstick again and...

Page 11: ...nition button is released and can be turned to the ON position Otherwise the ignition is turned off pos 1 fig 9 4 Move the throttle to the end position and let the ignition control remain in the OFF p...

Page 12: ...lock in place with the pin pos 6 fig 10 and screw pos 7 fig 10 Lower the plough bar for a greater cutting depth NOTE make sure to fit the plough bar correctly in the plough bar bracket for the best p...

Page 13: ...h caution Transport over longer distances WARNING Do not transport the machine upside down or on its side The machine must stand on the rotating blades and wheels WARNING Do not tilt the gearbox and d...

Page 14: ...mount ring and pos 2 fig 13 and the gearbox s mount ring pos 3 fig 13 rest against each other 3 Fit the locking device pos 1 fig 12 on the mount rings on the clutch and gearbox and lock with screw pos...

Page 15: ...d with engines from Honda or Briggs Stratton perform engine maintenance according to manufacturer s instructions Maintenance measures Before using Every 20 hours of operation or once a month Every 50...

Page 16: ...4 Replace and tighten the oil filling cap AIR FILTER MAINTENANCE WARNING Do not start the engine without the air filter Inspection DANGER Never use petrol or solvents to clean the filter risk of fire...

Page 17: ...d thread 6 Replace the spark plug if it is worn or if the insulator is damaged 7 Screw in the spark plug by hand and tighten with the spark plug spanner WARNING Tighten the spark plug correctly otherw...

Page 18: ...Acquaer Ltd www gamagarden eu H 4900 Feh rgyarmat Szatm ri t 11 17 3 Assemble the new rotating blades by following the instructions in the reverse order...

Page 19: ...at the oil reaches the lower edge of the filling hole Top up the oil if necessary and refit the cap WARNING Do not slip the clutch so that the rotating blades stop temporarily even though the engine i...

Page 20: ...k plug Old petrol Water or contamination in the fuel system Drain cut the old fuel and fill the tank with clean fresh unleaded petrol Contaminated air filter Clean or replace the air filter The rotati...

Page 21: ...us but to the shipper in question since otherwise any compensation claims the shipper would be voided This symbol on the device or the packaging indicates that the product shall not be managed as hou...

Reviews: