background image

6

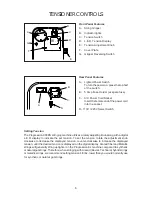
TENSIONER CONTROLS

Setting Tension

The Progression 600ES stringing machine utilizes a rotary adjusting knob along with a digital
L.E.D. display to indicate the set tension. To set the tension, rotate the adjustment knob
clockwise to decrease the displayed  tension, counter-clockwise to increase the displayed
tension, until the desired tension is displayed on the digital display. Aramid fiber and Metallic
strings will generally string up tighter on the Progression Es machine compared to synthetic
or natural gut strings. Therefore, when stringing with Aramid (Kevlar, Technora) hybrid strings
or metallic strings, we recommend setting tension 4-5 lbs. lower than you would normally use
for synthetic or natural gut strings.

C

D

B

A

C

D

E

B

A

F

G

8 8 . 8

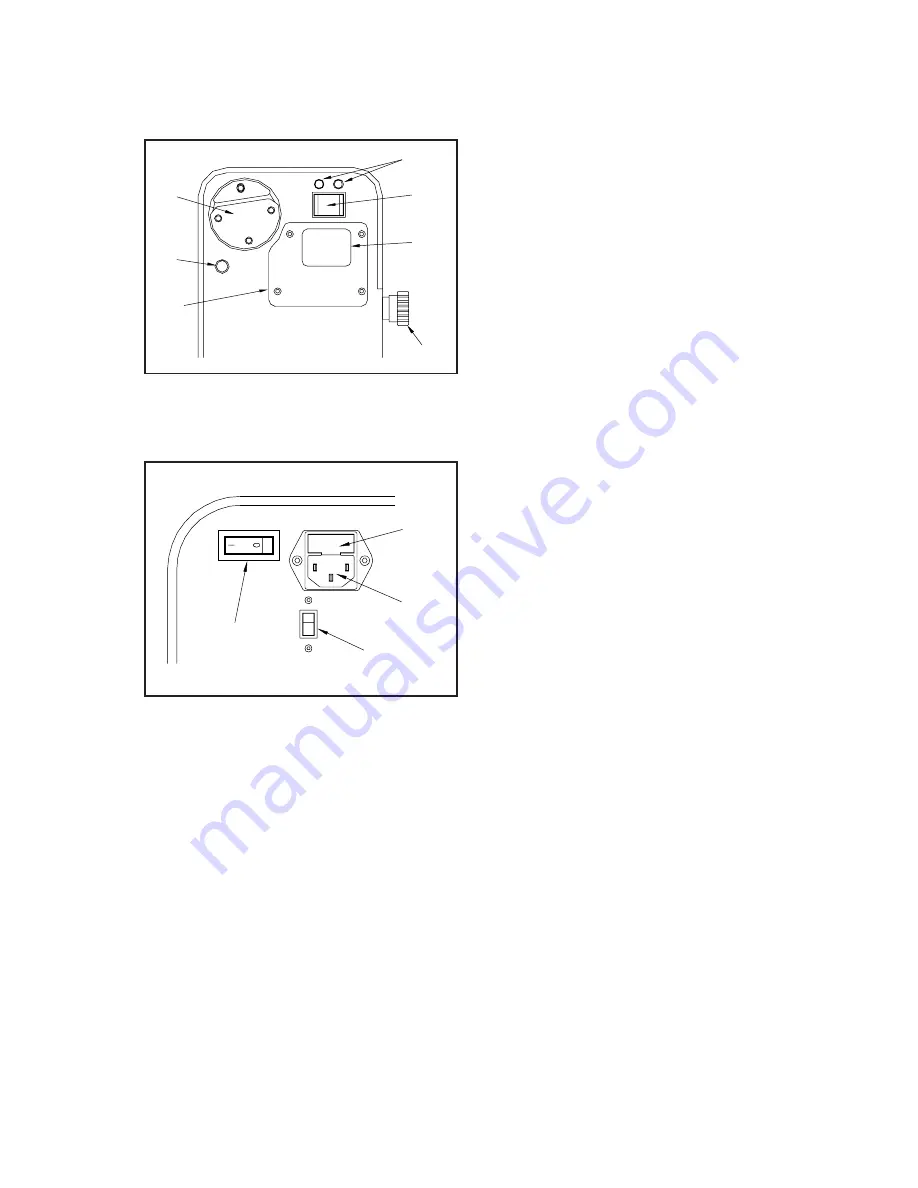
Front Panel Features

A -

String Gripper

B -

Indicator lights

C - Tension Switch

D - L.E.D. Tension Display

E -

Tension Adjustment Knob

F -

Cover Plate

G - Gripper Reversing Switch

Rear Panel Features

A -

Lighted Power Switch
To turn the power on, press the top half
of the switch.

B -

5 Amp Fuse Holder (w/ spare fuse)

C - A/C Power Cord Socket

Insert the female end of the power cord
into the socket.

D - 110V / 220V Select Switch

Summary of Contents for PROGRESSION 600ES-LED

Page 1: ...600ES LED PROGRESSION Copyright 1997 GAMMA Sports All Rights Reserved OWNER S MANUAL Issue 3 Version E Oct 28 1997 ...

Page 2: ...bligation under this warranty is limited to repair or replacement of defective EQUIPMENT and no one is authorized to promise any other liability GAMMA shall in no event be liable for any incidental or consequential damages To return defective EQUIPMENT a return authorization RA must be obtained from a GAMMA customer service representative by calling 1 800 333 0337 The RA must be marked on the outs...

Page 3: ... Mount Racquet Mounting System Accomodates All Racquets Without Adapters Parallel Jaw Rotating Gripper w Diamond Dust Coated Gripping Surfaces Professional Dual Action Diamond Dust Coated Fixed String Clamps Durable Polystyrene Base Cover w Convenient Padded Tool Tray Strong Light Weight Powder Coated Molded Aluminum Construction 2 ...

Page 4: ... hole in the bottom of the frame support post with the slot in the turntable Screw the lever lock bolt with washer into the bottom of the support post and tighten gently Positionthewashertheroundededge toward the turntable Repeat procedureontheoppositesideofthe turntable Fixed Clamp Installation To install the clamps remove the winged lockknobtoseparatetheknobfromthelower guide bushing Be careful ...

Page 5: ...base bushing until fully seated The post of the string clamp head and tube of the string clamp base are treated with grease to provide protection against corrosion dur ing shipping Remove any excessive grease with a clean cloth prior to use The post and tube may also be cleaned with isopropyl alcohol After this type of thorough cleaning the post and tube should be treated with a light coatingofmac...

Page 6: ...ing sure the shoulder supports are free to swivel in their mountings simultaneously rotatetheshouldersupportadjustmentknobs clockwiseuntilbothshouldersupportsgently and squarely contact the frame Securing the Frame Lock the shoulder supports in position by turning the knob at the base clockwise Repeat the adjustment procedure for the remaining support post Re tighten all of the frame supports in t...

Page 7: ...ne compared to synthetic or natural gut strings Therefore when stringing with Aramid Kevlar Technora hybrid strings or metallic strings we recommend setting tension 4 5 lbs lower than you would normally use for synthetic or natural gut strings C D B A C D E B A F G 8 8 8 Front Panel Features A String Gripper B Indicator lights C Tension Switch D L E D Tension Display E Tension Adjustment Knob F Co...

Page 8: ...the clamp base to the turntable Reverse the clamping procedure to unlock the string clamp The winged lock knob should be tightened enough to prevent clamp base slippage on the turntable when the desired tension is placed on the string To go from the loose position to the clamped position and back generally requires about 1 2 to 3 4 quarters of a turn Although when stringing at ex tremely high tens...

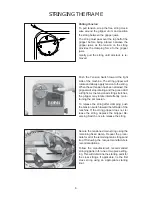
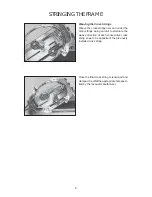
Page 9: ... the green LED will light As the tensioned string stretches the gripper may rotate intermittently main taining the set tension To release the string after clamping push the tension switch toward the left side of the machine If the string gripper does not re lease the string depress the Gripper Re versing Switch once to release the string Secure the tensioned main string using the remaining fixed c...

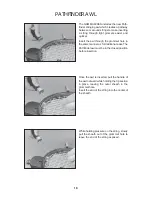
Page 10: ...r the main strings being careful to alternate the weave direction of each consecutive cross string so as to be opposite of the previously installed cross string Once the final cross string is tensioned and clamped tie off at the appropriate hole speci fied by the racquet manufacturer ...

Page 11: ...g pressure on the string slowly pull the sheath out of the grommet hole to leave the end of the string exposed The GAMMA 600ES includes the new Path finder stringing awl which creates a pathway between or around strings to make inserting a string through tight gromets easier and quicker Insert the awl through the grommet hole in the same manner as for traditional awls The Pathfinder awl must be in...

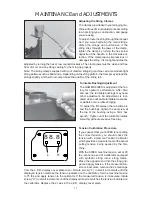
Page 12: ...able bushings may need minor adjustment An adjustment is indi cated when noticeable turntable looseness or wobble occurs while stringing To adjust the fit between the turntable pin and the bushings tighten the set screw at the top of the bushing using a 3mm hex wrench Tighten until the turntable rotates smoothly without excessive free play Tension Calibration Procedure If you suspect that your 600...

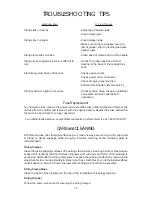
Page 13: ...ring slips in gripper Clean gripper jaws Make sure string is wrapped over top jaw of gripper prior to inserting between gripper jaws String slips in clamps Adjust gap between jaws Clean clamp jaws With time and use the clamping surfaces of your machine may become oily or dirty and result in string or clamp slippage while stringing Periodic cleaning of the following parts is recommended String Clam...

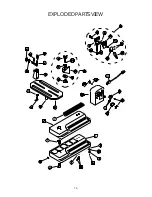
Page 14: ...UPPER GRIPPER JAW LOWER GRIPPER JAW GRIPPER JAW SPRING CAP SCREW TENSIONER ASSEMBLY A C POWER CORD FUSE HOLDER 5A FUSE PART 50 52 53 54 55 56 57 57A 58 59 60 61 62 66 67 67A 68 99 69 70 71 72 73 74 DESCRIPTION PIVOT PIN CLAMP HEAD ASSEMBLY CLAMP BASE ASSEMBLY CLAMP BASE GUIDE BUSHING GUIDE BUSHING NUT LOAD BUSHING RADIAL BEARING WINGED KNOB FIXED JAW LOOSE JAW PIVOT BLOCK LEVER RETURN SPRING HEX S...

Page 15: ...14 EXPLODEDPARTSVIEW ...
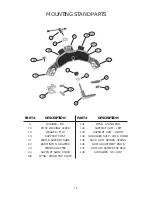
Page 16: ... FRAME SUPPORT SLIDE BADMINTON ADAPTER TENNIS ADAPTER SUPPORT SLIDE KNOB MTNG STAND TOP PLATE PART 141 142 143 144 145 146 147 148 DESCRIPTION MTNG STAND PAD SUPPORT ARM LEFT SUPPORT ARM RIGHT SHOULDER SUPP LOCK KNOB SUPP ARM RETURN SPRING ARM ADJUSTMENT KNOB ARM ADJUSTMENT SCREW SHOULDER V CLAMP 14 13 147 146 142 24 9 122 22 23 21 148 15 ...

Reviews: