

Reference 3000
™
Potentiostat/Galvanostat/ZRA Quick-Start Guide
12
Gamry Instruments, Inc. © 2008
988-00008
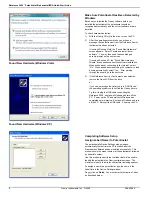
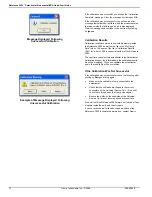
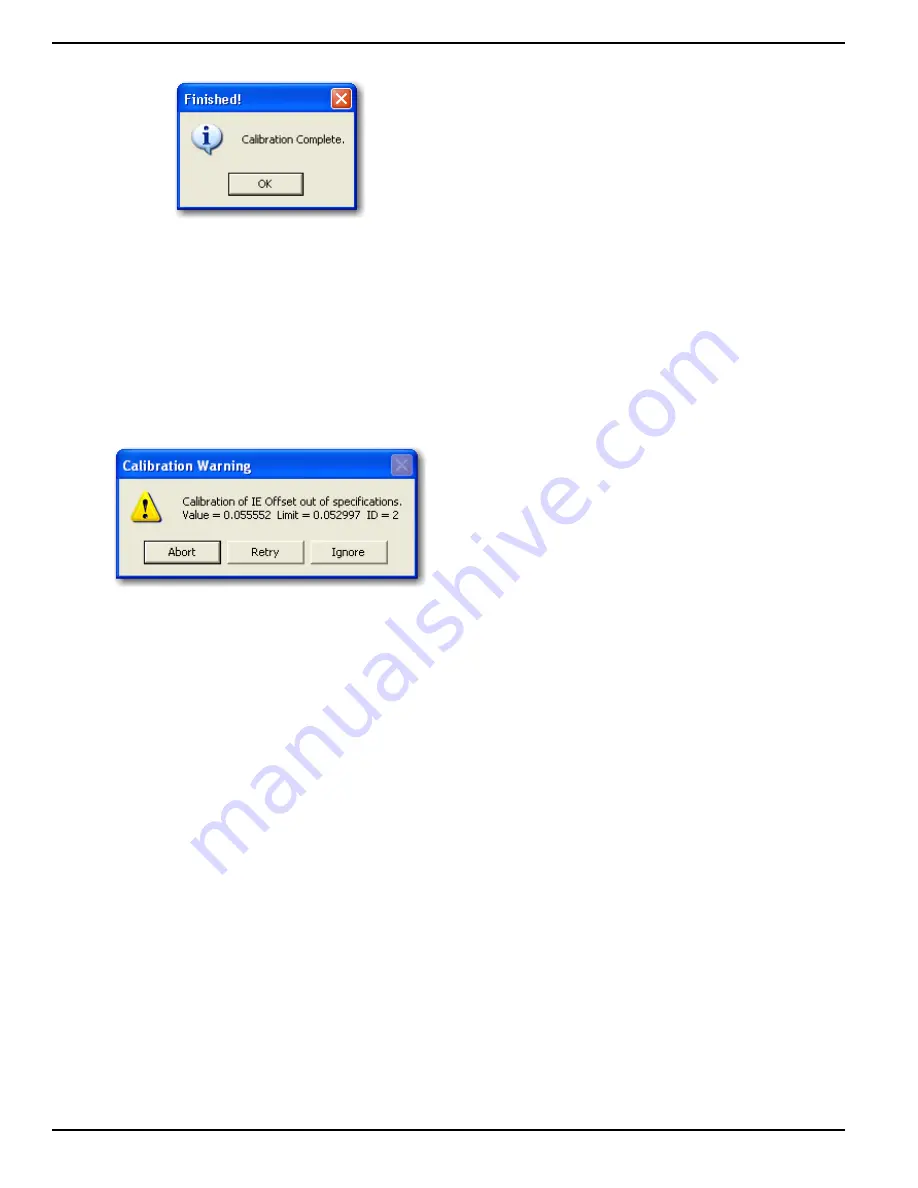
Message Displayed Following
Successful Calibration
Example of Message Displayed Following
Unsuccessful Calibration
If the calibration was successful
, you will see the “Calibration
Complete” message. Clear the message by clicking on
OK
.
If the calibration was not successful
, you will see an error
message that tells which test failed, and the measured value
that was outside the valid range, which is also displayed.
Clear the message and continue to the next test by clicking
on
Ignore
.
Calibration Results
Calibration results are stored in non-volatile memory inside
the Reference 3000 as well as in a file in the “My Gamry
Data” folder. The name of the file is “Calibration Results
<SN>.txt”, where <SN> is the serial number of the Reference
3000.
The next time you select this potentiostat in the Potentiostat
Calibration window, the information in the calibration results
file will be displayed. When you calibrate the potentiostat
again, the results file will be overwritten.
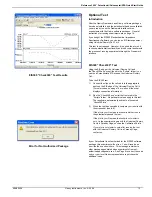
If the Calibration Was Not Successful
If the calibration was not successful, check the following after
clicking on
Retry
and trying again.
•
Make sure the cell cable is firmly connected to the
potentiostat.
•
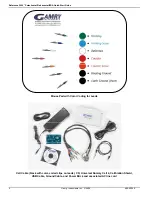
Check that the cell leads are clipped to the correct
connectors on the Universal Dummy Cell. (If in doubt,
check the color codes on the Gamry mouse pad.)
•
Be sure the welds on the underside of the Universal
Dummy Cell are not touching a conductive surface.
Also, wait until the Reference 3000 warms up (to drive off any
moisture inside the unit), and then try again.
If you have checked all of the above and waited until the
Reference 3000 is completely warmed up, contact Gamry.


