3
M
®
inenT User manual – M3, M5 & M7 Speakers
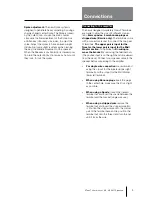
Spike adjustment:
The new Spike system is
designed to penetrate heavy carpeting, by using a
sharply shaped center Spike. The Spike is locked
by the outer Knob. Loosen the knob counter
clockwise to allow adjustment of the Spike. Use
an Allen key (Unbrako), size 6 mm, to adjust the
spike. Adjust the spikes to have an even weight
distribution (same slight resistance when turning
the key) to eliminate movement of the speaker.
When the Speaker is positioned in its desired posi-
tion turn the outer Knobs Clockwise by hand, until
they lock, to lock the spikes.
Connecting to the ampli
fi
er:
The newly designed proprietary GamuT Terminals
are made to allow the use of 3 different connec-
tions:
8mm spades, 4 mm banana plugs or
stripped wire (Bi-wire only).
The terminals come
with a connector bracket to connect the two pairs
of terminals.
The upper pair is input for the
Tweeter, the lower pair is input for the Mid/
Woofer section.
To optimize for
Bi-wiring re-
move the bracket
by removing the terminal nuts.
(The positive input is on the right hand side viewed
from the back). Connect your speaker cable to the
speaker before connecting to the ampli
fi
er.
t
For single wire connection
we recommend
using the + input for the tweeter (upper right
terminal) and the – input for the Mid/Woofer
(lower left terminal).
t
When using Banana plugs
insert the plugs
in the center hole, make sure the
fi
t is as tight
as possible.
t
When using a Spade
, loosen the desired
terminal nut and insert the spade between the
terminal and the bracket (single wire use).
t
When using a stripped wire
remove the
terminal nut and insert the stripped wire into
it. Position the stripped wire onto the conical
part of the terminal base and re-position the
terminal nut onto the thread and turn the nut
until it locks the wire.
Connections
Summary of Contents for MinenT M3
Page 1: ......


