GAT NET.Lock 7000 System
Mounting
www.gantner.com
HB_GAT-NETLOCK7000--EN_30
13
3. MOUNTING
This mounting instruction describes how to mount the locker locks GAT NET.Lock 7000. Please read this
instruction carefully and follow it prior to working on the lockers or installing the locks.
As there is a wide variety of applications and locker types, a test installation including a functional testing
must always be performed prior to the serial production of the lockers and the installation of the locks (see
chapter "3.8. Test Installation").
Please also read the most important points for installation summarized in the chapter "3.7. Points to be
observed during Installation"!
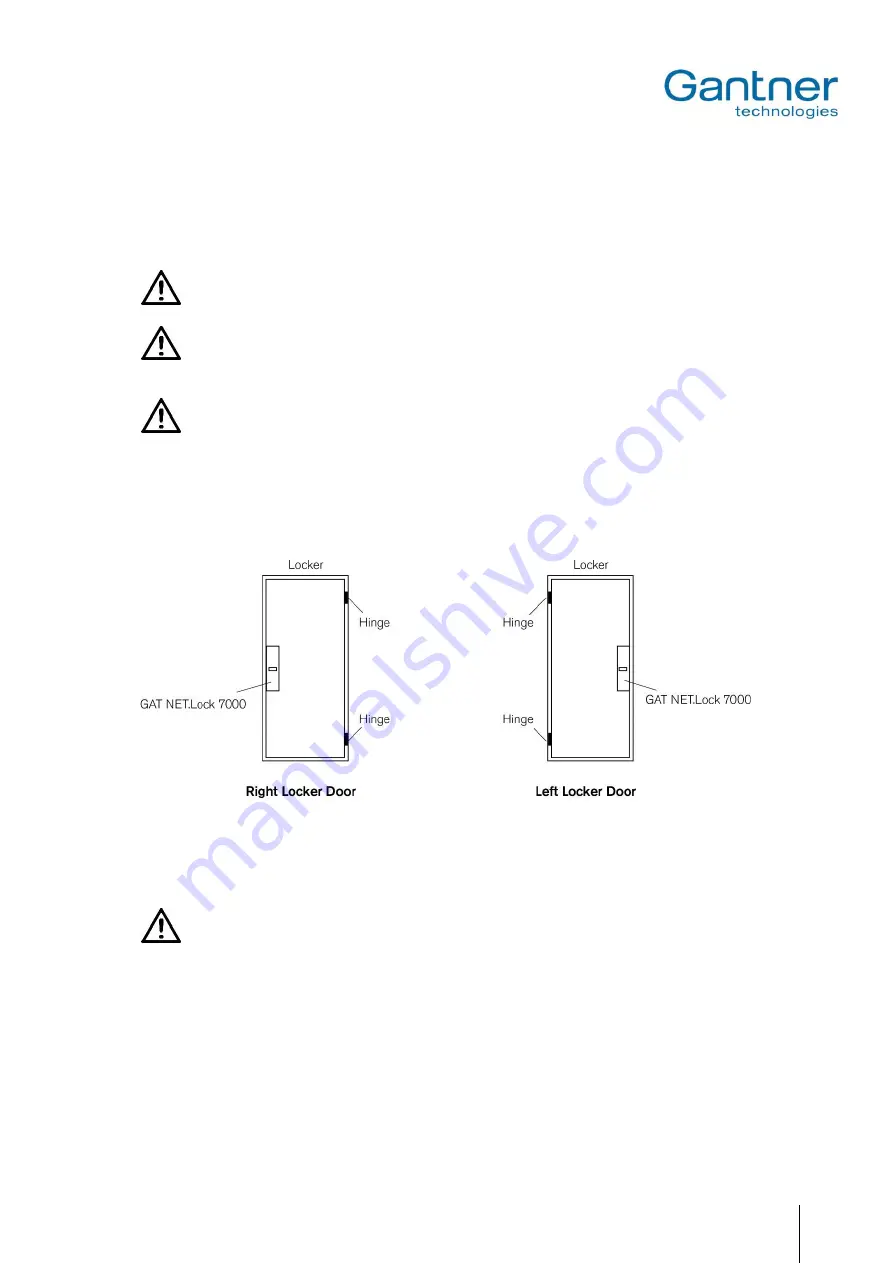
3.1 Definition of the Door Hinge (Right or Left Door)
For the mounting, it is important to determine whether the door is hinged to the left or the right. This is defined as
follows:
Figure 3.1
- Definition of the opening direction of lockers (left/right)
In the following pages the mounting for right-hinged doors is desribed. The installation process for left locker doors is
in principle the same as for right locker doors, only with flipped lock and door orientation.
The hinges must not be equipped with retaining springs or other elements which keep the locker door shut!
The locker door must open up without resistance by itself when it is unlocked by the GAT NET.Lock 7000.
3.2 Metallic and Non-Metallic Doors
Because the RFID field of the GAT NET.Lock 7000 is distorted or blocked by metal (e.g. with metallic locker doors),
a cut-out has to be made in metallic locker doors and the GAT NET.Lock Bolt Set 7200 and the label carrier is then
mounted in this cut-out. For non-metallic doors no cut-out but only a drilling for the LED field is required.
Since the reading range of the GAT NET.Lock 7000 is limited, the locker door at non-metallic doors may not be too
thick. The maximum door thickness at non-metallic doors depends on the used RFID technology and data carriers.


