Screw installation:
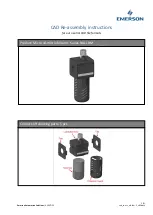
ssemble the unit in reverse order to that shown above.
aution:
Treat the screw with care and only remove it
rom its packaging when it is time to install it. Do not
on, this will cause vibration,
hen be required.
ion before installing the screw. The pulley has
keyway and key that is retained by a setscrew. Make sure this is tight.
efore fixing the lower bearing screws to the shaft, tighten the lower end nuts onto the
haft (don’t forget the washers) until it is hand tight. Then make 1 and 1/2 more turns on
eave the screw slightly tensioned.
earing collar onto the screw.
ake sure the bearings are greased.
hen tightening the screw retaining nuts, apply a small amount of tension to the screw.
to the entire threads of the screw, not just the travel
rea.
heck the operation of the safety switch. It must be adjusted as shown below.
A
C
f
allow the screw to bend by holding it improperly.
When handling it, support it along its length. The
screw is checked for concentricity before shipping. If
it is bent during installati
noise and damage to the lift. A replacement screw will
t
It may be preferable to assemble the Drive Nut and Safety Nut assembly onto the screw
before bringing the screw into place. Remember not to allow the screw to hang. This will
damage it and make it useless.
Make sure the pulley is in the proper posit
a
B
s
the nut to l
Tighten the screws of the lower b
M
W
Apply a generous amount of grease
a
C
ITEM #05751 Revision B
Garaventa Lift, April 2008
15


