background image

PP520 LED Lighting Controllers

Issue 018

User manual

www.gardasoft.com

Summary of Contents for PP520

Page 1: ...PP520 LED Lighting Controllers Issue 018 User manual www gardasoft com...

Page 2: ...equipment cannot cause any dangerous situation or significant financial loss to occur Deliberate acts of endangerment and vandalism are not covered by this document and must be considered by the inst...

Page 3: ...ontinuous 14 5 1 2 Pulsed 14 5 1 3 Switched 15 5 2 Triggers 15 5 3 Flags 15 5 4 Automatic light sensing 15 5 5 Cold start 16 6 Mechanical fixing 17 7 PP520 heat output 19 7 1 Heat output per channel 1...

Page 4: ...dress 35 11 Webpage configuration 37 11 1 Main page 37 11 2 Configuration page 38 11 3 General setup page 39 12 Command configuration 40 12 1 Command structure 40 12 2 Lighting commands 43 12 3 Comman...

Page 5: ...ribed in Section 6 Mechanical fixing using a DIN rail or the mounting holes In particular read the notes on heatsinking in Section 7 PP520 heat output Connect the PP520 up to a supply and an LED light...

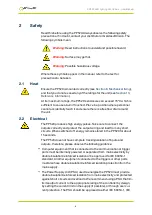
Page 6: ...connect the outputs correctly and protect the output wiring and load from any short circuits When switched off energy remains stored in the PP520 for about 15 seconds The PP520 does not have complete...

Page 7: ...t be externally fused to 4A using a slow blow fuse T4AH 50V The installer must provide a clearly marked nearby and easily accessible switch as part of the installation to allow the controller to be di...

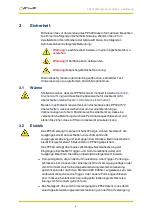
Page 8: ...ntliche Ber hrung durch das Personal ausgeschlossen ist und stellen Sie sicher dass Luft frei um das Ger t zirkulieren kann 3 2 Elektrik Das PP520 erzeugt Impulse mit hoher Energie Achten Sie darauf d...

Page 9: ...ofern angebracht gesch tzt sein Die Verkabelung der Stromversorgung zur Steuerung muss f r min destens 4A bemessen sein Die Verkabelung vom Kanalausgang zur Last muss h her als der maxi male Kanalausg...

Page 10: ...htigt werden 3 4 Installationsanleitung Haftungsausschluss Diese Informationen dienen nur zur Orientierung Installationstechniker m ssen ihre eigene spezifische Risikobewertung f r die jeweilige Insta...

Page 11: ...pas de le toucher par accident et veillez ce que l air circule librement autour de l unit 4 2 lectricit Le PP520produit des impulsions d nergie lev es Veillez bien raccorder les sorties et ce que les...

Page 12: ...e de la cha ne la charge doit avoir une capacit sup rieure au courant de sortie maximal de la cha ne Si le contr leur est mal r gl ou en cas de panne l nergie fournie par l alimentation au contr leur...

Page 13: ...indicatif Les installateurs doivent effectuer leur propre valuation des risques pour chaque installation M me si Gardasoft Vision Ltd a pr par minutieusement ces conseils Gardasoft Vision Ltd et Gard...

Page 14: ...tion 12 Command configuration Configurations are saved in non volatile memory so that the PP520 will resume operation after a power cycle 5 1 Output modes Three modes of operation are provided separat...

Page 15: ...nses a light connected to it for the first time and will wait for the current rating to be set If the flag is not set the PP520 will revert to the last current rating set E flag This flag enables or d...

Page 16: ...nual 5 5 Cold start To clear the configuration to the default settings turn on the PP520 while holding the SEL and q buttons for about 5 seconds until COL is displayed Both channels are set up for 50...

Page 17: ...rom the sides of plastic enclosures Likewise leave a similar space between the PP520 and any parts which could be affected by high temperatures The enclosure of the PP520 is used to dissipate power in...

Page 18: ...utput voltages to the minimum value required by the LED light and the PP520 together Chose a PSU that limits its output current by design by setting the current limit on the supply if this feature exi...

Page 19: ...Voltage across the light LD1 and LD1 for output 1 This is usually easy to calculate as the voltage across the light is normally the voltage rating of the light as declared in its specification Alterna...

Page 20: ...Us have some adjustment in their out put voltage Connect lights in series instead of parallel If you have an array of lights or LEDs in parallel then changing the arrangement to serial will increase t...

Page 21: ...n screw terminals at one end of the case see below The screw terminals have the following connections Screw terminal ID Function TRIG1 Channel 1 trigger input TRIG1 LED1 Channel 1 lighting output LED1...

Page 22: ...nt to be drawn Ideally wires should be double crimped or independently secured to ensure they cannot come loose Route low voltage and mains wiring separately If they must be loomed together ensure tha...

Page 23: ...eady for operation To show the unit is operating normally the LED display shows a pattern of alternating lines 9 2 Setting the light rating The Autosense feature detects the presence of a light and pr...

Page 24: ...ings Other displays are shown for channel 2 connected and channels 1 and 2 connected If an error occurs if the light is disconnected for example the PP520 displays OP Press the SEL button to cancel th...

Page 25: ...the SEL button Use the p and q buttons to set the intensity from 1 to 99 9 and press the SEL button Your PP520 is ready to use 9 4 Setting up switched output Press the SEL button for 1 second and foll...

Page 26: ...he SEL button Use the p and q buttons to set the intensity from 1 to 99 9 and press the SEL button Your PP520 is ready to use 9 5 Setting up pulsed operation Press the SEL button for 1 second and foll...

Page 27: ...se the p and q buttons to set the intensity from 1 to 999 and press the SEL button deL is displayed Press the SEL button to set up the delay time as described in Section 9 6 Setting pulse delay and wi...

Page 28: ...Number format Range of values E 3 0 001 999 Values displayed in milliseconds from 1ms to 999ms in steps of 1ms E 4 0 0001 99 9 Values displayed in milliseconds from 0 1ms to 99 9ms in steps of 0 1ms E...

Page 29: ...to 99 9ms in steps of 0 1ms Press the SEL button Use the p and q buttons to select the desired value Press the SEL button Use the p and q buttons to select E 5 to enter values from 0 02ms to 9 98ms in...

Page 30: ...20 s to 980 s in steps of 20 s using a PP520 or 1 s to 999 s in steps of 1 s using a PP520F Press the SEL button Use the p and q buttons to select the desired value Press the SEL button Note When a l...

Page 31: ...ou can connect it directly into the network port on a PC using a crossover cable 10 2 IP address The PP520 needs an IP address to communicate over Ethernet There are two ways to get an IP address eith...

Page 32: ...ternative Configuration tab You can find out what IP address is being used by a PC at any time by following the steps below i Go to the Control Panel ii Select Network Connections iii Right click on L...

Page 33: ...again IP2 is displayed Press the SEL button and use the p and q buttons to select the second three digits of the IP address Press the SEL button again IP3 is displayed Press the SEL button and use th...

Page 34: ...of the subnet mask Press the SEL button again Sb3 is displayed Press the SEL button and use the p and q buttons to select the third three digits of the subnet mask Press the SEL button again Sb4 is di...

Page 35: ...tton again gt4 is displayed Press the SEL button and use the p and q buttons to select the fourth three digits of the gateway address Press the SEL button again Your PP520 is ready to use 10 4 Reading...

Page 36: ...ed Press the SEL button to read the second three digits of the IP address Press the SEL button again IP3 is displayed Press the SEL button to read the third three digits of the IP address Press the SE...

Page 37: ...controller s IP address displayed in GardasoftMaint into your web browser which will display the Main screen GardasoftMaint software is available from www gardasoft com 11 1 Main page The main page s...

Page 38: ...l the parameters for each output channel Pressing the Submit button updates the PP520 configuration and saves the changes to non volatile memory On this page you can Change the current rating and brig...

Page 39: ...r Manual 11 3 General setup page The general setup page shown below allows you to set up or clear the webpage s password and set up the internal trigger You can also enter any Ethernet command from Se...

Page 40: ...an error occurs Several commands can be put into one command line by separating them by a semi colon The PP520 sends any replies to the commands followed by a character to show that the command line...

Page 41: ...configuration ST The typical output is CH 1 MD 2 IP 4 CS 0 100A SE 75 0 DL 2 0us PU 300 0us RT 500 0us FL 1 CH 2 MD 0 IP 2 CS 0 100A SE 25 8 DL 1 000ms PU 1 000ms RT 0 0us FL 0 Where CH Channel number...

Page 42: ...r can be read by this command Any error displayed on the unit is cleared so if there was a lighting error the PP520 resumes auto sensing on that channel The reply is in he same form as the GT command...

Page 43: ...rom the Ethernet port This command is cleared on a power cycle 12 2 Lighting commands Set the SafeSense mode REc m Where c output channel 1 or 2 m Bit 0 Bit 1 Bit 2 SafeSense mode 0 S flag set prompt...

Page 44: ...igger input You can configure the delay from the trigger to the start of the pulse the length of the pulse and the brightness An error is generated if the brightness setting requires a current greater...

Page 45: ...TT1 Enable the internal trigger and use the previously set period TT1 p Enable the internal trigger and set the period Where p period of the trigger in milliseconds For example TT1 200 Set the intern...

Page 46: ...to 65 brightness continuous RW RW1 50 Set channel 1 to 50 switched by trigger 1 RT RT2 3 4 50 Set channel 2 to 3ms pulses delayed by 4ms at 50 brightness RP RP1 2 Use trigger input 3 for channel 2 TR...

Page 47: ...current 150mA This is when using a 12V supply the current is lower at 24V Input enable level From 4 5V to 24V This is the voltage applied between and of each input Input disable level 1V See above Typ...

Page 48: ...ings from EEPROM they may be incorrect PO Err 34 Internal power dissipation is too high Output turned off OP Err 35 Output current to lighting is too low OP Err 39 There is not enough supply voltage f...

Page 49: ...e PP520 is fitted with a thermal cut out If the internal temperature reaches 62 C corresponding to a case temperature of 70 C the outputs are turned off This message is displayed until the PP520 has c...

Page 50: ...2017 Copyright 2017 Gardasoft Vision Ltd Gardasoft Vision Ltd Trinity Court Buckingway Business Park Cambridge CB24 4UQ UK tel 44 1954 234970 fax 44 1954 231567 Gardasoft LLC Oak Ridge Road Weare New...

Reviews: