4. Function
The mowing time depends on the height and moisture of the grass and the charge of the battery.
Mow twice a week during the growing season, your lawn will suffer if more than a third of its length is cut at
one time.
5. Initial Operation
Before using for the first time, the battery must be fully charged.
The lithium-ion battery can be charged in any state of charge, and the charging process can be interrupted at
any time without harming the battery (no memory effect).
1.
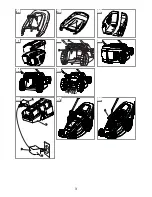
Insert the plug of the charger cable (26A) into the battery (26B).
2.
Insert the plug of the battery charger (26C) into a mains sok-
ket.
The charging indicator lamp (26D) on the battery charger lights up red. The battery is being charged.
When the charging indicator lamp lights up green, the battery is fully charged.
Charging times
4035 (battery 8836 / 3,0 Ah) :
4,5 hrs (90% charge) : 7 hrs (100% charge)
4041 (battery 8837 / 4,5 Ah) :
7,5 hrs (90% charge) : 9 hrs (100% charge)
3.
First remove the charging cable from the charging socket and then unplug the battery charger from the
mains socket.
Your product can be used to cut grass using the following methods:-
Grassbox Fitted (23) :- Grass is collected effectively and compacted into the grassbox.
Mulch Plug Fitted (24) :- Grass cuttings are finely chopped to return nutrients to your lawn.
Rear Discharge (25) :- Effectively cuts long grass with no need to empty the grassbox.
Do not overload your mower as this may cause the motor to overheat - see 9. Troubleshooting.
When mowing in long thick grass, a first cut with the cutting height set higher will help reduce the load. See
6. Operation - Cutting Height Adjustment.
Please note:- This product is equipped with the EnergySave feature which gives up to 20% extended battery
run time. It does this by automatically sensing different grass conditions.
Blade speed automatically increases in tough grass conditions and decreases in lighter grass conditions.
You may hear the sound level increase and decrease as blade speed changes. This sound variation is
perfectly normal and means the mower is cutting at optimum blade speed.
WARNING !
Overvoltage damages batteries and the battery charger.
Ensure the correct mains voltage.
Charging the battery
GB
1.
Place the battery into the top of the product (27).
2.
Fold down the battery handle (28A) to lock it into the product
Do not operate the lawnmower if the blade stops repeatedly (battery is fully discharged), as this shortens the
life of the battery.
If the lawnmower stops during operation or no longer starts (charging level display flashes red), recharge
the battery.
When the battery is fully discharged (e.g. long storage), the charging indicator light (25D) flashes at the
beginning of the charging process.
If the charging indicator light is still flashing after 15 min, there could be a fault (see 9. Troubleshooting)
Attaching the battery to the product
Important !
Ensure that there is no dirt or moisture in the battery socket and battery contacts.
16

