


10
11
GB
GB
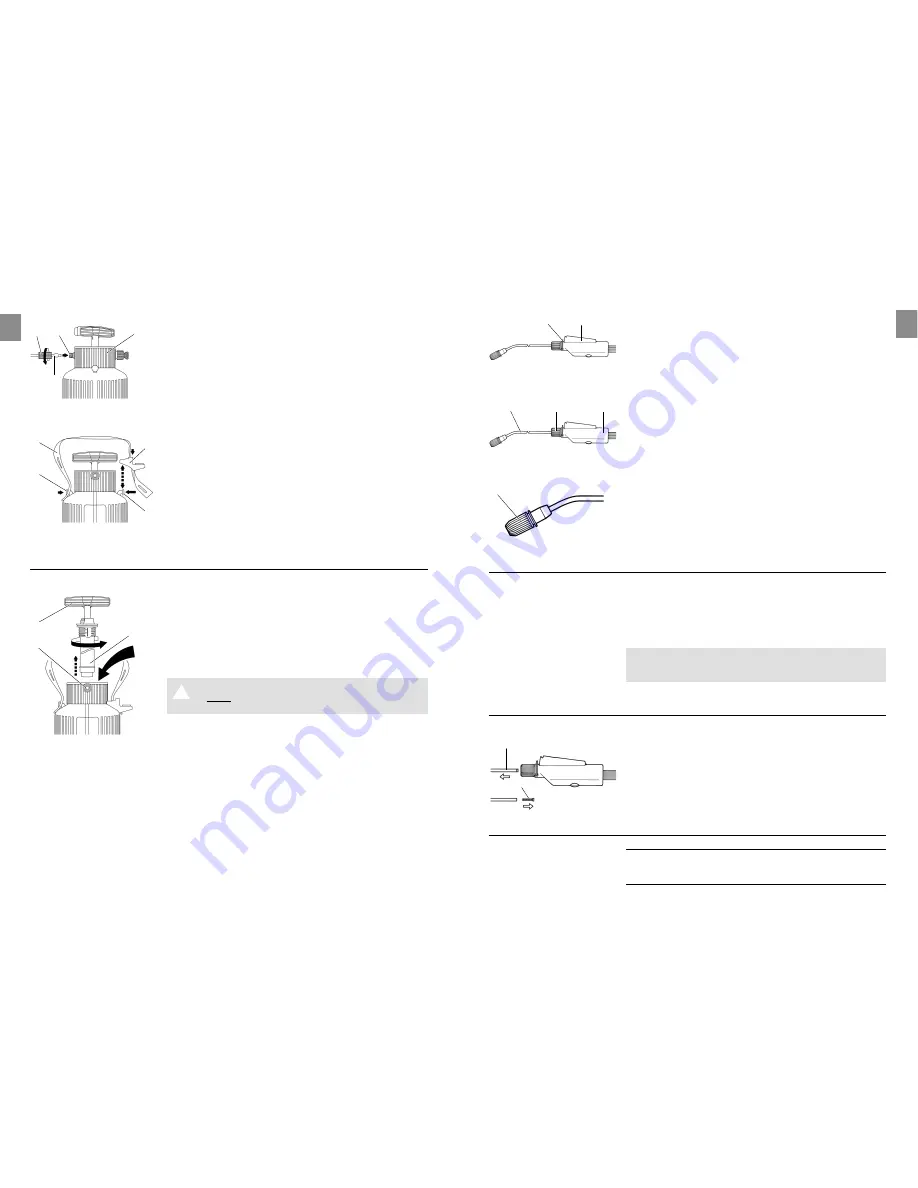
Attaching the spray hose
to the container cap :
Attaching the shoulder strap :
1. Push the short union nut
7
over the spray hose
5
.
2. Push on the spray hose
5
so that it covers at least the
beginning of the thread
8
.
3. Screw the short union nut
7
onto the container cap
9
and tighten by hand (do not use pliers).
1. Remove the spray tube holder
0
from above (direction of
the arrow).
2. Guide the shoulder strap
A
through the elongated hole
of the spray tube holder
0
and attach it into the holder
B
of the container.
3. Press the spray tube holder back on until you hear it click
into place.
4. Attach the shoulder strap on the other side of the holder
B
.
4. Operation
1. Mix the fluid well.
2. Press the pump handle
C
down slightly, turn to the left and
remove the pump
D
.
3. Pour the fluid into the container up to the maximum mark
(5 litres).
Please observe the safety and proportioning instructions provid-
ed by the manufacturer of the product you are going to spray.
4. Tighten the pump again with the pump handle
C
by hand
(do not use pliers).
Risk of injury !
A
V
Never connect your Pressure Sprayer to an air
compressor.
5. Unlock the pump handle
C
by turning slightly to the left and
pump the pump repeatedly (approx. 30 – 40 times) until the
operating pressure is reached.
Any excess pressure escapes through the safety valve
E
.
Filling the container :
Cleaning the Pressure
Sprayer :
Cleaning the filter :
1. Press the operating switch
G
on the handle.
The Pressure Sprayer begins spraying.
2. Release the operating switch
G
on the handle.
The Pressure Sprayer stops spraying.
Setting the permanent lock:
v
Press the permanent lock
H
.
The operating switch
G
is pressed down and stays down.
The spray tube can be swivelled 360° in the hand valve.
1. Unscrew the union nut
1
on the hand valve
2
.
2. Turn the spray tube
3
to the correct position.
3. Tighten the union nut
1
on the hand valve
2
by hand
(do not use pliers).
You can adjust the spray jet from full jet (nozzle closed) to a fine
mist spray (nozzle open).
v
Open or close the spray nozzle
I
according to the spray jet
you require.
5. Cleaning
Always clean your Pressure Sprayer after spraying.
v
Fill the Pressure Sprayer with clean water (the water may
contain some washing-up liquid if necessary) and empty out
the water by spraying it through the spray tube in the same
way as when spraying a product.
This cleans the valves, the spray tube and the nozzles.
We recommend that you have your Pressure Sprayer thoroughly
inspected (preferably at a GARDENA Service Centre) after
using it for 5 years.
6. Trouble-Shooting
If the spray jet from the Pressure Sprayer is very weak you
should clean the filter in the container.
v
Remove the sieve
J
from the spray tube
3
and clean it.
Problem Possible
Cause
Remedy
Pump does not build up
Safety valve is loose.
v
Tighten the safety valve.
pressure.
Hose connection at the container
v
Tighten the hose connec-
and hand valve is not tight.
tions at the container and
hand valve.
Spraying :
Adjusting the spray tube :
Setting the spray jet :
A
B
0
B
7 8
5
9
E
C
D
3
J
I
H
G
2
1
3


