background image

USER MANUAL FOR GB-S3.1 WOOD CHIPPER


PARTS LOCATOR


No. 

Code 

Name 

Q'ty 

No. 

Code 

Name 

Q'ty 

101-001D 

212cc gas engine 

18 

801-030 

M8 x 16 Flanged hex bolt 

15 

902-12C-02A 

Front cover of housing 

19 

803-005 

M8 Flanged locknut 

26 

902-12C-05A 

Removable cover of housing 

20 

801-031 

M8 x 20 Flanged hex bolt 

902-12C-01A 

Back cover of housing 

21 

801-067 

M6 x 35 Flanged hex bolt 

902-12A-04 

Supports 

22 

803-012 

M6 Flanged locknut 

16 

902-12C-06A 

Combination blades assembly 

23 

801-059 

M6 x 16 Flanged hex bolt 

902-12C-10 

Discharge chute 

24 

802-018 

M10 Dual disc self-locking washers 

902-12A-09 

Adjustable discharge chute 

25 

801-071 

3/8-24 UNF -30 bolt 

902-12A-07-3 

Handle 

26 

801-070 

M6 x 12 Flanged hex bolt 

10 

902-12C-08 

Bracket 

27 

801-065 

M6 x 16 Hand screw bolt 

11 

703-003 

Tire 

28 

801-062 

M6 x 40 Flanged hex bolt 

12 

702-002 

Elbow pipe pad 

29 

801-068 

M8 x 55 Flanged hex bolt 

13 

701-013 

Rubber Curtain Strips 

30 

801-072 

5/16-24 UNF -25 bolt 

14 

902-12C-07-1 

Bottom hopper 

31 

802-001 

M8 flat washer 

15 

902-12C-07-2 

Upper hopper 

32 

802-003 

M8 spring washer 

16 

902-12A-10 

Fixing plate 

33 

902-12A-12 

Back window cover plate 

17 

804-002 

3 x 40 Pin 


Summary of Contents for GB-S3.1

Page 1: ...USER MANUAL FOR GB S3 1 WOOD CHIPPER W W W E F C U T C O M...

Page 2: ...ks Before Starting 7 Starting To Chip 7 Chipping 7 Blockages 7 Refueling 8 Engine Maintenance Schedule 8 Resharpening 8 Replacement of Blade 8 Chipping System 9 Guide To Replace Blades 10 TROUBLESHOOT...

Page 3: ...any obligation Due to improvements in design and performance during production there may be in some cases minor discrepancies between the actual chipper and the text in this manual The manual should b...

Page 4: ...16 Flanged hex bolt 4 7 902 12C 10 Discharge chute 1 24 802 018 M10 Dual disc self locking washers 1 8 902 12A 09 Adjustable discharge chute 1 25 801 071 3 8 24 UNF 30 bolt 1 9 902 12A 07 3 Handle 1...

Page 5: ...ard tape to identify this working area and keep it clear from debris build up Chips should be ejected away from any area the general public have access to Hazardous material Some species of trees and...

Page 6: ...clear of people animals and children Always keep the operating area clear from debris build up Always keep clear of the chip discharge tube Foreign objects may be ejected with great force Always ensu...

Page 7: ...cutting activity to clear the combustion engine Once complete bring the machine onto full throttle for a further 5 minutes Storage fluids should be replaced DO NOT USE old stagnate fluids Fluids with...

Page 8: ...ether with R1 Install bottom hopper with R5 R6 Step 2 Step 6 Fit tires and bracket together with R2 Install upper hopper with R7 Step 3 Step 7 Fit bracket together with cover of housing R3 Install the...

Page 9: ...it will need to be removed Stop the engine and wait for moving parts to stop before removing the material Trim the branch until it is a suitable shape for the chipper to accept BLOCKAGES Always be aw...

Page 10: ...h securely fitting caps Clean the area around the fuel cap and use a hopper for refueling Replace the fuel cap securely Do not fill the tank beyond the maximum fill indicator Avoid skin contact with f...

Page 11: ...USER MANUAL FOR GB S3 1 WOOD CHIPPER 9 CHIPPING SYSTEM No Part description Q ty 1 Flywheel assembly 1 2 M8 lock nut 6 3 Blade 2 4 M8 x 25 Hexagon countersunk head bolt 6...

Page 12: ...blade unmovable use 13mm socket spanner to UNSCREW the opposite nut and then unfix blade After unscrewed each locknut MUST be replaced by new one for keeping lock function 6 Once again use Allen key t...

Page 13: ...Owner s Manual Ensure machine is off Not feeding Blades dull Rotate sharpen or replace blades Ensure machine is off Obstructed discharge Clear debris from discharge chute Ensure machine is off Low eng...

Page 14: ...ical position push choke lever left to FULL CHOKE position push throttle lever to 1 2 way between FULL fast position and LOW THROTTLE slow position 6 Turn the ON OFF switch to the ON position grasp st...

Page 15: ...asoline tank is connected properly and solidly 3 Check the carburetor bolts are tight or carburetor floats are stuck If the bolt pointed by the yellow arrow is loose tighten it enough If gasoline flow...

Page 16: ...l laws End of Machine Life Follow these guidelines using approved local waste and disposal agencies for recycled materials according to applicable Health Safety and Environmental laws Position the mac...

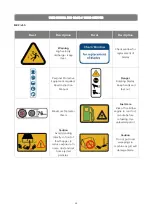
Page 17: ...ent required Read Instruction Manual Danger Rotating blades Keep hands and feet out Maximum Diameter 76mm Fuel Here Risk of fire Allow engine to cool for 1 minute before refueling Use unleaded petrol...

Page 18: ...ANUAL FOR GB S3 1 WOOD CHIPPER 16 Packing List Part Q ty Image Main body assembly 1pc Bracket 1pc Tires 2pcs Supports 1pc Discharge chute assembly 1pc Bottom feed hopper 1pc Upper feed hopper 1pc Hand...

Page 19: ...ort after sale service inquiry Note must provide SN below when after sale service or technical support SN sticked here CONTACT US QINGDAO ZHONGLANG MACHINERY TECHNOLOGY CO LTD 1005 Kangda Fortune Plaz...

Page 20: ...GARDENBEAUT Maker of Garden Beaut...

Reviews: