background image

S

U

A

1800 909 909

www.globalpowerbrands.com      email: help@globalpowerbrands.com

AFTER SALES SUPPORT

36357

S

U

A

1800 909 909

www.globalpowerbrands.com      email: help@globalpowerbrands.com

AFTER SALES SUPPORT

36357

13

To avoid objects that caused an obstruction from being repeatedly sucked in, it 
may be necessary to move the unit slower over the debris to be cleaned up. 

 Note. 

 If the internal mechanism in the unit should be blocked when the machine 

is running. Turning the switch several times while air is flowing through the unit 
should remove the blockage. Make sure you are not standing in front of the 
blower nozzle, when you operate the switch.

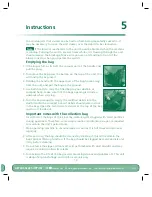
Emptying the bag

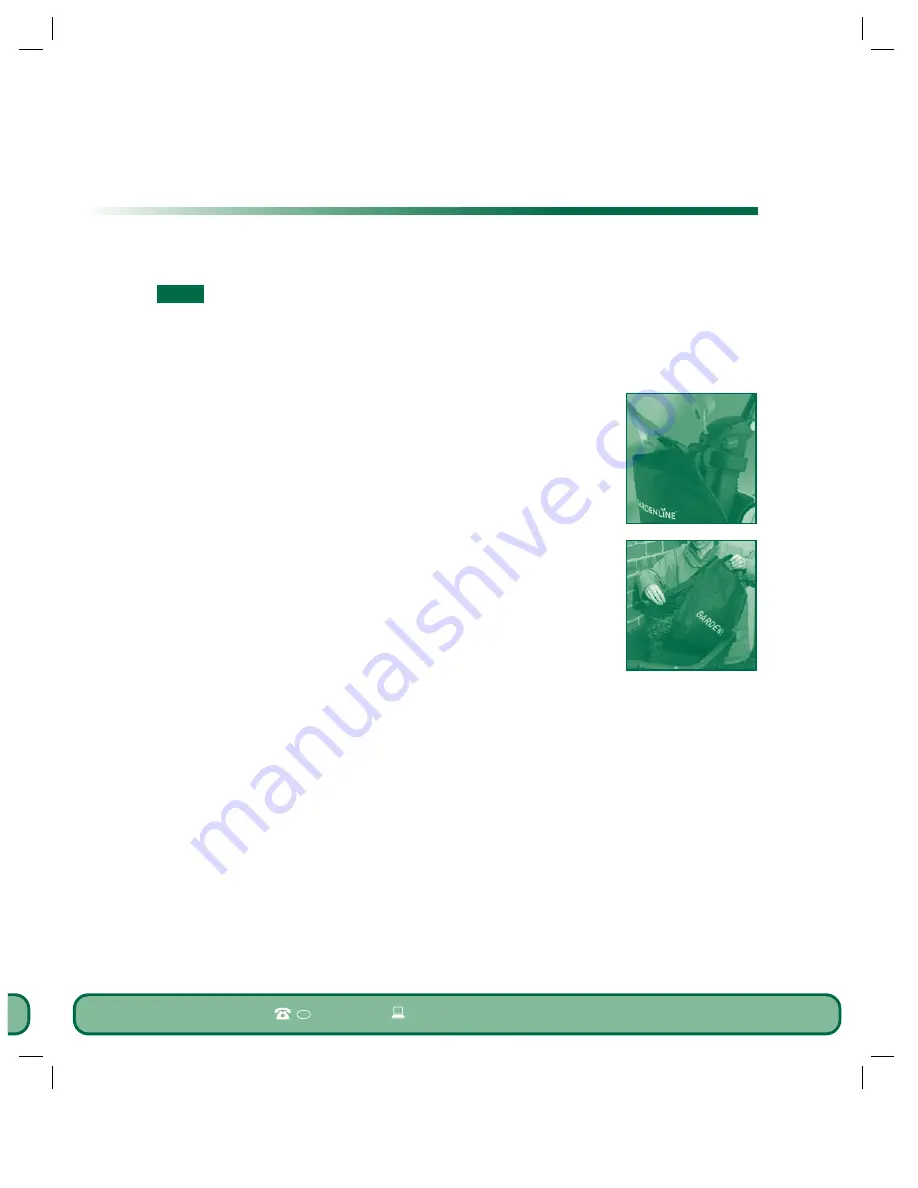
1. If the bag is full, switch off the vacuum unit at the handle and 

pull the plug.

2. To remove the bag press the button on the top of the unit, this 

will unclip the bag insert.

4. Holding the handle lift the upper part of the bag frame away 

from the unit, and put the bag on the ground.

5. Use both hands to carry the filled bag to your dustbin or 

compost heap, make sure that the bags opening is directed 
upwards when carrying.

6. Turn the bag around to empty the mulched debris into the 

dustbin/onto the compost heap. If debris should remain stuck 
in the bag. Open the two Velcro fasteners at the top of the bag 
and turn it inside out. 

Important notes with the collection bag

As with all of the bags of this kind, the material gets clogged with small particles 
during operation. Therefore, some simple routine maintenance steps are required 
to maintain the unit’s performance.

1. Stop operating machine in vacuum mode as soon as it is full check content level 

regularly.

2. After each use, the bag should be cleaned by shaking it, this will maintain the 

bag’s proper filtering function. If the bag should be clogged by moist particles, let 
it dry before cleaning. 

3. Do not force the zipper, often teeth will get blocked with dust and dirt and may 

require cleaning to allow its release.

4. To maximise the life of the bag avoid vacuuming stones and pebbles etc. This unit 

is design for plant foliage and similar materials only.

Instructions

5

Summary of Contents for 36357

Page 1: ...25C Upright Blower Vacuum User Guide PMS877C After Sales Support Now you have purchased a Gardenline product you can rest assured in the knowledge that as well as your 1 year parts and labour guarantee you have the added peace of mind of dedicated helplines and web support ...

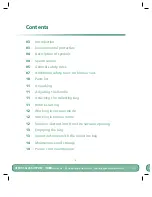
Page 2: ...ecifications 05 General safety rules 07 Additional safety rules for blower vacs 10 Parts list 11 Unpacking 11 Adjusting the handle 11 Attaching the collecting bag 11 Before starting 12 Working in vacuum mode 12 Working in blower mode 12 Remove obstructions from the vacuum opening 13 Emptying the bag 13 Important notes with the collection bag 14 Maintenance and storage 14 Power cord maintenance ...

Page 3: ...ble service CAUTION Carefully read through this entire Instruction Manual before using your new Gardenline Power Tool Take special care to heed the Cautions and Warnings Your Gardenline power tool has many features that will make your job faster and easier Safety performance and dependability have been given top priority in the development of this tool making it easy to maintain and operate Enviro...

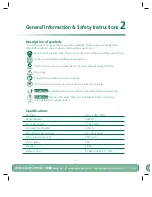
Page 4: ...to relevant standards for electromagnetic compatibility Warning Read the instruction manual carefully Do not use in the rain or leave outside while it is raining WARNING Keep spectators away Beware of objects being flung out WARNING Remove the plug from the wall socket before carrying out any kind of maintenance Specifications Voltage 230 240V 50Hz Rated power 2400W No Load Speed 15 000 min 1 Vacuum...

Page 5: ...lugs must match the outlet Never modify the plug in any way Do not use any adapter plugs with earthed grounded power tools Unmodified plugs and matching outlets will reduce risk of electric shock b Avoid body contact with earthed or grounded surfaces such as pipes radiators ranges and refrigerators There is an increased risk of electric shock if your body is earthed or grounded c Do not expose powe...

Page 6: ...g part of the power tool may result in personal injury e Do not overreach Keep proper footing and balance at all times This enables better control of the power tool in unexpected situations f Dress properly Do not wear loose clothing or jewellery Keep your hair clothing and gloves away from moving parts Loose clothes jewellery or long hair can be caught in moving parts g If devices are provided fo...

Page 7: ...ult in a hazardous situation h This appliance is not intended for use by persons including children with reduced physical sensory or mental capabilities or lack of experience and knowledge unless they have been given supervision or instruction concerning use of the appliance by a person responsible for their safety i Children should be supervised to ensure that they do not play with the appliance ...

Page 8: ... material that may cause a reduction in air flow Keep a balanced and stable stance while using the tool Do not switch on the tool in enclosed or poorly ventilated spaces or in the presence of inflammable and or explosive substances such as liquids gasses and powders Make sure you have a safe hand when you are working on inclines Move forward by walking do not run Do not get distracted and always con...

Page 9: ...dry light material as grass leaves small twigs and pieces of paper The vacuuming of heavy materials as metal stones branches broken glass and wet leaves is expressly excluded If operating a power tool in a damp location is unavoidable use a residual current device RCD protected supply with a residual tripping current of 30mA or less Use of an RCD reduces the risk of electric shock Always use weath...

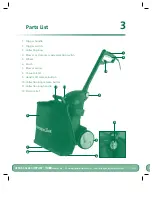
Page 10: ...RT 36357 10 AF 1 Trigger handle 2 Trigger switch 3 Collecting bag 4 Blower or Vacuum mode selection switch 5 Wheel 6 Brush 7 Blower outlet 8 Vacuum inlet 9 Handle tilt release button 10 Collection bag release button 11 Collection bag handle 12 Strain relief Parts List 4 3 1 5 6 7 8 2 10 11 9 12 3 ...

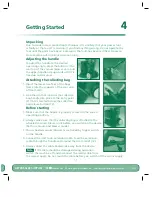
Page 11: ...ports at the rear end of the chassis 2 Line the clip that is below the collection bag handle into place at the entry point 11 this is located below the collection bag release button 10 Before starting 1 Make sure that the handle is properly secured in the correct operating position 2 Always make sure that the collecting bag is attached to the wheeled vacuum blower unit before you switch on the dev...

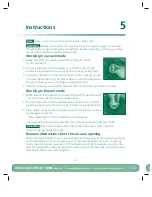
Page 12: ...the area you wish to clean Working in blower mode 1 Make sure that the unit is switched off on off in position off This is the same as the vacuum mode above 2 Turn the function switch anticlockwise until the arrow of the switch is aligned with the arrow of the blower mode BLOW 3 Blow debris away by moving forward with the blower making sweeping movements Never blow debris into the direction of onl...

Page 13: ... dustbin or compost heap make sure that the bags opening is directed upwards when carrying 6 Turn the bag around to empty the mulched debris into the dustbin onto the compost heap If debris should remain stuck in the bag Open the two Velcro fasteners at the top of the bag and turn it inside out Important notes with the collection bag As with all of the bags of this kind the material gets clogged w...

Page 14: ...the blower vacuum always check to make sure that the product is clean and free of dirt and debris Operate the selector lever backwards and forwards to ensure correct operation Store the blower vacuum in a dry place and out of reach of children Make sure all the nuts bolts and screws are firmly tightened to ensure the safe operation of the device Regularly check the collecting bags for signs of wear...

Page 15: ...57 15 S U A 1800 909 909 www globalpowerbrands com email help globalpowerbrands com AFTER SALES SUPPORT 36357 ...

Page 16: ... ...

Reviews: