background image

24.5cc 4 Stroke Petrol Blower Vacuum

AFTER SALES SUPPORT

e-mail: help@powertoolsupport.com

1800 909 909

MODEL: №. EBV245A  •  08/2018  •  52754

(toll free)

AFTER SALES SUPPORT

(toll free)

24.5cc 4 Stroke Petrol Blower Vacuum


e-mail: help@powertoolsupport.com

1800 909 909

MODEL: №. EBV245A   •  08/2018  •  52754

22

23

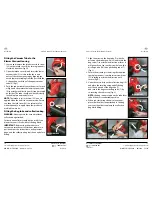
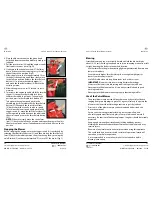
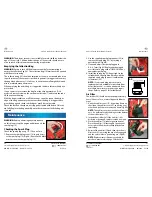
4.   Place the blower vacuum on the ground and 

hold the blower vacuum handle firmly with your 

left hand.

5.   Pull the recoil starter (20) until the engine sounds 

like it wants to run or starts (Fig W).

6.   Slowly move the choke lever (red) (17) halfway 

down. If the motor is not running re try to start in 

the half way choke position (Fig X).

7.   Allow the motor to run for approximately 20 sec 

in the half choke position and then slowly move 

to the full run position. Release the throttle lock 

button (31) to release the throttle trigger (2), 

and move the throttle lock lever (4) back to the 

tortoise position.

8.   Allow the engine to run for 10 seconds to let it 

warm up.

9.   To increase the engine speed, hold in the throttle 

trigger (2), then move the throttle lock lever 

towards the rabbit to go faster.  To keep in this 

position, press in the throttle lock button (31).

   To decrease the engine speed, push in the 

throttle trigger (2) to release the the throttle lock 

button (31), then push the throttle lock lever 

(4) back towards the tortoise to reduce speed. 

To lock in at the lower speed, again push in the 

trigger switch (2), move the throttle lock lever (4) 

to the required speed in between the rabbit and 

the tortoise, and press in the throttle lock button 

(31).

   NOTE: If the motor stalls, move the choke lever 

(red) (17) back to the full choke position and repeat from point 4 unless 

the motor is already warm. If already warm, start in the half or no choke 

position.

Stopping the Blower

Before stopping the engine, ensure the trigger switch (2) is not locked by 

releasing the throttle lock button (31), and then moving the throttle lock 

lever (4) back to the rabbit position, then stop the engine by pressing the 

on/off switch (3) on the symbol marked “O” to turn OFF the motor (Fig Y).

W.

X.

Y.

Blowing

Start the blower engine, as previously described. Hold the blower firmly 

about 10–20 cm from the ground and move it in a sweeping motion from left 

to right, directing the debris to the desired location.
•    Use low throttle settings when clearing lightweight materials from around 

lawns or shrubbery.

•    Use medium to higher throttle settings to move lightweight grass or 

leaves from driveways or paths.

•     Use full throttle when moving heavy loads such as dirt or snow.
  

IMPORTANT. Blower noise increases at higher throttle settings.  

Always use the lowest throttle setting required to get the job done.

•    Never operate the blower unless it is properly assembled and in good 

working condition.

•    Never operate the blower without a properly functioning muffler.

Use of the Petrol Blower

•    The petrol blower vacuum can efficiently move a wide variety of debris 

ranging from grass clippings to gravel. As a general rule try to operate the 

blower at the lowest throttle setting necessary to get the job done.

•    Prior to use of the blower ensure you have read and understood this 

instruction manual.

•    Ensure you are wearing suitable clothing, no loose jewellery, and 

also safety equipment like safety glasses, ear protection and a mask if 

necessary.  Be cautious of hair entanglement. Long hair should be suitably 

protected.

•    Keep a gap between the air intake and clothing and body parts as 

blocking the intake will reduce the performance of the blower and may 

result in injury.

•    Be aware of any local or national restrictions when using this appliance. 

This could include, but not restricted to, times of operation, location of 

operation, or work place operation.

•    It is recommended to use a rake or broom to loosen debris before 

blowing/ vacuuming.

Operation

Operation

Summary of Contents for 52754

Page 1: ...https help tools Read all safety warnings and all instructions thoroughly before operating this product Ensure you keep your manual in a safe place for future reference IM ed 4 08 2018 52754 24 5CC 4 STROKE PETROL BLOWER VACUUM ...

Page 2: ...Pack contents parts 2 Description of Symbols 3 General safety warnings 4 Additional Safety rules for Petrol BlowerVacuums 9 Parts List 12 Assembly 14 Preparation of the BlowerVacuum prior to use 14 Setting up for use as a Blower 14 Attaching the BlowerTube 14 Setting up for use as aVacuum 15 Fitting theVacuumTube to the BlowerVacuum Housing 16 Fitting the Bag tube into the Collection bag 16 Prepar...

Page 3: ...lower Vacuum on pages 21 22 as well as the maintenance instructions on pages 26 28 Contents of carton 2 3 Description of symbols The rating plate on your product may show symbols These represent important information about the product or instructions on its use Conforms to relevant standards for electromagnetic compliance Warning Explosive material Extremely hot surface Do not touch a hot muffler ...

Page 4: ...pected situations Dress properly Do not wear loose clothing or jewellery Keep your hair clothing and gloves away from moving parts Loose clothes jewellery or long hair can be caught in moving parts If devices are provided for the connection of dust extraction and collection facilities ensure that these are connected and properly used Use of these devices can reduce dust related hazards Power tool ...

Page 5: ... starting the engine Never remove the cap of the fuel tank or add fuel while the engine is running or when the engine is hot If fuel is spilled do not attempt to start the engine but move the machine away from the area of spillage and avoid creating any source of ignition until the fuel has evaporated and the vapour dispersed Replace all fuel tanks and containers caps securely Add 4 stroke oil to ...

Page 6: ...fuel while the engine is running or still hot Do not mix oil and fuel Do not use 2 stroke oil Do not start the engine if there is spilt fuel on the blower vacuum or in the area surrounding Take the blower away from the zone where fuel has been spilt and avoid any contact from a hot source as long as the spilt fuel is completely evaporated Tighten the fuel tank cap and fuel can cap tightly and ensu...

Page 7: ... the vibration immediately Reduce the throttle before turning off the engine and turn the fuel off when you have finished blowing or vacuuming The user is responsible for the safety of other people animals and objects in the working area Keep children and domestic animals at a safe distance while the blowerVacuum is in use Fill the oil reservoir with 4 stroke oil Do not use 2 stroke oil We recomme...

Page 8: ...ottle lock lever 5 Upper blow tube 6 Blow tube nozzle 7 Bag tube 8 Intake Cover 9 Upper Vacuum tube 10 Collection bag 11 Vacuum Tube nozzle 12 Primer 13 Fuel cap 14 Oil reservoir dipstick 15 Air filter cover 16 Air filter 17 Choke lever red 18 Spark plug cover 19 Spark Plug 20 Recoil starter 21 Motor internal 22 Fuel tank 23 Shoulder strap 24 Discharge port 25 Spark Plug Spanner combination screwd...

Page 9: ...plug spanner combination screwdriver 25 screw in the assembly screw until secure 4 Loosen the screw with 2 small washers from the discharge port 24 using the supplied spark plug spanner combination screwdriver 25 Align and push the assembled blower tube assembly over the discharge port 24 on the blower outlet lining up the arrow on the discharge port with arrow on the tube and then rotate clockwis...

Page 10: ...t is used in blow mode Fitting the bag tube and collection bag WARNING Never operate the vacuum without collection bag attached Serious personal injury could be the result if the blower vacuum is used without the bag fitted IMPORTANT Before using this product as a vacuum ensure the correct vacuum tubes are in position as per the instructions on the previous page and the collection bag zip is done ...

Page 11: ...ly hand tightened Adding and Checking the oil IMPORTANT The motor of this blower vacuum is packed with NO OIL in the motor Prior to starting the motor 4 stroke oil MUST be added to the oil reservoir 14 Failure to add sufficient oil will result in damage to the motor which is NOT covered under the warranty of the unit NOTE This is a 4 stroke blower vacuum The motor sump MUST be filled with 60mL of ...

Page 12: ...aking care NOT to cross thread the cap on the fuel tank 22 Tighten the cap firmly in a clockwise direction 3 When starting the engine ensure it is at least 15m away from the area where the fuel tank has been filled up in order to avoid any risk of fire Always use extreme care when handling fuel Fuel is highly flammable Never attempt to fuel the product if the fuel system components are damaged or ...

Page 13: ...witch 2 is not locked by releasing the throttle lock button 31 and then moving the throttle lock lever 4 back to the rabbit position then stop the engine by pressing the on off switch 3 on the symbol marked O to turn OFF the motor FigY W X Y Blowing Start the blower engine as previously described Hold the blower firmly about 10 20 cm from the ground and move it in a sweeping motion from left to ri...

Page 14: ...RNING Ensure the blower vacuum on off switch 3 is in the OFF position as indicated by the O on the on off switch 3 FigY and that the spark plug cap is removed disconnected to prevent accidental starting which may cause serious injury WARNING Never attempt to clear a blockage by placing your hand down the inlet tube 1 Switch the on off switch 3 to the OFF position as indicated by the O on the on of...

Page 15: ...lower stop the engine and disconnect the spark plug 19 Checking the Spark Plug Check the spark plug every 10 15 hours of use 1 Remove the spark plug cover 18 to gain access to the spark plug 19 Fig AA Remove the black arrestor cover on the spark plug 19 2 Use the supplied spark plug spanner 25 to remove the spark plug 19 by turning it anti clockwise Fig AB 3 Clean and adjust the spark plug gap to ...

Page 16: ...re to add a tag on the blower after the oil has been drained to say OIL DRAINED Oil must be added before the next use Protect all metal engine parts from corrosion by coating them with oil Remove the spark plug 19 put several drops of oil into the cylinder through the spark plug hole and then pull the recoil starter 2 to 3 times in order to distribute the oil evenly Replace the spark plug and spar...

Page 17: ...gone into the manufacture of this product and it should therefore provide you with years of good service when used properly In the event of product failure within its intended use over the course of the first 3 years after the date of purchase we will remedy the problem as quickly as possible once it has been brought to our attention In the unlikely event of such an occurrence or if you require an...

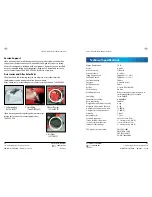
Page 18: ...uct Dimensions 98cm x 27cm x 37cm Set up for Blower function tolerances L x W x H Set up for Vacuum function 118cm x 27cm x 37cm without collection bag tolerances L x W x H This product complies with EN15503 2009 EN15503 A1 2013 PPP 53351A 2012 EN ISO 14982 2009 Service Support If you have any issues with the operation of your product please take it with a copy of your receipt to one of our Nation...

Page 19: ...oducts are developed to our stringent quality specifications If you are not entirely satisfied with this product please return it to your nearest ALDI store within 60 days from the date of purchase for a full refund or replacement or take advantage of our after sales support by calling the supplier s Customer Service Hotline Made in China Gardenline is a registered trademark of ALDI Stores DISTRIB...

Reviews: