background image

Page 

4

GARDTEC 

590/591

User Manual

Part Setting The System 
(using Master & Main type codes)

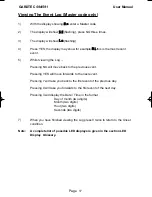
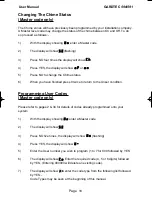
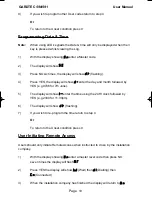
1)

With the display showing:-

2)

Enter a Master or Main type code, the
display will show for example:-

3)

Press 1, 2 or 3 (for Part 1, 2 or 3), the
display will show for example:-

4)

The exit tone may or may not be heard
dependant on the system settings.

5)

Exit the premises or retire to an unprotected
part of the system. At the end of the exit time
either the exit sounder will stop or a single
beep will be emitted (dependant on system
settings).

< < < < UN-SET > > > >

01  JAN 18 :  58 : 01

Do you want to . . 
Set ?

EXIT Now!    
Part 1

15

PR5075U.qxd  19/06/00  10:59  Page 4

Summary of Contents for GARDTEC 590

Page 1: ...G G G GA A A AR R R RD D D DT T T TE E E EC C C C 5 5 5 59 9 9 90 0 0 0 5 5 5 59 9 9 91 1 1 1 LCD User Instructions LED User Instructions GARDINER TECHNOLOGY ...

Page 2: ...Resetting After Mains Failure 13 Using LED Keypads 13 Setting The System 13 Unsetting The System 14 Part Setting The System 14 Area Setting 15 Removing Zones 23 Testing The System 16 Viewing The Event Log 17 Changing The Chime Status 18 Programming User Codes 18 User Initiating Remote Access 19 Resetting After An Alarm 20 Resetting After Mains Failure 20 LED Display Glossary 21 System Attributes 2...

Page 3: ... Level User Code User number 1 will always be a Master Level User but the remaining 6 User Codes may be programmed by a Master Code to the required level of access These may be changed at any time via a Master level code The User Code levels available and the functions available for the levels are 1 Set Only Only Allows for the setting of the system 2 Main User Allows Setting Part Setting Zone Rem...

Page 4: ...remises via the authorised exit route the exit tone will change if any detectors are violated during exit 4 Once the premises are secure listen that the exit tone returns to the continuous tone 5 Wait until the exit tone finishes before leaving Unsetting The System 1 Enter the premises via the authorised entry route the broken entry tone will sound proceed to the keypad 2 At the keypad enter a val...

Page 5: ...ess 1 2 or 3 for Part 1 2 or 3 the display will show for example 4 The exit tone may or may not be heard dependant on the system settings 5 Exit the premises or retire to an unprotected part of the system At the end of the exit time either the exit sounder will stop or a single beep will be emitted dependant on system settings UN SET 01 JAN 18 58 01 Do you want to Set EXIT Now Part 1 15 ...

Page 6: ...ill un remove a zone the display will show 6 Repeat step 5 until you have removed all the required zones 7 Press 0 to escape the display will show 8 Press YES the continuous exit tone will sound 9 Exit the premises via the authorised exit route the exit tone will change as detectors are violated When the premises are secure listen that the exit tone returns to the continuous tone Wait until the ex...

Page 7: ...the display and will be deleted as each zone is triggered Press 0 to escape Pressing 6 will silence the internal sounder Pressing 4 will toggle the Strobe On Off Pressing 9 will toggle the Bell On Off 7 Whilst in Test mode any zones violated will sound the internal sounder if it has not been silenced and show on the display 8 When you have finished testing the system press 0 twice the display will...

Page 8: ...ent in the log Whilst viewing the Log Pressing NO will move back to the previous event Pressing YES will move forward to the next event Pressing 7 will take you back to the last event of the previous day Pressing 9 will take you forward to the first event of the next day 6 When you have finished viewing the Log press 0 twice the display will show UN SET 01 JAN 18 58 01 Do you want to Set Do you wa...

Page 9: ...llows 1 With the display showing 2 Enter a Master Code the display will show for example 3 Press NO four times the display will show 4 Press YES the display will show for example Or 5 Press NO to change the status of the Chime then press YES the display will show 6 Press 0 to escape the display will show UN SET 01 JAN 18 58 01 Do you want to Set Do you want to Change Chime Chime is Off ok Chime is...

Page 10: ...0000 will delete an existing code Note If the code already exists or is a duress of another code an error will be shown choose another code and return to step 6 7 The display will show not if user 1 is being programmed The display will scroll showing the code types available see user types or display 8 Enter the required type followed by YES the display will show 9 If you wish to program other Use...

Page 11: ...ss YES the display will show 5 Enter the Day Month ie 0706 for 7th June followed by YES The display will show 6 Enter the time using 24Hr Clock ie 23 30 for 11 30pm followed by YES the display will show 7 Press 0 the display will show UN SET 01 JAN 18 58 01 Do you want to Set Do you want to Set DATE TIME Enter Day Month Then YES Enter Hrs Mins Then YES Do you want to Set DATE TIME UN SET 07 Jun 23...

Page 12: ...o initiate the Remote Call follow the instructions below 1 Negotiate with your installation company when you should initiate the Remote Call 2 With the display showing 3 Enter a Master Code the display will show User Names on 816 840 Only 4 Press NO seven times the display will show 5 Press YES the display will show Until Dialling commences Then Until Connection Then 6 When your installation compa...

Page 13: ... the system is programmed for any code reset enter a user followed by YES if Master or Main code is used the exit tone will sound and the display will show for example 2 Enter the code again to abort the setting 3 The system is now reset Or If a higher level of code is required one of the following displays will be shown Use a Master code to reset the system Or Call the installation company Or Cal...

Page 14: ...r a mains failure the user will have to enter his her code twice in order to operate the system Using LED Keypads This section is dedicated to using LED keypads Twin Seven Segment Setting The System 1 With the display showing U N 2 Enter the User Code followed by YES if Master or Main type code has been used 3 The display will show E and the exit tone will sound Exit the premises via the authorise...

Page 15: ...in type code 2 The display will show S E flashing Press 1 2 or 3 for Part 1 2 or 3 the display will show the E and The two bottom bars if Part 1 has been selected The top and bottom bars if Part 2 has been selected The bottom bar only if Part 3 has been selected 3 The exit tone may or may not be heard dependant on the system settings 4 Exit the premises or retire to an unprotected part of the syst...

Page 16: ...ay will show r E flashing press YES 4 The display will show r 5 Enter the zone number you wish to remove followed by YES 6 The display will show r 7 If you wish to remove other zones return to step 5 Or To escape press 0 the display will show S E flashing 8 Press YES to start setting the system 9 Exit the premises or retire to an unprotected part of the system At the end of the exit time the exit ...

Page 17: ...ress YES the display will show t A press YES if you wish to test all areas or press NO until the area you wish to test is displayed then press YES 5 The display will show t E if all zones are clear 6 Whilst in test mode Pressing 6 will silence the internal sounders Pressing 4 will toggle the strobe On Off Pressing 9 will toggle the Bells On Off 7 When you have finished testing the system press 0 t...

Page 18: ... NO will move back to the previous event Pressing YES will move forwards to the next event Pressing 7 will take you back to the first event of the previous day Pressing 9 will take you forwards to the first event of the next day Pressing 3 will display the Date Time in the format Day of month two digits Month two digits Hour two digits Seconds two digits 7 When you have finished viewing the Log pr...

Page 19: ...e finished press 0 twice to return to the Unset condition Programming User Codes Master code only Please refer to pages 2 34 for details of codes already programmed onto your system 1 With the display showing U C enter a Master code 2 The display will show S E 3 Press NO five times the display will show U C flashing 4 Press YES the display will show U 5 Enter the User number you wish to program 1 ...

Page 20: ...month followed by YES e g 0706 for 7th June 5 The display will show t enter the time using the 24Hr clock followed by YES e g 2330 for 11 30pm 6 The display will show D t flashing 7 If you wish to re program the time return to step 4 Or To return to the Unset condition press 0 User Initiating Remote Access Users should only initiate Remote Access when instructed to do so by the installation compan...

Page 21: ... now reset Or If the display shows Er when you attempt to reset it refer to the programmed reset mode and take the appropriate action as follows Reset Type Action Master Code Use a Master code to set and abort setting Engineer Code Call the installation company Engineer Anti Code Call the installation company Anti Code When you try to set the system make a note of the four digit number given on th...

Page 22: ...ntrol box tamper B B bell box tamper P L Telephone Line fault or coms fail P C Power Cut t 4 Tamper keypad 4 may show 1 to 4 E R Reset is required by a higher level code or an error has occurred whilst programming A C Reset by Anti Code is required S E flashing Do you want to Set r E Remove zones t E Test system H Change Chime U C Program User codes D t Program date time L O Log _ _ Waiting for nu...

Page 23: ...hing zone 4 was removed L R Telephone Line restored P R Power restored D 3 Duress code by user 3 R E Watchdog reset A R Alarm was reset B O bells on 0 1 User code 1 used may show 1 to 47 F 2 Fire activated from alert keys on keypad 2 A 2 Alert activated from alert keys on keypad 2 P 2 Panic activated from alert keys on keypad 2 t F A zone on test has failed R L read Log ...

Page 24: ... 590 591 User Manual System Attributes Zone No Zone Type Location Part Info Example E E Front Door 1 2 1 2 3 4 5 6 7 8 Service Record Date Comments Signature Alarm Reset Type Tamper Reset Type Service Company Tel Fax ...

Page 25: ... 591 User Manual User Chart Please use this chart to indicate what user names have been programmed onto your system and those that are in use In Use Name User 1 User 2 User 3 User 4 User 5 User 6 User 7 User 8 User Notes ...

Page 26: ...of the programming functions Setting the System with ACE 1 Point the keyfob at the ACE receiver and press the button 2 When the exit tone sounds exit the premises in the usual way Part Setting the System with ACE 1 Point the keyfob at the ACE receiver and press the button 2 When you hear the exit tone press the keyfob button again within 3 seconds for Part Set 1 or Press 1 2 or 3 on the receiver k...

Page 27: ... between programming onto the first and subsequent ACE receivers High Security In this mode each keyfob will occupy a User number The number of keyfobs that may be used is limited by the maximum number of user codes available on the system up to a maximum of fourteen 1 Follow the procedure for programming user codes to the point when the user code is entered 2 Point the keyfob at the ACE unit and ...

Page 28: ...Gardiner Technology Ltd Queensway Rochdale Lancashire OL11 1TQ United Kingdom Internet http www gardiner technology com e mail sales gardiner technology com PR5075 Rev1 0 GARDINER TECHNOLOGY ...

Reviews: