


WARRANTY:
GB ELECTRICAL, INC. warrants its
products against defects in workmanship and
materials for 1 year from date of delivery to user.
Chain is not warranted. Warranty does not cover
ordinary wear and tear, abuse, misuse, overloading,
altered products or use of improper fluid.
WARRANTY RETURN PROCEDURE:
When question
of warranty claim arises, send the unit to the nearest
GB Authorized Service Center for inspection,
transportation prepaid. Furnish evidence of purchase
date. If the claim comes under the terms of our
warranty the Authorized Service Center will REPAIR
OR REPLACE PARTS AFFECTED and return the unit
prepaid.
PARTS AND SERVICE:
For quality workmanship and
genuine GB ELECTRICAL parts, select an Authorized
GB Service Center for your repair needs. Only
repairs performed by an Authorized Service Center
displaying the official GB Authorized sign are backed
with full factory warranty. Contact GB Electrical
(414) 352-4160 for the name of the nearest GB
Authorized Service Center.
REPAIR AND SERVICE INSTRUCTIONS: For repair service and parts contact your nearest GB ELECTRICAL
Service Center. The Service Center will provide complete and prompt service on all GB ELECTRICAL products.
GB Electrical, Inc.
An Applied Power Company
6101 N. Baker Road, Milwaukee, WI 53209
Phone: (414) 352-4160
FAX (414) 352-2377
RPS-0036 Rev. A
03/07
The table top should always be lowered
from its vertical position at a slow,
controllable rate. A freely falling table
top will only shorten the life of your
bending table and bender components.
Open the jack release valve only enough
to provide a slow smooth return of your
table top and bender to their horizontal
position. Also, when changing the table
top position from horizontal to vertical or
vertical to horizontal, always check for and
provide proper clearances for table,
bender and conduit.
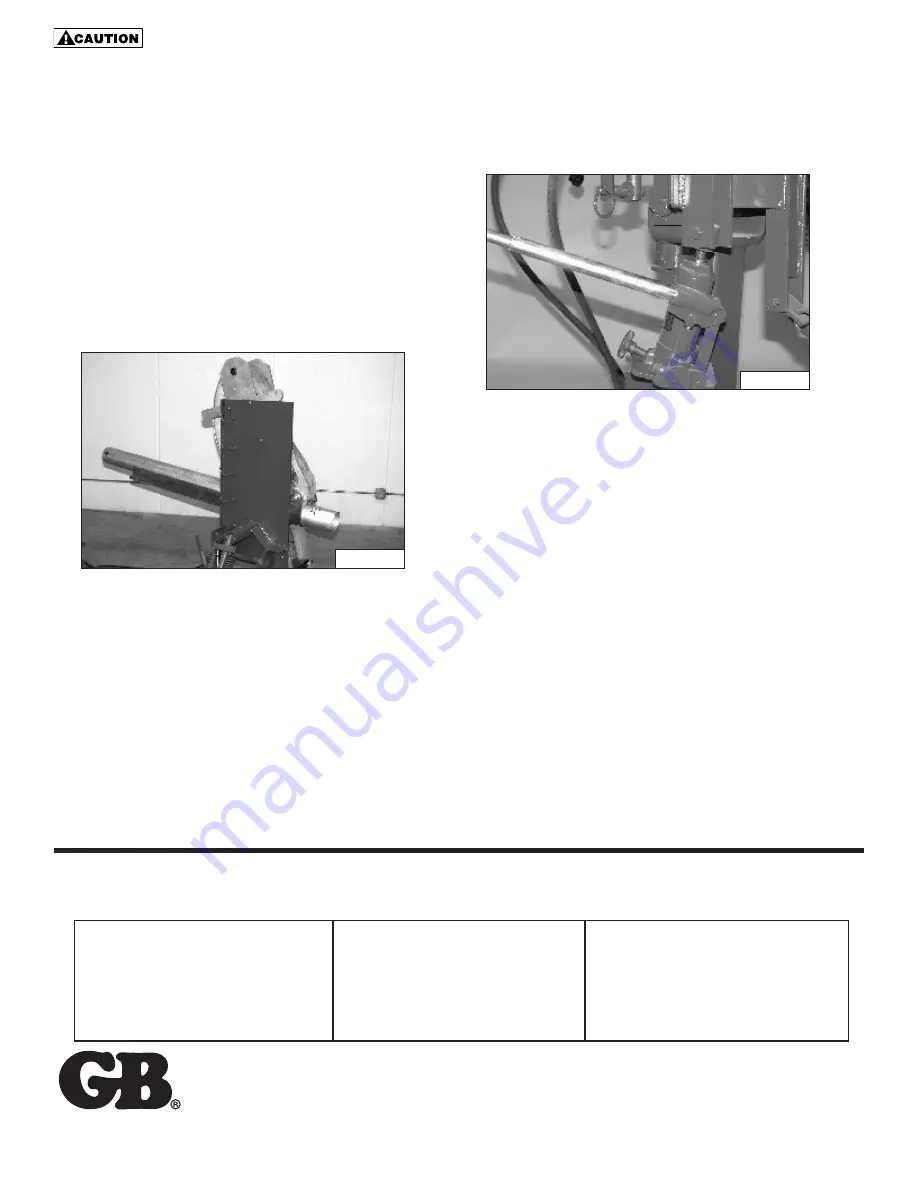
Maintenance of Table
1. To lubricate, apply #20 oil to all pivot points as
indicated in Fig. 10 at least once every month.
2. Retorque the four (4) mounting screws, indicated in
Fig. 10, monthly, to 50 ft. lbs. Visually inspect all
fasteners daily and retorque where necessary.
3. Periodically inspect table for worn and/or damaged
parts and replace where necessary.
Maintenance of Jack
Filling reservoir - with table top in horizontal position,
remove the filler plug as shown in Fig. 11. Add Enerpac
Hydraulic Oil until oil level is up to filler hole. Replace
filler plug. DO NOT use brake fluid, alcohol, glycerine,
and similar fluids. These fluids will damage packings and
corrode metallic parts.
Purging air - if the oil supply is low or if the table was on
its side, the pump may have become air bound. To purge
air from the system, proceed as follows:
1. Put table top in horizontal position.
2. Remove filler plug and check oil level (do not replace
filler plug).
3. Open release valve and operate pump several times.
4. Close the release valve, operate pump and check to
see that the table top raises. If the table top does not
raise, repeat steps 3 and 4.
5. If table top does not raise, lower it to its horizontal
position. Re-check the oil level and replace filler plug.
Figure 10
Figure 11


