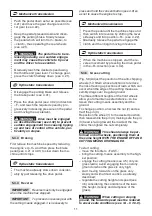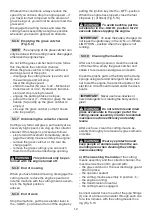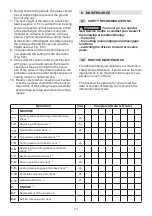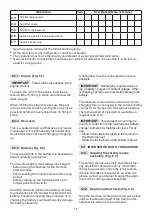
7
the spokes directed towards the seat.
Fit the spacer (6) and fasten the steering wheel
in place using the screws supplied (7), in the
indicated order.
Fit the steering wheel cover (8) clicking the three
fasteners into place.
• Steering wheel Type “Il” (Fig. 3.2)
Put the machine on a flat surface and straighten
the front wheels.
Mount the hub (1) on the shaft (2), making sure
that the plug (3) is correctly fitted into the hub
seat.
Fit the dashboard cover (4) clicking the seven
fasteners into place.
Fit the steering wheel (5) onto the hub (1) with
the spokes pointing in the proper direction.
3.3 FITTING THE SEAT (Fig. 3.3)
Fit the seat (1) onto the plate (2) using the
screws (3).
3.4 ASSEMBLY AND CONNECTING
HE BATTERY (Fig. 3.4)
The battery (1) is housed under the seat and
secured by a spring (2).
First connect the red wire (3) to the positive pole
(+) and then the black wire (4) to the negative
pole (–), using the screws supplied as shown.
Apply silicone grease to the terminals and
check that the protective cap for the red wire (5)
is in place.
IMPORTANT
Always fully charge the bat-
tery according to the instructions in the battery
booklet.
IMPORTANT
To prevent the safety device in
the electronic circuit board from cutting in, never
start the engine until the battery is fully charged!
3.5 MOUNTING THE FRONT BUMPER
(if provided)
• Bumper Type “I” (Fig. 3.5)
Mount the front bumper (1) on the bottom of the
frame (2) using the four screws (3).
• Bumper Type “Il” (Fig. 3.6)
Fit the two brackets (1) and (2) to the bottom of
the frame (3) and fully tighten the screws (4).
Attach the front bumper (5) to the brackets (1)
and (2) using the screws (6) and nuts (7).
3.6 ASSEMBLY AND COMPLETING THE
REAR PLATE (Fig. 3.7)
Assemble the two lower brackets (1) and (2), fol
-
lowing the assembly direction as shown in the
illustration, and fasten them with the screws (3)
and nuts (4), tightening them completely.
Remove the two screws (8), which will be used
later.
Assemble the lower part (5) of the rear plate and
fasten it to the lower brackets with the screws
(6) and bolts (7), without tightening them com
-
pletely.
Finish fastening the lower part (5) of the rear
plate, completely tightening the two central
screws (8) that you previously removed and the
four upper screws (9); then tighten the two lower
nuts (7) completely.
Insert the lever (11) of the “grass catcher full”
indicator into its seat (12) and push it down until
you hear a click.
Assemble the two grass catcher brackets (21)
and (22), following the assembly direction as
shown in the illustration, and fasten them with
the screws (23) and snap washers (24), tighten
-
ing them firmly.
4. CONTROLS AND INSTRUMENTS
4.1 STEERING WHEEL (Fig. 4.1 no.1)
Turns the front wheels.
4.2 THROTTLE LEVER (Fig. 4.1 no.2)
Regulates the engine’s r.p.m. The positions are
indicated on the plate showing the following
symbols:
«CHOKE» cold start
«SLOW» for minimum engine speed
«FAST» for maximum engine speed
– The «CHOKE» position enriches the mixture
so it must only be used for the time necessary
for cold starts.
– When moving from one area to another, put
the lever in a position between «SLOW» and
«FAST».
– When cutting, shift into «FAST”.
4.2a
CHOKE CONTROL (if fitted)
(Fig. 4.1 no.2a)
It enriches the mixture and must only be used
for the necessary time for cold starts.
Summary of Contents for GTG 84 RB
Page 2: ...GTG 84 RB MP 84...
Page 5: ...iii 1 2 3 4 2 3 3 1 1 3 3 2 OK NO 1 2 3 4 5 3 1 3 2 3 3 3 5 3 6 3 4 5 1 6 7 8...
Page 6: ...iv 1 2 3 3 4 4 4 1 8 8 11 12 5 7 6 7 6 24 23 21 24 23 22 5 5 8 8 9 9 9 9 3 7...
Page 7: ...v 4 2 4 3 1 1 15 x 5 00 6 13 x 5 00 6 5 1 5 2 5 4 5 3...
Page 8: ...vi 1 3 2 1 1 A 5 5 5 7 5 8 5 6 1 3 2 1a 2 1 1 1 2 3 1 5 9 5 13 5 10 5 11 5 12...
Page 9: ...vii 1 2 3 1 1 1 2 1 3 1 3 5 14 6 1 6 2 5 15 1 2 6 3 6 4 6 5 6 6...
Page 10: ...viii 1 1 6 7 m a x 2 4 5 N 2 5 k g m a x 9 8 0 N 1 0 0 k g 8 1...
Page 96: ......


