background image

96

POLSKI

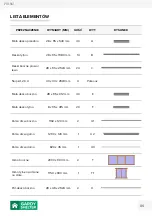
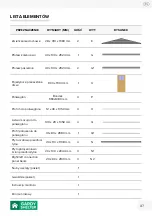
WYT.

PRZEZNACZENIE

WYMIARY (MM)

ILOŚĆ

P

Poliwęglan

Bandes 990x1080

6

H

Profil h do poliwęglanu

12 x 40 x 1050 mm

4

Q

Listwa mocująca do poliwęglanu

20 x 100 x 1050 mm

4

Q1

Profil połączenia do poliwęglanu

41 x 83 x 2980 mm

1

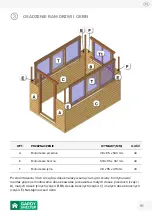
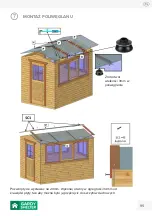
Zamontuj pierwszy panel z poliwęglanu (część P). Zachowaj ostrożność, jeśli możesz pracuj 

w rękawiczkach i uważaj by nie zaciąć się w dłonie. Kontunuuj w kierunku tyłu szklarni, 

układając kolejne panele. Wsunąć profil w kształcie H między każdą płytę i przykręcić do 

płatwi. Umieść profil łączący kalenicę i powtórz tą samą operację dla lewej strony.

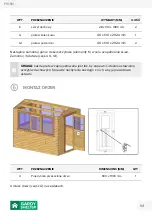
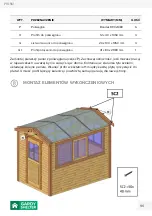
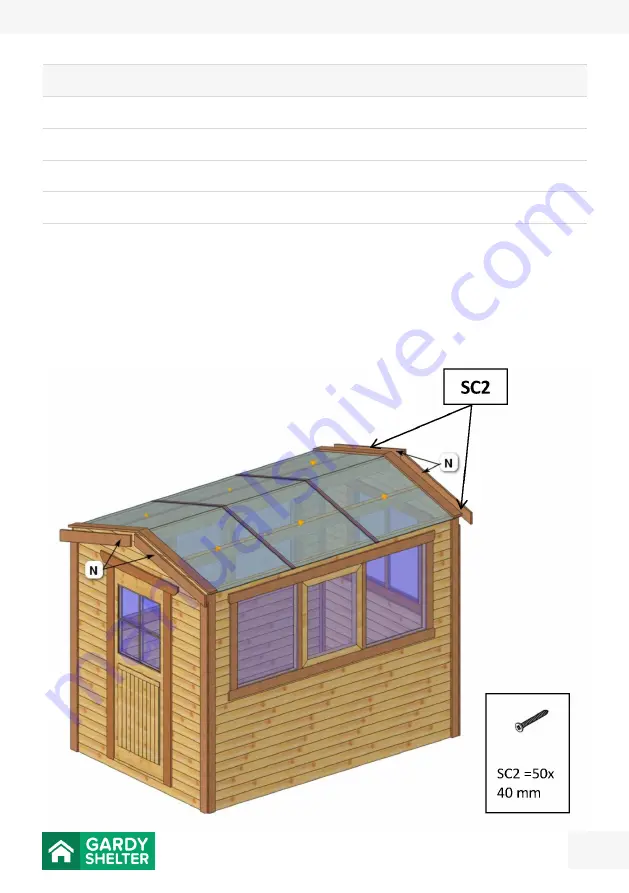
MONTAŻ ELEMENTÓW WYKOŃCZENIOWYCH

Summary of Contents for 7022

Page 1: ...STRUCTIONS Wood greenhouse 6m AUFBAUANLEITUNG Gew chshaus aus Holz 6m INSTRUCCIONES DE INSTALACI N Invernadero de jard n de madera de 6m ISTRUZIONI DI MONTAGGIO Serra da giardino in legno 6m INSTRUKCJ...

Page 2: ...cts the wood This product must be UV resistant and must guarantee the wood protection against humidity and biological attacks Panels must be dry before assembly ATTENTION Do not clog the joints in the...

Page 3: ...your greenhouse Just like your home stain is very important for your garden greenhouse All wooden parts require maintenance good maintenance will give you more pleasure We recommend the following tre...

Page 4: ...the construction The openings left by falling knots should be filled with wood filler 3 The warranty doesn t cover defects which are as a result of Not level foundation Lack or insufficiency of a coat...

Page 5: ...anty period for the greenhouse as a whole 8 The warranty begins on the day of purchase date indicated on the purchase order for 2 years for raw greenhouses and 5 years for treated greenhouses 9 Compla...

Page 6: ...eft 28 x 95 x 2924 mm 24 C Columns 1 2 3 4 40 x 40 x 2148 mm 4 Poteaux Little side plank 28 x 95 x 312 mm 40 E Little back plank 8 x 95 x 415 mm 20 F Side door frame 1160 x 120 mm 2 U1 Upper door fram...

Page 7: ...ate panel Bandes 990x1080 mm 4 P Polycarbonate h profile 12 x 40 x 1050 mm 4 H Polycarbonate fixing blade 100 x 20 x 1050 mm 4 Q Polycarbonate connection profile 41 x 83 x 2980 mm 1 Q1 Back front edge...

Page 8: ...8 ENGLISH BASE FRAME ASSEMBLY NECESSARY TOOLS COLUMN 1 COLUMN 2 COLUMN 3 COLUMN 4...

Page 9: ...0 x 2148 mm 4 Start with lower and front back planks parts B C by positioning plank s lug upward Form a base frame and screw them onto the columns To install planks use a rubber hammer and an assembly...

Page 10: ...2 Upper door frame 1290 x 120 mm 1 U3 Lower door frame 820 x 45 mm 1 T Side window 2300 x 900 mm 2 T1 Fixed rear window 1150 x 900 mm 1 To assemble the door frame the RIGHT and LEFT side frames parts...

Page 11: ...40 E Little side plank 128 x 95 x 312 mm 40 F Little back plank 28 x 95 x 415 mm 20 After assembling 3 or 4 rows of planks slide the door frame into the wall Then put the planks one by one little fron...

Page 12: ...H WALL PANELS ASSEMBLY MARQUE DESIGNATION DIMENSIONS MM QTY X Side half plank 28 x 48 x 2924 mm 2 Continue by assembling the planks one by one front planks parts B side planks parts C X and back plank...

Page 13: ...13 GB UPPER PART ASSEMBLY Make a hole at 10cm of the end of the gable et put 1 screw Ridges have to be screwed from the outside on each gable side...

Page 14: ...TION DIMENSIONS MM QTY K Gable 28 x 310 x 1980 mm 2 G Upper ridge beam 40 x 130 x 2924 mm 1 G1 Lateral ridge beam 40 x 130 x 2924 mm 2 Put gables parts K to end the panel and after put the ridge beams...

Page 15: ...B POLYCARBONATE PANEL ASSEMBLY Make a 3mm hole into the polycarbonate panel Let the board protrude by 20 mm Make pants 34 mm from the edge of the floor so that the assembly can be screwed onto the gab...

Page 16: ...050 mm 4 Q1 Polycarbonate connection profile 41 x 83 x 2980 mm 1 Place the first polycarbonate panel part P Handle it with care preferably with gloves Continue with the others polycarbonate panels sli...

Page 17: ...anel Beam 20 x 100 x 2044 mm 4 N2 Right Left Connection Panel Beam 20 x 80 x 2130 mm 4 Then assemble back front edge beam back front connection panel beam and right left connection panel beam parts N...

Page 18: ...TRAITEMENT DES MADRIERS Avant de commencer monter vous devez traiter les bois bruts l aide d une lasure ou de tout autre produit prot geant le bois de fa on optimale Ce produit doit tre r sistant aux...

Page 19: ...et maintenez les loin des chelles des outils et autres l ments de la serre Ne les laissez pas monter sur la serre ENTRETIEN R NOVATION MAINTENANCE Le traitement du bois prolongera la dur e de vie de v...

Page 20: ...mb s du bord des planches mais qui sont recouverts lors du montage Les d colorations du bois Les petites d chirures sur les champs Les fissures de retrait Les poches de r sine Les distorsions et d for...

Page 21: ...es du droit contraignant 7 Les cas relevant de la garantie ne conduisent pas au prolongement de la p riode de garantie et ne constituent pas davantage le d but d une nouvelle p riode de garantie La p...

Page 22: ...x 2924 mm 24 C Poteaux 1 2 3 4 40 x 40 x 2148 mm 4 Poteaux Petit madrier lat ral 28 x 95 x 312 mm 40 E Petit madrier arri re 8 x 95 x 415 mm 20 F Cadre de porte lat ral 1160 x 120 mm 2 U1 Cadre de por...

Page 23: ...90x1080 mm 4 P Profil h pour polycarbonate 12 x 40 x 1050 mm 4 H Latte de fixation du polycarbonate 100 x 20 x 1050 mm 4 Q Profil de raccord du polycarbonate 41 x 83 x 2980 mm 1 Q1 Planche de rive ava...

Page 24: ...24 FRAN AIS POSE DE LA BASE OUTILS N CESSAIRES POTEAU1 POTEAU 2 POTEAU 3 POTEAU 4...

Page 25: ...arri re pi ces B C en positionnant l ergot des madriers vers le haut Ensuite vous devez les assembler pour former un cadre de base et les visser sur les poteaux d angle Pour installer les madriers uti...

Page 26: ...p rieur 1290 x 120 mm 1 U3 Cadre de porte inf rieur 820 x 45 mm 1 T Fen tre lat rale 2300 x 900 mm 2 T1 Fen tre arri re fixe 1150 x 900 mm 1 Montez le cadre de la porte ainsi les cadres lat raux DROIT...

Page 27: ...arri re 28 x 95 x 415 mm 20 Apr s avoir assembl 3 ou 4 rang es de madriers glissez le cadre de porte dans le mur Continuez le montage en assemblant les madriers l ment par l ment les petits madriers...

Page 28: ...RE DESIGNATION DIMENSIONS MM QTY X Demi madrier lat ral 28 x 48 x 2924 mm 2 Continuez le montage en assemblant les madriers l ment par l ment les madriers avant pi ces B les madriers lat raux pi ces C...

Page 29: ...29 FR POSE DES L MENTS SUP RIEURS Faire un trou a 10 cm de l extr mit du pignon et mettre 1 vis Les pannes doivent tre viss es depuis l ext rieur sur chaque c t des pignons...

Page 30: ...K Pignon 28 x 310 x 1980 mm 2 G Panne fa tage 40 x 130 x 2924 mm 1 G1 Panne interm diaire 40 x 130 x 2924 mm 2 Assemblez ensuite les madriers sup rieurs du pignon pi ces K pour terminer les parois Met...

Page 31: ...31 FR POSE DU POLYCARBONATE Faire un trou de 3mm dans le polycarbonate Laissez d passer la planche de 20 mm Faire des trous 34 mm du bord du plancher afin de pouvoir visser l ensemble sur les pignons...

Page 32: ...83 x 2980 mm 1 Posez la premi re plaque de polycarbonate pi ce P Manipulez la avec pr caution de pr f rence avec des gants pour ne pas vous couper les mains Puis continuer vers l arri re de la serre e...

Page 33: ...de paroi droite gauche 20 x 80 x 2130 mm 4 Continuez par monter les planches de rives avant et arri re les planches de raccord de parois avant et arri re et les planches de raccord de parois lat rale...

Page 34: ...sollten Sie das rohe Holz mit einer Holzlasur oder einem anderen Holzschutzmittel behandeln Dieses Produkt sollte UV best ndig sein und das Holz vor Feuchtigkeit und biologischem Schaden sch tzen Die...

Page 35: ...sur auch f r Ihr Gartengew chshaus sehr wichtig Alle Holzteile m ssen gewartet werden Auf lange Sicht wird eine gute Instandhaltung f r mehr Freude am Produkt sorgen Wir empfehlen die folgende Behandl...

Page 36: ...bilit t der Konstruktion nicht nachteilig beeinflussen L cher die durch herausfallende ste entstehen m ssen mit Zellstoff gef llt werden 3 Die Garantie erstreckt sich nicht auf M ngel die infolge von...

Page 37: ...te oder ausgetauschte Teile l uft gleichzeitig mit der Garantiezeit f r das Gew chshaus als Ganzes ab 8 Die Garantie beginnt am Tag des Kaufs Datum auf dem Kaufbeleg angegeben und dauert 2 Jahre f r u...

Page 38: ...t 28 x 95 x 2924 mm 24 C Pfosten 1 2 3 4 40 x 40 x 2148 mm 4 Poteaux Kleines Seitenbrett 28 x 95 x 312 mm 40 E Kleines R ckwandbrett 8 x 95 x 415 mm 20 F Seitent rrahmen 1160 x 120 mm 2 U1 Oberer T rr...

Page 39: ...es 990x1080 mm 4 P Profil H f r Polycarbonat 12 x 40 x 1050 mm 4 H Befestigungsleiste f r Polycarbonat 100 x 20 x 1050 mm 4 Q Polycarbonat Verbindungsprofil 41 x 83 x 2980 mm 1 Q1 Vordere und hintere...

Page 40: ...40 DEUTSCH POSITION DER BASIS BEN TIGTE WERKZEUGE PFOSTEN 1 PFOSTEN 2 PFOSTEN 3 PFOSTEN 4...

Page 41: ...Brettern Teile B C so dass die Laschen der Bretter nach oben zeigen Dann werden sie zu einem Grundrahmen zusammengesetzt und mit den Eckpfosten verschraubt Verwenden Sie zum Verlegen der Bretter vorz...

Page 42: ...T rrahmen 1290 x 120 mm 1 U3 Unterer T rrahmen 820 x 45 mm 1 T Seitenfenster 2300 x 900 mm 2 T1 Festes R ckfenster 1150 x 900 mm 1 Montieren Sie den T rrahmen wie folgt Der rechte und linke Seitenrahm...

Page 43: ...mm 20 Nach dem Zusammenbau von 3 oder 4 Bretterreihen schieben Sie den T rrahmen in die Wand Setzen Sie den Zusammenbau fort indem Sie die Bretter St ck f r St ck zusammensetzen die kleinen vorderen...

Page 44: ...UNG GR E MM MENGE X Halbes Seitenbrett 28 x 48 x 2924 mm 2 Setzen Sie den Zusammenbau fort indem Sie die Bretter St ck f r St ck zusammensetzen die vorderen Bretter B St cke die seitlichen Bretter C X...

Page 45: ...45 DE EINBAU DER OBEREN ELEMENTE Bohren Sie ein Loch 10 cm vom Ende des Giebels und setzen Sie 1 Schraube ein Die Pfetten m ssen auf jeder Seite von au en an den Giebel angeschraubt werden...

Page 46: ...28 x 310 x 1980 mm 2 G Firstpfette 40 x 130 x 2924 mm 1 G1 Zwischenpfette 40 x 130 x 2924 mm 2 Montieren Sie dann die oberen Giebelbretter K St cke um die W nde zu vervollst ndigen Montieren Sie die 3...

Page 47: ...DES POLYCARBONATS Machen Sie ein 3 mm Loch in das Polycarbonat Lassen Sie das Brett 20 mm hervorstehen Machen Sie L cher 34 mm von der Bretterkante entfernt damit die Einheit auf die Giebel geschraubt...

Page 48: ...ste Polycarbonatplatte Teil P Gehen Sie vorsichtig damit um vorzugsweise mit Handschuhen um sich nicht in die H nde zu schneiden Anschlie end geht es weiter zur R ckseite des Gew chshauses wo die n ch...

Page 49: ...te 20 x 80 x 2130 mm 4 Fahren Sie fort indem Sie die vorderen und hinteren Randbretter die Verbindungsbretter der Vorder und R ckwand sowie die Verbindungsbretter der rechten und linken Seitenwand mon...

Page 50: ...e o cualquier otro producto que proteja de manera ptima la madera Este producto debe ser resistente a los rayos UV y debe garantizar la protecci n de la madera contra la humedad y los ataques biol gic...

Page 51: ...la madera prolongar la vida til de su invernadero Al igual que en su hogar el tinte es muy importante para el invernadero de su jard n Todas las piezas de madera requieren mantenimiento A la larga un...

Page 52: ...Distorsiones y deformaciones de la madera Siempre que estas anomal as no influyan negativamente en la estabilidad de la construcci n Las aberturas que dejan los nudos que caen deben taparse con masill...

Page 53: ...o reemplazadas expira al mismo tiempo que el per odo de garant a para el invernadero en su conjunto 8 La garant a comienza el d a de la compra fecha indicada en la orden de compra y dura 2 a os para...

Page 54: ...x 2924 mm 24 C Puestos 1 2 3 4 40 x 40 x 2148 mm 4 Poteaux Tabl n lateral peque o 28 x 95 x 312 mm 40 E Tabla trasera peque a 8 x 95 x 415 mm 20 F Marco de puerta lateral 1160 x 120 mm 2 U1 Marco de...

Page 55: ...erfil h para policarbonato 12 x 40 x 1050 mm 4 H List n de fijaci n de policarbonato 100 x 20 x 1050 mm 4 Q Perfil de conexi n de policarbonato 41 x 83 x 2980 mm 1 Q1 Tablero de la fascia delantera tr...

Page 56: ...56 ESPA OL COLOCANDO LA BASE HERRAMIENTAS NECESARIAS PUESTO 1 PUESTO 2 PUESTO 3 PUESTO4...

Page 57: ...eros traseros partes B C colocando la leng eta de los tablones hacia arriba Luego debe juntarlos para formar un marco base y atornillarlos a los postes de las esquinas Para instalar los tablones utili...

Page 58: ...1290 x 120 mm 1 U3 Marco de puerta inferior 820 x 45 mm 1 T Ventana lateral 2300 x 900 mm 2 T1 Ventana trasera fija 1150 x 900 mm 1 Monte el marco de la puerta de la siguiente manera los marcos latera...

Page 59: ...eque a 28 x 95 x 415 mm 20 Despu s de ensamblar 3 o 4 filas de tablas deslice el marco de la puerta en la pared Continuar el montaje ensamblando los tablones elemento por elemento los tablones frontal...

Page 60: ...RCA DESIGNACI N DIMENSIONES MM CANT X Media plancha lateral 28 x 48 x 2924 mm 2 Continuar el montaje ensamblando las lamas elemento por elemento las lamas delanteras partes B las lamas laterales parte...

Page 61: ...61 ES POSICI N DE ELEMENTOS SUPERIORES Hacer un agujero a 10 cm del extremo del pi n y poner 1 tornillo Las correas deben atornillarse desde el exterior a cada lado de los frontones...

Page 62: ...ANT K Pi n 28 x 310 x 1980 mm 2 G Falla de la cresta 40 x 130 x 2924 mm 1 G1 Falla intermedia 40 x 130 x 2924 mm 2 Luego ensamble los tablones superiores del hastial piezas K para completar las parede...

Page 63: ...ACI N DEL POLICARBONATO Haga un agujero de 3 mm en el policarbonato Deje que la tabla sobresalga 20 mm Hacer unos agujeros a 34 mm del borde de la placa de yeso para poder atornillar el conjunto a los...

Page 64: ...2980 mm 1 Coloque la primera hoja de policarbonato parte P Man jelo con cuidado preferiblemente con guantes para no cortarse las manos Luego contin e hacia la parte trasera del invernadero colocando l...

Page 65: ...i n de pared derecha izquierda 20 x 80 x 2130 mm 4 Contin e ensamblando las placas de los bordes delantero y trasero las placas de conexi n de la pared delantera y trasera y las placas de conexi n de...

Page 66: ...mpre al di sopra del livello del terreno PRETRATTAMENTO DELLE TAVOLE Prima di iniziare a salire si dovrebbe trattare il legno grezzo con una macchia di legno o altro conservante per legno per dargli u...

Page 67: ...scale attrezzi e altre parti della serra Non lasciateli salire sulla serra MANUTENZIONE RISTRUTTURAZIONE MANUTENZIONE Ristrutturazione manutenzione Trattare il legno prolungher la vita della vostra se...

Page 68: ...o Nodi che sono cresciuti fuori dal bosco Nodi che sono caduti dal bordo delle tavole ma che sono coperti durante il montaggio Scolorimento del legno Piccole lacerazioni sul campo Cricche da ritiro Ta...

Page 69: ...entrano nella garanzia non comportano un estensione del periodo di garanzia n costituiscono l inizio di un nuovo periodo di garanzia Il periodo di garanzia per le parti riparate o sostituite scade con...

Page 70: ...m 24 C Pali 1 2 3 4 40 x 40 x 2148 mm 4 Poteaux Tavolato laterale piccolo 28 x 95 x 312 mm 40 E Tavolato posteriore piccolo 8 x 95 x 415 mm 20 F Telaio della porta laterale 1160 x 120 mm 2 U1 Telaio s...

Page 71: ...ilo h per policarbonato 12 x 40 x 1050 mm 4 H Nastro di montaggio in policarbonato 100 x 20 x 1050 mm 4 Q Profilo di collegamento in policarbonato 41 x 83 x 2980 mm 1 Q1 Pannello frontale e posteriore...

Page 72: ...72 ITALIANO POSA DELLA BASE STRUMENTI NECESSARI PALO 1 PALO 2 PALO 3 PALO 4...

Page 73: ...i posteriori parti B C con le alette delle tavole rivolte verso l alto Poi bisogna assemblarli per formare un telaio di base e avvitarli ai montanti d angolo Per installare le tavole utilizzare prefer...

Page 74: ...ta 1290 x 120 mm 1 U3 Telaio inferiore della porta 820 x 45 mm 1 T Finestra laterale 2300 x 900 mm 2 T1 Finestra posteriore fissa 1150 x 900 mm 1 Assemblare il telaio della porta come segue i telai la...

Page 75: ...to posteriore piccolo 28 x 95 x 415 mm 20 Dopo aver montato 3 o 4 file di assi far scorrere il telaio della porta nella parete Continuare il montaggio assemblando le tavole pezzo per pezzo le tavole p...

Page 76: ...MARCA DESIGNAZIONE DIMENSIONE MM QT X Mezza tavola laterale 28 x 48 x 2924 mm 2 Continuare il montaggio assemblando le tavole pezzo per pezzo le tavole anteriori pezzi B le tavole laterali pezzi C pez...

Page 77: ...77 I POSA DEGLI ELEMENTI SUPERIORI Praticare un foro a 10 cm dall estremit del palo e mettere 1 vite Gli arcarecci devono essere avvitati dall esterno su ogni lato dei pignoni...

Page 78: ...K pignone 28 x 310 x 1980 mm 2 G arcareccio di colmo 40 x 130 x 2924 mm 1 G1 guasto intermedio 40 x 130 x 2924 mm 2 Quindi montare le tavole del timpano superiore pezzi K per completare le pareti Mon...

Page 79: ...INSTALLAZIONE DEL POLICARBONATO Praticare un foro di 3 mm nel policarbonato Lasciare che il bordo sporga di 20 mm Praticare dei fori a 34 mm dal bordo in modo che lo stesso possa essere avvitato ai p...

Page 80: ...2980 mm 1 Installare la prima piastra in policarbonato parte P Maneggiarlo con cura preferibilmente con i guanti per evitare di tagliarsi le mani Poi si prosegue verso il retro della serra posando le...

Page 81: ...a parete destra sinistra 20 x 80 x 2130 mm 4 Continuare montando i pannelli di rivestimento anteriori e posteriori i pannelli di collegamento delle pareti anteriore e posteriore e i pannelli di colle...

Page 82: ...yst pieniem do monta u zaimpregnuj elementy z surowego drewna lub zabezpiecz je produktami nadaj cymi mu trwa o Wybierz produkt zabezpieczaj cy drewno przed promieniowaniem UV i wilgoci oraz uszkodzen...

Page 83: ...element w szklarni Nie pozw l dzieciom wspina si na szklarni KONSERWACJA SZKLARNI RENOVATION MAINTENANCE By zapewni szklarni trwa o na lata wszystkie jej drewniane elementy powinny zosta zaimpregnowan...

Page 84: ...kni cia w drewnie P kni cia skurczowe Kieszenie ywiczne Zniekszta cenia i wypaczenia drewna Gwarancja nie obejmuje tych wad tak d ugo jak nie wp ywaj one negatywnie na stabilno konstrukcji Otwory pozo...

Page 85: ...ie stanowi rozpocz cia nowego okresu gwarancji Okres gwarancji na naprawione lub wymienione cz ci wygasa r wnocze nie z okresem gwarancji na szklarni jako ca o 8 Okres gwarancji rozpoczyna si w dniu z...

Page 86: ...a 28 x 95 x 2924 mm 24 C S upki 1 2 3 4 40 x 40 x 2148 mm 4 Poteaux Ma a deska boczna 28 x 95 x 312 mm 40 E Ma a deska tylna 8 x 95 x 415 mm 20 F Rama drzwi boczna 1160 x 120 mm 2 U1 Rama drzwi g rna...

Page 87: ...oliw glan Bandes 990x1080 mm 4 P Profil h do poliw glanu 12 x 40 x 1050 mm 4 H Listwa mocuj ca do poliw glanu 100 x 20 x 1050 mm 4 Q Profil po czenia do poliw glanu 41 x 83 x 2980 mm 1 Q1 P yta czo ow...

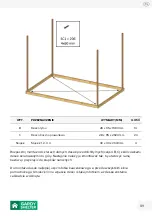
Page 88: ...88 POLSKI PO O ENIE BAZY POTRZEBNE NARZ DZIA S UPEK 1 S UPEK 2 S UPEK 3 S UPEK 4...

Page 89: ...pocznij monta od czterech dolnych desek przednich tylnych cz ci B C z ko c wkami desek skierowanymi do g ry Nast pnie nale y je zmontowa tak by utworzy ram bazow i przykr ci do s upk w naro nych Do mo...

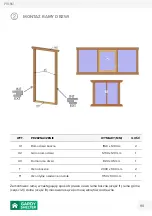
Page 90: ...0 mm 2 U2 G rna rama drzwi 1290 x 120 mm 1 U3 Dolna rama drzwi 820 x 45 mm 1 T Okno boczne 2300 x 900 mm 2 T1 Okno tylne osadzone na sta e 1150 x 900 mm 1 Zamontowa ram w nast puj cy spos b prawa i le...

Page 91: ...czna 128 x 95 x 312 mm 40 F Ma a deska tylna 28 x 95 x 415 mm 20 Po zmontowaniu 3 lub 4 rz d w desek nale y wsun ram do ciany Kontynuowa monta poprzez montowanie desek kawa ek po kawa ku ma ych desek...

Page 92: ...A CIAN WYT PRZEZNACZENIE WYMIARY MM ILO X P deska boczna 28 x 48 x 2924 mm 2 Kontynuuj monta sk adaj c deski kawa ek po kawa ku deski przednie elementy B deski boczne elementy C elementy X i deski tyl...

Page 93: ...93 PL MONTA ELEMENT W DACHOWYCH Zr b dziur 10 cm od kraw dzi szczytu dachowego i w 1 rub P atwie musz by przykr cone od zewn trz po obu stronach szczyt w...

Page 94: ...zyt dachowy 28 x 310 x 1980 mm 2 G p atew kalenicowa 40 x 130 x 2924 mm 1 G1 p atew po rednia 40 x 130 x 2924 mm 2 Nast pnie zamontuj g rne deski szczytowe elementy K w celu uzupe nienia cian Zamontuj...

Page 95: ...95 PL MONTA POLIW GLANU Zr b otw r wielko ci 3mm w poliw glanie Pozw l p ycie wystawa na 20mm Wykonaj otwory w ogleg o ci 34mm od kraw dzi p yty tak aby mo na by o j przykr ci do szczyt w dachowych...

Page 96: ...ia do poliw glanu 41 x 83 x 2980 mm 1 Zamontuj pierwszy panel z poliw glanu cz P Zachowaj ostro no je li mo esz pracuj w r kawiczkach i uwa aj by nie zaci si w d onie Kontunuuj w kierunku ty u szklarn...

Page 97: ...x 100 x 2044 mm 4 N2 prawy lewy panel po czeniowy 20 x 80 x 2130 mm 4 Kontynuuj monta przednich i tylnych p yt maskuj cych p yt cz cych przedni i tyln cian oraz p yt cz cych praw i lew cian boczn cz c...

Page 98: ......

Reviews: