30
After addressing, rigging, powering, and cabling the fixture, the controller should
be connected and turned on. The DMX512 protocol of the fixture
(channel/attribute assignments) should be written into the controller. It can either
be taken from a built-in fixture library or built from scratch (see controller user
manual for details). After the controller has been patched, then you should be
able to take control of each fixture and change its parameters. Begin by making
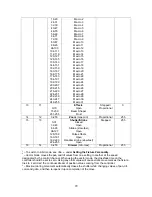
sure all of the lamps are on. Select all fixtures, and using the control channel
(channel 6 in 16-bit mode, channel 4 in 8-bit mode), set the value between 128-
139. You should see each fixture reset itself and in a couple of minutes you
should see enough light leakage to know the lamps are on. If a fixture does not
reset, check the power, data and control.
Once the lamps have all been turned on, test the controller/fixtures configuration
to make sure you have control of each fixture. Select each fixture one at a time in
sequence, make sure the shutter is open and the dimmer is at full, then check
pan and tilt to make sure you have control of each fixture.
You are now ready to begin programming.
Summary of Contents for GKH 575
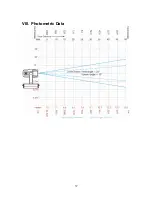
Page 37: ...37 VIII Photometric Data...
Page 38: ...38...


