English
32/124
English
33/124
Do not use the machine if it is damaged or not well
regulated.
Use this machine to do jobs for which it has been
designed. Any other use could be dangerous to the
end user, for the machine and to other people, animals
and things that are nearby.
Check that the machine is correctly mounted with both
tubes and the catcher.
Verify that:
- The machine completely and look for loose parts
(screws, nuts, etc.) and damages.
- Press, repair or replace everything you need before
using the machine
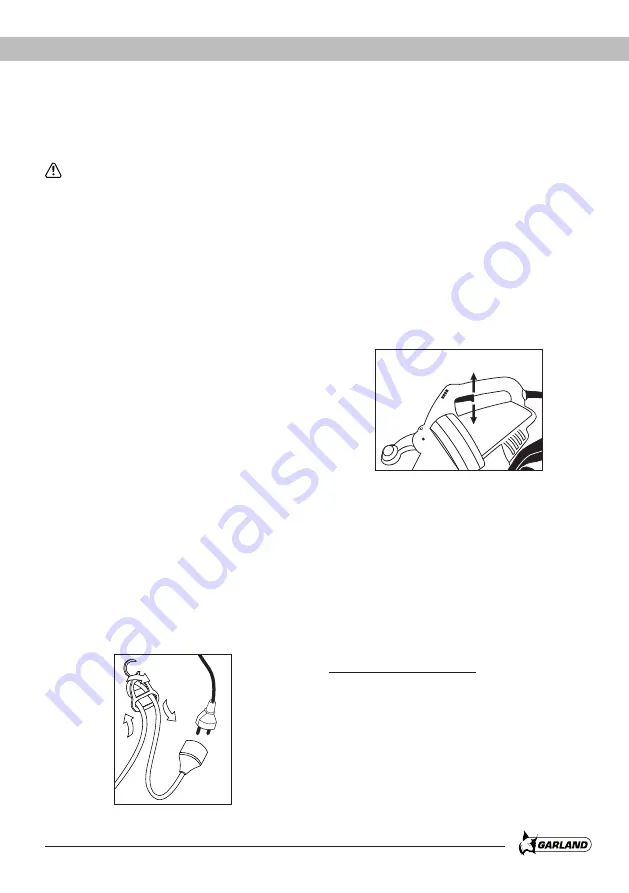
6.3.1. FIXING CABLE EXTENSION
Only use cable extensions that are homologated for
outdoor use.
The cable section must be at least 1.5mm and the
cable extension should never be longer than 25m and
must be completely unrolled before starting to work.
Fix the cable by inserting it on the hook provided to
this effect at the back of the machine.
Ensure that the cable and the plug are in a perfect
state and that they comply with the machines
prerequisites.
Place the cable elongator in such a way that it does
not get tangled with branches and other cutting edges
and also ensure it is not dangling across the working
area. The cable elongator must always be behind the
machine and the end user.
6.3.2. START AND STOPPAGE
Start up of the machine:
Press the switch (¨I¨).
Stopping the machine:
Release the switch (¨O¨).
6.3.3. CHECKING POINTS AFTER START UP
It is important to ensure that there are no loose parts
and to check the temperature of the machine. If you
detect anything strange, stop immediately and check
carefully. In case of any anomaly or problem take the
machine to your nearest service agent for repair.
Never carry on working if the machine does not seem
to work properly.
6.4. OVERLOAD PROTECTION
This machines has a security switch that will
disconnect the machine should there be an
overcharge of work. If the machine does not start, it
could be because the machine has the safety switch
activated. Should this be the case, disconnect the
machine and wait for 15 minutes before restarting the
machine.
I
0
Summary of Contents for GAS 259 E
Page 41: ...English 41 124 NOTES...
Page 103: ...103 124 2 2 1 18 2 2...
Page 104: ...104 124 2 2 1...
Page 105: ...105 124 2 2 2 Raynaud s 2 3 15...
Page 106: ...106 124 2 4 230v 50Hz 30mA 1 5mm2 25...
Page 107: ...107 124 2 5 2 6 2 7...
Page 108: ...108 124...
Page 109: ...109 124 3 1 5mm2 25 1 5 mm2 II EC Lwa dB A XX...
Page 110: ...110 124 4...
Page 111: ...111 124 5 2 1 2 ON OFF 3 4 5 6 7 8 9 10 11 12 5 5 1 5 C 45 C 3 12 9 10 7 1 8 4 2 11 5 6...
Page 113: ...113 124 6 6 1 6 2 6 2 2 6 2 2 6 2 3 6 3 6 3 1 1 2 1 2...
Page 114: ...114 124 6 3 2 1 5 mm 25m 6 3 3 I O 6 3 4 6 4 15 I 0...
Page 115: ...115 124 7 10 10 20 15 7 1...
Page 116: ...116 124 7 2 7 3 7 4 7 5 1 O 2 3 8...
Page 117: ...117 124 8 1 8 1 1 8 1 2 8 1 3 8 1 4 8 1 5...
Page 118: ...118 124 9...
Page 119: ...119 124 10 11 0 C 45oC 12...
Page 120: ...120 124 13 1 1999 44 2 13 2 Garland Garland Garland 13 3 H Garland 13 4 13...
Page 122: ...122 124 NOTES...
Page 124: ......


