
3
Replace the battery cover, and turn the D-ring clockwise.
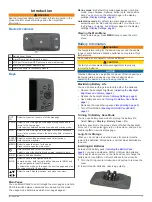
Installing the Battery Pack
1
Turn the D-ring counter-clockwise, and pull up to remove the
cover.
2
Locate the metal contacts on the end of the lithium-ion
battery.
3
Insert the battery into the compartment, contacts first.
4
Press the battery into place.
5
Replace the battery cover, and turn the D-ring clockwise.
Charging the Battery Pack
NOTICE
To prevent corrosion, thoroughly dry the USB port, the weather
cap, and the surrounding area before charging or connecting to
a computer.
Do not attempt to use the device to charge a battery that was
not provided by Garmin
®
. Attempting to charge a battery that
was not provided by Garmin can damage the device and void
the warranty.
Before you can connect the straight connector of the USB cable
to your device, you may need to remove optional mount
accessories.
NOTE:
The device does not charge when outside the approved
temperature range (
).
You can charge the battery using a standard wall outlet or a
USB port on your computer.
1
Pull up the weather cap
À
from the mini-USB port
Á
.
2
Plug the small end of the USB cable into the mini-USB port.
3
Plug the USB end of the cable into an AC adapter or a
computer USB port.
4
If necessary, plug the AC adapter into a standard wall outlet.
When you connect the device to a power source, the device
turns on.
5
Charge the battery completely.
Removing the NiMH Battery Pack
WARNING
Do not use a sharp object to remove batteries.
1
Turn the D-ring counter-clockwise, and pull up to remove the
cover.
2
Pull up on one side of the battery pack.
Turning On the Device
Hold .
Adjusting the Backlight Brightness and
Volume
You can adjust the backlight brightness to maximize battery life.
If you are using an external speaker with a 12/24-Volt adapter
cable with the device, you can adjust the volume level of the
audio output.
1
Select .
2
Select and to adjust the brightness.
3
Select and to adjust the volume.
4
Select
ENTER
.
Support and Updates
Garmin Express
™
(
) provides easy
access to these services for Garmin devices.
• Product registration
• Product manuals
• Software updates
• Data uploads to Garmin Connect
™
• Map, chart, or course updates
Setting Up Garmin Express
1
Connect the device to your computer using a USB cable.
2
3
Follow the on-screen instructions.
Connected Features
Connected features are available for your GPSMAP 276Cx
device when you connect the device to a compatible
smartphone using Bluetooth
®
wireless technology. Some
features require you to install the Garmin Connect Mobile app
on the connected smartphone. Go to
more information. Some features are also available when you
connect your device to a wireless network.
Phone notifications
: Displays phone notifications and
messages on your GPSMAP 276Cx device.
LiveTrack
: Allows friends and family to follow your races and
training activities in real time. You can invite followers using
email or social media, allowing them to view your live data on
a Garmin Connect tracking page.
Activity uploads to Garmin Connect
: Automatically sends
your activity to your Garmin Connect account as soon as you
finish recording the activity.
Software Updates
: Allows you to update your device software.
Weather
: Allows you to view current weather conditions and
weather forecasts.
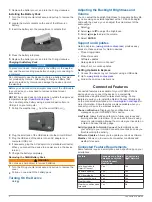
Connected Feature Requirements
Some features require a smartphone and a specific app on your
smartphone.
Feature
Connected to a Paired
Smartphone with the
Garmin Connect
Mobile App
Connected to a
Wi
‑
Fi
®
Network
Activity uploads to
Garmin Connect
Yes
Yes
Software updates
Yes
Yes
EPO downloads
Yes
Yes
Live geocache data
Yes
Yes
Weather radar
Yes
Yes
Weather conditions and
forecasts
Yes
No
2
Connected Features
Summary of Contents for 276Cx
Page 1: ...GPSMAP 276Cx Owner s Manual...







![Navig[8]r NAVBIKE-GPS User Manual preview](http://thumbs.mh-extra.com/thumbs/navig-8-r/navbike-gps/navbike-gps_user-manual_3574097-01.webp)


