G1000 / GFC 700 System Maintenance Manual - 300/B300 Series King Air
Page 6-7
190-00716-01
Revision 1
Replacement:
1.
Crimp pins, item 2, onto each of the thermocouple wires, item 1. Ensure that pre-stripped wire
length is 1/8” prior to crimping.
2.
Insert newly crimped pins and wires into the appropriate connector housing location, item 4, as
specified by King Air 300/B300 Wiring Diagram, listed in Table 1-2.
3.
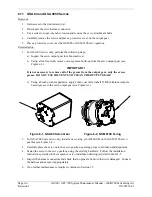
Place thermocouple body, item 1, onto the backshell boss, item 5. Place the thermocouple as
shown in Figure 6-4 so that the wires exit towards the bottom of the backshell.
4.
Fasten thermocouple tightly to backshell using the provided screw, item 3.
5.
Fasten cover, item 6, to backshell using screws, item 7.
6.
Continue to Section 7.4.1 and verify that the ITT indications are valid on the MFD.
6.18 GPS/WAAS
Antennas
Removal:
1.
Gain access to the antenna coaxial cable connector by removing the cabin interior ceiling panel.
Refer to the Antenna Install drawing listed in Table 1-2.
2.
Disconnect the antenna coaxial cable.
3.
Remove the antenna mounting screws.
4.
Remove antenna.
Reinstallation:
1.
Install antenna using retained mounting screws.
2.
Connect the antenna coaxial cable.
3.
Fillet seal around antenna. Refer to the Antenna Install drawing listed in Table 1-2.
4.
Reinstall cabin interior ceiling panel.
5.
Proceed to Section 7.3.1 GPS Signal Acquisition for testing.
6.19 Diversity Transponder Antenna
Removal:
1.
Gain access to the antenna coaxial cable connector and mounting hardware by removing the cabin
interior ceiling panel. Refer to the Antenna Install drawing listed in Table 1-2.
2.
Disconnect the antenna coaxial cable.
3.
Remove the two nuts and washers securing the antenna.
4.
Remove antenna.
Reinstallation:
1.
Install antenna using retained hardware.
2.
Connect the antenna coaxial cable.
3.
Fillet seal around antenna. Refer to the Antenna Install drawing listed in Table 1-2.
4.
Reinstall cabin interior ceiling panel.
5.
Test the GTX 33D according to Section 7.5.2.
Summary of Contents for Cessna Caravan G1000
Page 2: ...This page intentionally left blank...
Page 89: ......

