


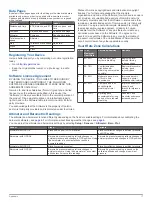


Alert Name Alert Type
Description
Speed
Range
You can set minimum and maximum
speed values.
Pace
Range
You can set minimum and maximum pace
values.
Heart Rate Range
You can set minimum and maximum heart
rate values or select zone changes. See
and
.
Cadence
Range
You can set minimum and maximum
cadence values.
Battery
Event
You can set a low battery power alert.
Setting a Proximity Alarm
Proximity alarms alert you when you are within a specified
range of a particular location.
1
Select the action key.
2
Select
Alerts
>
Proximity
>
Edit
>
Create New
.
3
Select a location.
4
Enter a radius.
5
Select
Done
.
Calculating the Size of an Area
Before you can calculate the size of an area, you must acquire
satellites.
1
Select the action key.
2
Select
GPS Tools
>
Area Calc.
.
3
Walk around the perimeter of the area.
4
When you are finished, select the action key to calculate the
area.
5
Select an option:
• Select
Save Track
, enter a name, and select
Done
.
• Select
Change Units
to convert the area to a different
unit.
• Select
to exit without saving.
Viewing the Almanacs
You can view almanac information for the sun and moon, and
hunting and fishing.
1
Select the action key.
2
Select an option:
• To view the sunrise, sunset, moonrise, and moonset
information, select
GPS Tools
>
Sun & Moon
.
• To view the predicted best times for hunting and fishing,
select
GPS Tools
>
Hunt & Fish
.
3
If necessary, select or to view a different day.
Viewing Satellite Information
The satellite page shows your current location, GPS accuracy,
satellite locations, and signal strength.
1
Select the action key.
2
Select
Start GPS
.
3
Select the action key.
4
Select
GPS Tools
>
Satellite
.
5
Select to view additional information.
Simulating a Location
When you are planning routes or activities in a different area,
you can turn off GPS and simulate a different location.
1
Select the action key.
2
Select
Setup
>
System
>
GPS Mode
>
Demo Mode
.
3
Select a location.
4
Select
Go
>
Move to Location
.
Customizing Your Device
Setup Overview
The
Setup
menu contains many ways to customize your device.
Garmin recommends that you familiarize yourself with the
settings for each feature. If you customize your settings before
your activity, you will spend less time adjusting the watch during
your activity. To open the
Setup
menu, select the action key,
and select
Setup
.
NOTE:
All changes you make are saved to the active profile
(
).
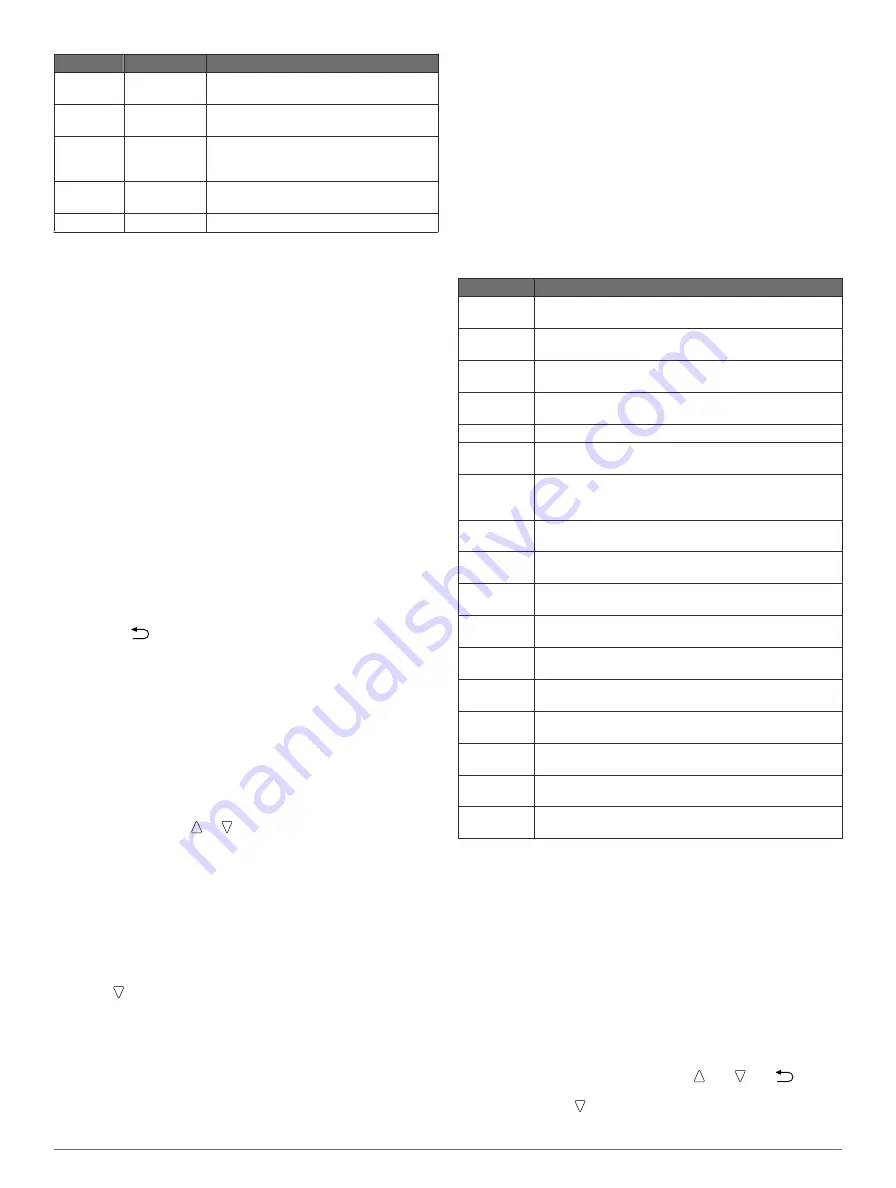
Setup Item
Available Settings and Information
System
You can customize GPS settings, arrow keys, and the
device language (
).
Data Pages
You can customize data pages and data fields
(
Sensors
You can customize the compass (
altimeter (
ANT Sensor
You can set up wireless accessories such as the heart
rate monitor or tempe™ (
).
Tones
You can customize the tones and vibrations (
).
Display
You can adjust the backlight and screen contrast
(
Reset
You can clear the trip data, sensor plots (
),
waypoints, or track log, or you can reset all of your
settings (
).
Map
You can customize the map orientation and how items
appear on the map (
Tracks
You can customize the track recording settings
(
Time
You can customize the appearance of the time page
(
Units
You can change the units of measure for data such as
distance, elevation, and temperature (
).
Pos. Format
You can change how your position data appears
(
Profiles
You can change the active profile and edit your profiles
(
Fitness
You can turn on
Auto Lap
, customize your fitness user
profile, and edit your heart rate zones (
Geocaches
You can customize how your geocaches are listed and
activate chirp (
Menu
You can customize the items that appear in the main
menu (
).
About
You can view information about the device and software
(
Customizing the Main Menu
You can add, delete, or move items in the main menu.
1
Select the action key.
2
Select
Setup
>
Menu
.
3
Select a menu item.
4
Select an option:
• Select
Move Up
or
Move Down
to change the location of
the item in the list.
• Select
Remove
to delete an item from the list.
• Select
Insert
to add an item to the list.
Customizing the Arrow Keys
You can customize the hold function of and and
for
your activity. For example, if the hiking profile is active, you can
customize the hold function to start and stop the timer.
1
Select the action key.
Customizing Your Device
9


