background image

Getting Started

 WARNING

See the 

Important Safety and Product Information

 guide in the 

product box for product warnings and other important 

information.

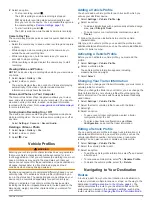
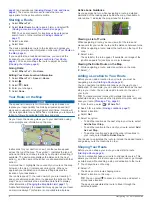
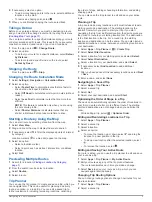
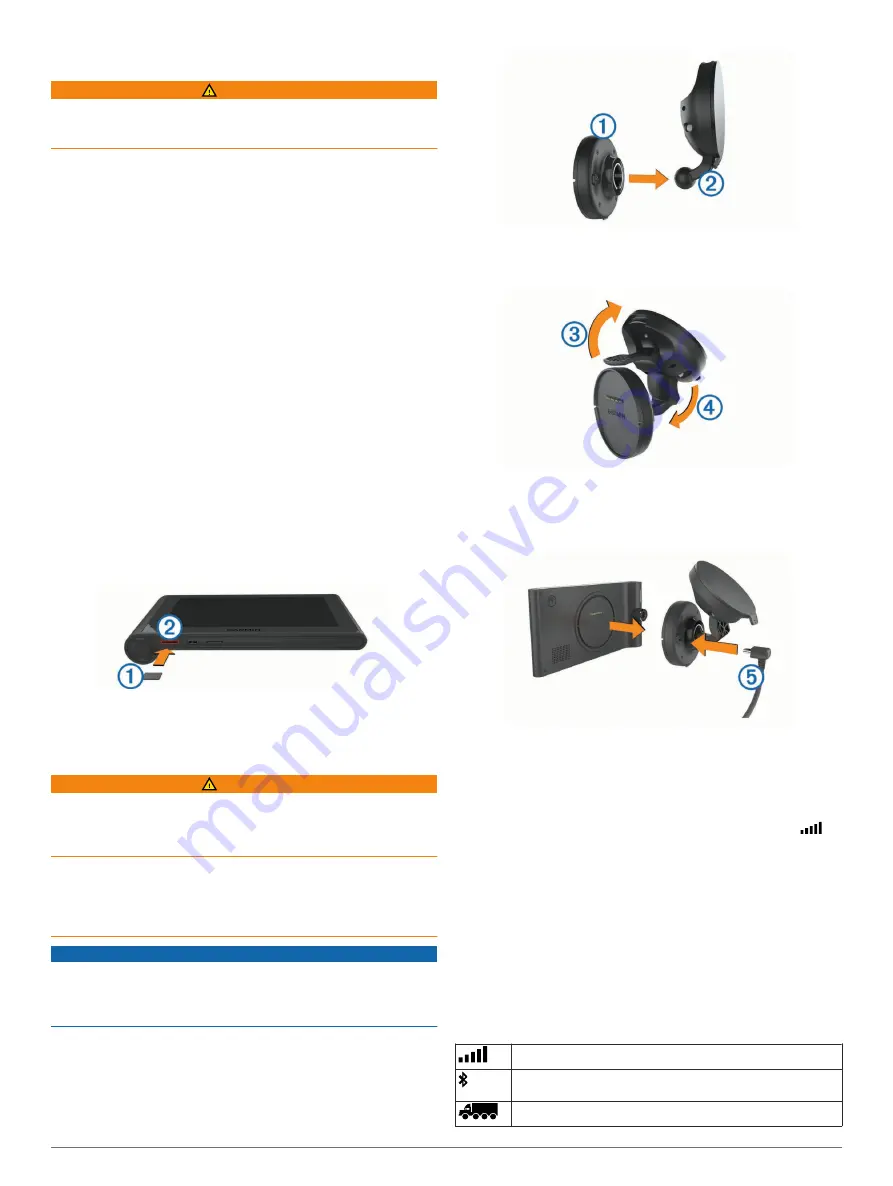
• Install the camera memory card (

Installing the Dash Camera 

Memory Card

, page 1

).

• Update the maps and software on your device (

Updating 

Maps and Software with Garmin Express

, page 20

).

• Mount the device in your vehicle and connect it to power 

(

Mounting and Powering the dēzlCam Device in Your 

Vehicle

, page 1

).

• Align the dash camera (

Aligning the Camera

, page 2

).

• Acquire GPS signals (

Acquiring GPS Signals

, page 1

).

• Adjust the volume (

Adjusting the Volume

, page 2

) and 

display brightness (

Adjusting the Screen Brightness

page 2

).

• Set up a vehicle profile for your truck.
• Navigate to your destination (

Starting a Route

, page 4

).

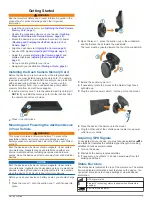
Installing the Dash Camera Memory Card

Before the device can record video from the integrated dash 

camera, you must install a camera memory card. The camera 

requires a microSD

 or microSDHC memory card up to 64GB 

with a speed rating of class 4 or higher. You can use the 

included memory card, or you can purchase a compatible 

memory card from an electronics supplier.

1

Insert a memory card 

À

 into the camera memory card slot 

Á

.

NOTE: 

If you install the memory card into the incorrect slot, 

the camera cannot record video.

2

Press it in until it clicks.

Mounting and Powering the dēzlCam Device 

in Your Vehicle

 WARNING

This product contains a lithium-ion battery. To prevent the 

possibility of personal injury or product damage caused by 

battery exposure to extreme heat, store the device out of direct 

sunlight.
Both the device and its mount contain magnets. Under certain 

circumstances, magnets may cause interference with some 

internal medical devices, including pacemakers and insulin 

pumps. Keep the device and its mount away from such medical 

devices.

NOTICE

Both the device and its mount contain magnets. Under certain 

circumstances, magnets may cause damage to some electronic 

devices, including hard drives in laptop computers. Use caution 

when the device or its mount is near electronic devices.

Before you use your device on battery power, you should charge 

it.

1

Press the mount 

À

 onto the suction cup 

Á

 until it snaps into 

place.

2

Open the lever 

Â

, press the suction cup to the windshield, 

and flip the lever back toward the windshield.
The lever must be oriented toward the top of the windshield.

3

Extend the suction cup arm 

Ã

.

4

If necessary, rotate the mount so the Garmin

®

 logo faces 

right-side up.

5

Plug the vehicle power cable 

Ä

 into the port on the mount.

6

Place the back of the device onto the mount.

7

Plug the other end of the vehicle power cable into a power 

outlet in your vehicle.

Acquiring GPS Signals

To navigate with your device, you must acquire satellites. 

 in 

the status bar indicates the satellite signal strength. Acquiring 

satellites can take several minutes.

1

Turn on the device.

2

Wait while the device locates satellites.

3

If necessary, go outdoors to an open area, away from tall 

buildings and trees.

Status Bar Icons

The status bar is located at the top of the main menu. The status 

bar icons display information about features on the device. You 

can select some icons to change settings or view additional 

information.

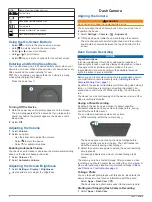
GPS signal status

Bluetooth

®

 technology status (appears when Bluetooth is 

enabled)
Vehicle profile indicator

Getting Started

1

Summary of Contents for dezlCAM

Page 1: ...d zlCam Owner s Manual June 2015 190 01892 00_0B...

Page 2: ...d n Maps Lifetime are trademarks of Garmin Ltd or its subsidiaries These trademarks may not be used without the express permission of Garmin The Bluetooth word mark and logos are owned by the Bluetoot...

Page 3: ...Search Bar 7 Changing the Search Area 7 Points of Interest 7 Finding a Location by Category 7 Searching Within a Category 7 Navigating to Points of Interest Within a Venue 7 Finding Trucking Points o...

Page 4: ...18 Viewing the Weather Forecast 18 Viewing Weather Near a Different City 18 Viewing the Weather Radar 18 Viewing Weather Alerts 18 Checking Road Conditions 18 Viewing Previous Routes and Destinations...

Page 5: ...light Both the device and its mount contain magnets Under certain circumstances magnets may cause interference with some internal medical devices including pacemakers and insulin pumps Keep the device...

Page 6: ...should be centered between the top and bottom of the screen Dash Camera Recording NOTICE Legal Restrictions In some jurisdictions it could be considered an invasion of privacy rights to take or publi...

Page 7: ...rofile the device avoids including restricted or impassable areas in routes based on the dimensions weight and other characteristics you entered for your vehicle Adding a Vehicle Profile You should ad...

Page 8: ...page 11 A data field displaying the speed limit may appear as you travel on major roadways This feature is not available in all areas Active Lane Guidance As you approach a turn while navigating a ro...

Page 9: ...of stops adding scheduling information and adding shaping points You can also use the trip planner to edit and save your active route Planning a Trip A trip can include many locations and it must inc...

Page 10: ...nd avoid traffic delays manually 1 While navigating a route select Traffic 2 Select Alternate Route if available 3 Select Go Avoiding Toll Roads Your device can avoid routing you through areas that re...

Page 11: ...ovie theaters To search for a business name enter all or part of the name To search for an address near you enter the house number and street name To search for an address in another city enter the ho...

Page 12: ...are account You can view detailed Foursquare location information such as user ratings restaurant pricing information and hours of operation 1 From the location search results select a Foursquare poin...

Page 13: ...n to most often 1 Select Where To Set Home Location 2 Select Enter My Address Use Current Location or Recently Found The location is saved as Home in the Saved menu Going Home Select Where To Go Home...

Page 14: ...d provides statistics about your trip NOTE If you make frequent stops leave the device turned on so it can accurately measure elapsed time during the trip From the map select Speed Viewing the Trip Lo...

Page 15: ...Changing the Map Perspective 1 Select Settings Map Vehicle Driving Map View 2 Select an option Select Track Up to display the map in two dimensions 2 D with your direction of travel at the top Select...

Page 16: ...ite down the FM traffic receiver unit ID 4 Go to www garmin com fmtraffic to purchase a subscription and get a 25 character code The traffic subscription code cannot be reused You must obtain a new co...

Page 17: ...on where you refueled Editing Fuel Logs 1 Select Apps IFTA Logging Fuel Logs 2 If necessary select a truck 3 If necessary select a quarter 4 Select a log 5 Select an option Select a field to edit the...

Page 18: ...e at the top of the screen To view status details select the field beside a status bar To edit select the grid and select a field To view violation information select Adding Shipments 1 Select Apps Ho...

Page 19: ...navigation prompts to your headset as you navigate a route About Hands Free Calling NOTE While most phones and headsets are supported and can be used it cannot be guaranteed that a particular phone o...

Page 20: ...Live Services Garmin Live Services page 16 Saved locations and recently found locations are synchronized with your phone each time your device connects to Smartphone Link Downloading Smartphone Link S...

Page 21: ...ill up your fuel tank 1 Select Apps ecoRoute At the Pump 2 Enter the current fuel price 3 Enter the amount of fuel the vehicle has used since the last time the fuel tank was filled 4 Enter the distanc...

Page 22: ...e weather alerts may appear on the map You can also view a map of weather alerts near your current location or near a selected city 1 Select Apps Weather 2 If necessary select a city 3 Select Weather...

Page 23: ...omatically set day or night colors based on the time of day Brightness Adjusts the display brightness Display Timeout Sets the amount of idle time before your device enters sleep mode Screenshot Allow...

Page 24: ...er your device at http my garmin com Resetting the Device You can reset your device if it stops functioning Hold the power key for 12 seconds Specifications Operating temperature range From 20 to 55 C...

Page 25: ...t Copy 5 Browse to a folder on the device NOTE For a removable drive or volume you should not place files in the Garmin folder 6 Select Edit Paste Disconnecting the USB Cable If your device is connect...

Page 26: ...n the vehicle power outlet My battery does not stay charged for very long Decrease the screen brightness Display Settings page 19 Shorten the display timeout Display Settings page 19 Decrease the volu...

Page 27: ...7 cities 8 coordinates 8 intersections 8 finding services up ahead 10 Foursquare 8 fuel prices 17 stations 9 fuel data entering 13 fuel economy 17 See also ecoRoute fuel logs 13 fuel price changing 17...

Page 28: ...uts adding 9 deleting 9 simulated locations 19 sleep mode 2 Smartphone Link 16 connecting 16 disabling calls 16 Garmin Live Services 16 software updating 20 version 19 specifications 20 speech recogni...

Page 29: ......
Page 30: ...5 69 33 99 39 02 36 699699 52 001 855 792 7671 0800 0233937 47 815 69 555 00800 4412 454 44 2380 662 915 35 1214 447 460 386 4 27 92 500 0861 GARMIN 427 646 27 0 11 251 9999 34 93 275 44 97 46 7744 52...

Reviews: