8
Introduction
5
Review the course indicated by the ma-
genta line.
NOTE: When using Auto Guidance, a
gray segment within any part of the ma-
genta line indicates that Auto Guidance
cannot calculate part of the Auto Guid-
ance line. This is due to the settings for
minimum safe water depth and minimum
safe obstacle height.
6
Follow the magenta line, steering to avoid
land, shallow water, and other obstacles.
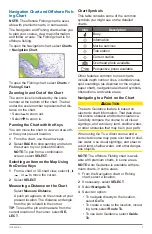
Viewing Location and Object Informa-
tion on a Chart
You can view information about a location
or an object on the Navigation chart or the
Fishing chart.
NOTE
: The offshore Fishing chart is avail-
able with premium charts, in some areas.
1
From the Navigation chart or Fishing
chart, select a location or object.
A list of options appears along the right
side of the chart. The options that appear
vary based on the location or object you
selected.
2
Select an option:
•
To navigate to the selected location,
select
Navigate To
.
•
To mark a waypoint at the cursor loca-
tion, select
New Waypoint
.
•
To view the distance and bearing of the
object from your current location, select
Measure Distance
.
The distance and bearing appear on
the screen. Select
SELECT
to measure
from a location other than your current
location.
•
To view tide, current, celestial, chart
notes, or local services information
near the cursor, select
Information
.
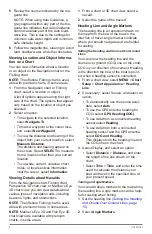
Viewing Details about Navaids
From the Navigation chart, Fishing chart,
Perspective 3D chart view, or Mariner’s Eye
3D chart view, you can view details about
various types of navigation aids, including
beacons, lights, and obstructions.
NOTE
: The offshore Fishing chart is avail-
able with premium charts, in some areas.
NOTE
: Mariner’s Eye 3D and Fish Eye 3D
chart views are available with premium
charts, in some areas.
1
From a chart or 3D chart view, select a
navaid.
2
Select the name of the navaid.
Heading Line and Angle Markers
The heading line is an extension drawn on
the map from the bow of the boat in the
direction of travel. Angle markers indicate
where you should navigate and are helpful
for casting.
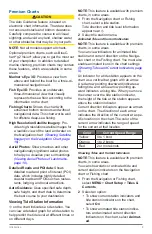
Setting the Heading and Course Over Ground
Lines
You can show the heading line and the
course over ground (COG) line on the chart.
COG is your direction of movement. Heading
is the direction the bow of the boat is point-
ed, when a heading sensor is connected.
1
From a chart view, select
MENU
>
Chart
Setup
>
Chart Appearance
>
Heading
Line
.
2
If necessary, select Source, and select an
option:
•
To automatically use the source avail-
able, select
Auto
.
•
To use the GPS antenna heading for
COG, select
GPS Heading(COG)
.
•
To use data from a connected heading
sensor,select
Heading
.
•
To use data from both a connected
heading sensor and the GPS antenna,
select
COG and Heading
.
This displays both the heading line and
the COG line on the chart.
3
Select Display, and select an option:
•
Select
Distance
>
Distance
, and enter
the length of the line shown on the
chart.
•
Select
Time
>
Time
, and enter the time
used to calculate the distance your
boat will travel in the specified time at
your present speed.
Turning on Angle Markers
You can add angle markers to the map along
the heading line. Angle markers can be help-
ful for casting when fishing.
1
Set the heading line
and Course Over Ground Lines, page
.
2
Select
Angle Markers
.


