Setting the Water Temperature Offset
The temperature offset compensates for the temperature reading from a temperature sensor or temperature-
capable transducer.
1 Measure the water temperature using the temperature sensor or temperature-capable transducer that is
connected to the network.
2 Measure the water temperature using a different temperature sensor or a thermometer that is known to be
accurate.
3 Subtract the water temperature measured in step 1 from the water temperature measured in step 2.
This value is the temperature offset. Enter this value in step 5 as a positive number if the sensor measures
the water temperature as being colder than it actually is. Enter this value in step 5 as a negative number if the
sensor measures the water temperature as being warmer than it actually is.
4 Select Settings > My Vessel > Temp. Offset.
5 Complete an action:
• If the sensor or transducer is connected to the chartplotter or a sonar module, select Settings > My Vessel
> Temp. Offset.
• If the sensor or transducer is connected to the NMEA 2000 network, select Settings > Communications >
NMEA 2000 Setup > Device List, select the transducer, and select Review > Temp. Offset.
6 Enter the temperature offset value calculated in step 3.
Setting the Fuel Capacity of the Vessel
1 Select Settings > My Vessel > Fuel Capacity.
2 Enter the combined total capacity of the fuel tanks.
Synchronizing the Fuel Data with the Actual Vessel Fuel
You can synchronize the fuel levels in the chartplotter with the actual fuel in the vessel when you add fuel to
your vessel.
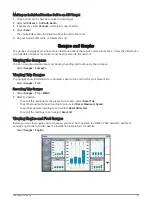
1 Select Gauges > Engine > MENU.
2 Select an option:
• After you have filled up all the fuel tanks on the vessel, select Fill Up All Tanks. The fuel level is reset to
maximum capacity.
• After you have added less than a full tank of fuel, select Add Fuel to Boat, and enter the amount added.
• To specify the total fuel in the vessel tanks, select Set Total Fuel Onboard, and enter the total amount of
fuel in the tanks.
Customizing Engine Gauge and Fuel Gauge Limits
You can configure the upper and lower limits and the range of desired standard operation of a gauge.
NOTE: Not all options are available for all gauges.
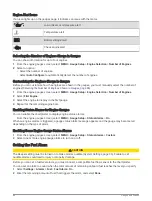
1 From an applicable gauges screen, select MENU > Gauge Setup > Set Gauge Limits.
2 Select a gauge to customize.
3 Select an option:
• To set the minimum value of the standard operating range, select Rated Min..
• To set the maximum value of the standard operating range, select Rated Max..
• To set the lower limit of the gauge lower than the rated minimum, select Scale Min..
• To set the upper limit of the gauge higher than the rated maximum, select Scale Max..
4 Select the limit value.
5 Repeat steps 4 and 5 to set additional gauge limits.
Device Configuration
99

