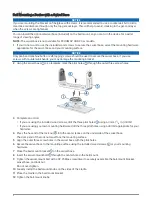
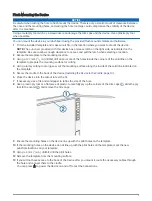
Installing the Device in the Cradle
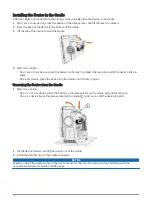
After the cables are connected to the cradle, you can quickly place the device in the cradle.
1 On a 7xsv or 9xsv device, press the button on the release lever, and lift the lever to unlock it.
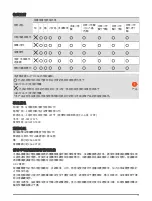
2 Place the base of the device in the bottom of the cradle.
3 Tilt the top of the device toward the cradle.
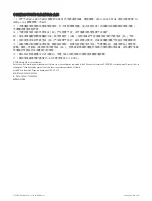
4 Perform an action:
• On a 7xsv or 9xsv device, press the button on the lever, and push the lever down until the device clicks in
place.
• On a 6xsv device, press the device into the cradle until it clicks in place.
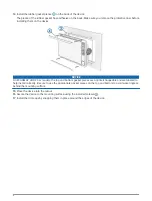
Removing the Device from the Cradle
1 Perform an action:
• On a 7 sv or 9 sv device, press the button on the release lever on the cradle, and pull the lever up.
• On a 6 sv device, press the release lever on the cradle until you can tilt the device forward.
2 Tilt the device forward, and lift the device out of the cradle.
3 Install the weather cap on the cradle connector.
NOTICE
Failure to install the weather cap on the cradle connector may result in corrosion that interferes with the
connection between the cradle and the device.
10