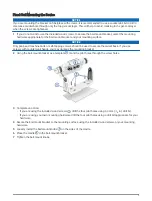
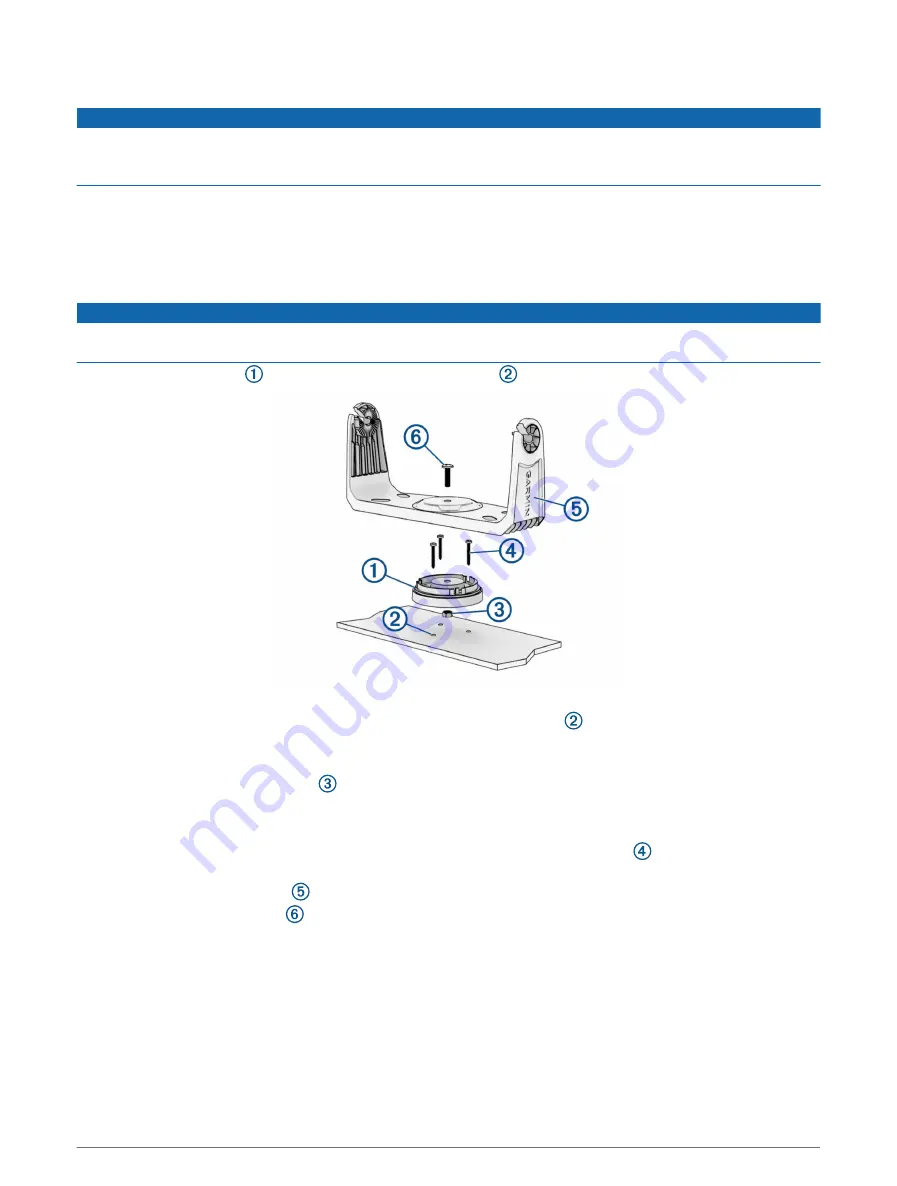
Bail Mounting a Device with a Swivel Base
NOTICE
If you are mounting the bracket on fiberglass with screws, it is recommended to use a countersink bit to drill a
clearance counterbore through only the top gel-coat layer. This will help to avoid cracking in the gel-coat layer
when the screws are tightened.
You can install the optional swivel base (included) on the bail mount, so you can turn the device for a wider
range of viewing angles.
NOTE: The swivel base is not available for ECHOMAP UHD2 9 sv models.
1 If you do not want to use the included wood screws to secure the swivel base, select the mounting hardware
appropriate for the swivel base and your mounting surface.
NOTICE
Only pan-head machine bolts or self-tapping screws should be used to secure the swivel base. If you use
screws with countersunk heads, you may damage the mounting bracket.
2 Using the swivel base as a template, mark the pilot holes through the outer three screw holes.
3 Complete an action:
• If you are using the included wood screws, drill the three pilot holes using a 3 mm (
1
/
8
in.) drill bit.
• If you are using your own mounting hardware, drill the three pilot holes using a drill bit appropriate for your
hardware.
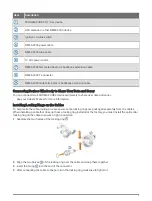
4 Press the hex end of the lock nut into the center recess on the underside of the swivel base.
The dome end of the lock nut must face the mounting surface.
5 Align the outer three screw holes in the swivel base with the pilot holes.
6 Secure the swivel base to the mounting surface using the included wood screws or your mounting
hardware.
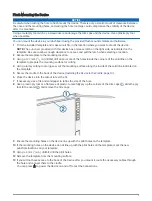
7 Place the bail-mount bracket on the swivel base.
8 Insert the swivel-mount bolt through the center hole in the bail mount.
9 Tighten the swivel-mount bolt with a #2 Phillips screwdriver to securely assemble the bail-mount bracket,
swivel base, and lock nut.
Do not over-tighten.
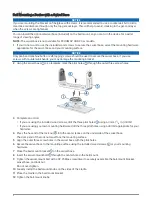
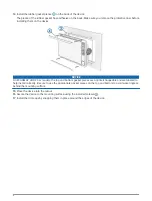
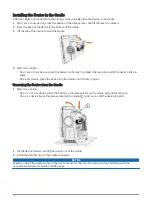
10 Loosely install the bail-mount knobs on the sides of the cradle.
11 Place the cradle in the bail-mount bracket.
12 Tighten the bail-mount knobs.
4


