Tips for Riding a Course
• Use turn guidance (
).
• If you include a warmup, select
to begin the course, and warm up as normal.
• Stay away from your course path as you warm up.
When you are ready to begin, head toward your course. When you are on any part of the course path, a
message appears.
NOTE: As soon as you select
, your Virtual Partner starts the course and does not wait for you to warm up.
• Scroll to the map to view the course map.
If you stray from the course, a message appears.
Viewing Course Details
1 Select Navigation > Courses.
2 Select a course.
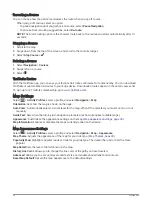
3 Select an option:
• Tap the course to view the course on the map.
• Select Summary to view details about the course.
• Select Climbs to view details and elevation plots for each climb.
• Select Laps to select a lap and view additional information about each lap.
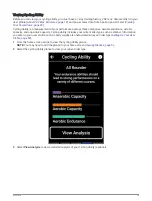
• Select Course Demands to view an analysis of your cycling ability for the course.
• Select Power Guide to view an analysis of your effort for the course.
Displaying a Course on the Map
For each course saved to your device, you can customize how it appears on the map. For example, you can set
your commute course to always display on the map in yellow. You can have an alternate course display in
green. This allows you to see the courses while you are riding, but not follow or navigate a particular course.
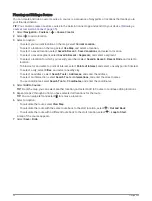
1 Select Navigation > Courses.
2 Select the course.
3 Select .
4 Select Always Display to make the course appear on the map.
5 Select Color, and select a color.
6 Select Course Points to include course points on the map.
The next time you ride near the course, it appears on the map.
36
Navigation


