background image

3

Starting Up

Installing the Batteries

     The eTrex Legend operates on two AA batteries 
(not included), which are located in the back of the unit. 
Rechargeable Alkaline, NiMH, NiCad or 
Lithium batteries may also be used. 
Stored data will not be lost when 
the batteries are removed. 

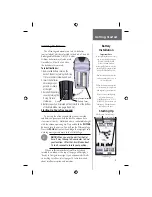
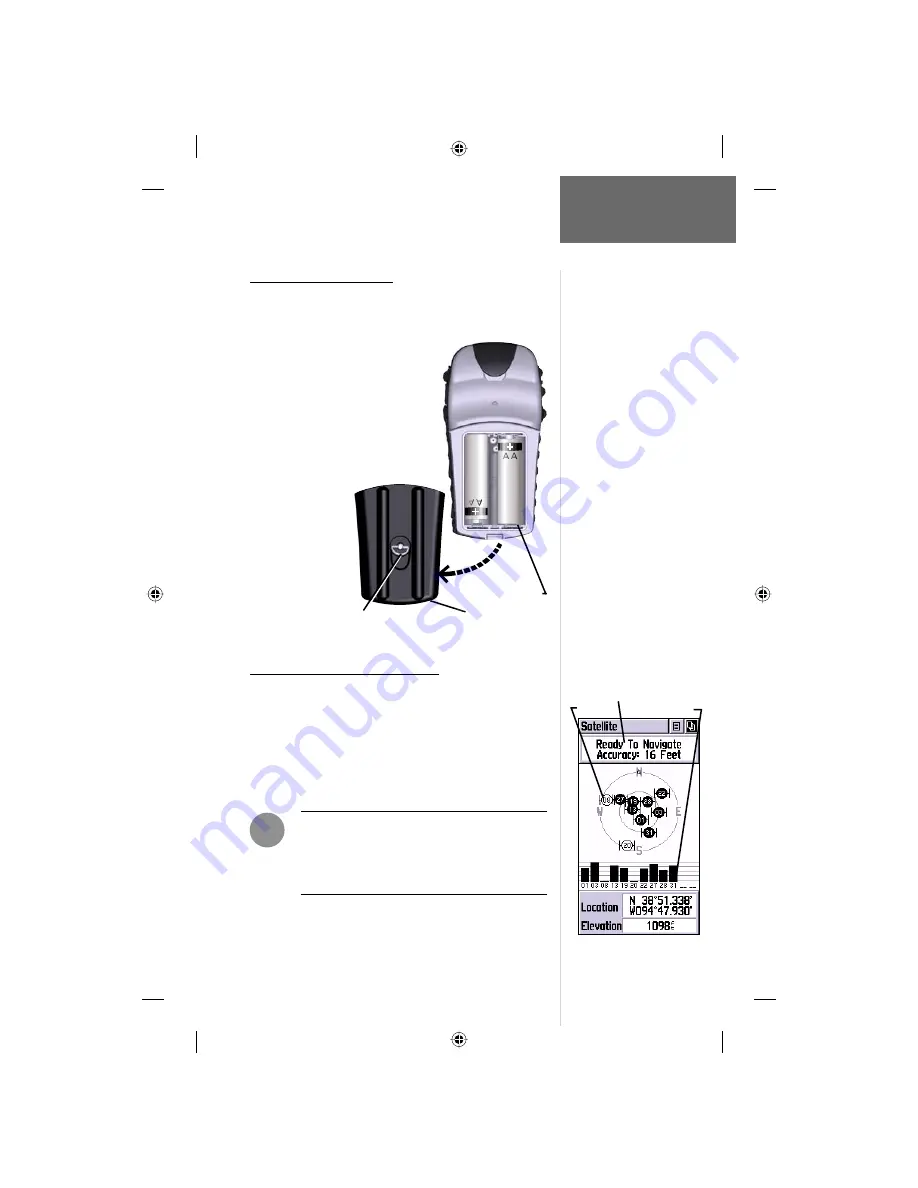
To install batteries:

1. Remove the battery cover on the
    back of the unit by turning the D-ring 
    1/4 turn counter-clockwise and pull.
2. Insert the batteries
    observing proper
    polarity as shown 
    at the right.
3. Reinstall the battery
    cover by turning the
    D-ring 1/4 turn
    clockwise.
4. Battery capacity is  displayed on the Status Bar at the bottom 
  of the Main Menu. (see pages 9 and 26)

Battery Cover

D-ring

Battery Compartment

Important Note:

When replacing batteries, use only 

new or fully recharged batteries. 

Do not mix Alkaline, NiMH, 

NiCad or Lithium batteries. 

Rechargeable batteries may typ-

ically display less capacity than 

disposable Alkaline batteries.

Remove the batteries from the 

unit if you don’t plan to use it 

for several months.

Follow the battery manufactur-
er’s instructions for proper care  

and disposal of used batteries.

Extensive use of backlighting 

will reduce battery life. 

Using ‘Battery Saver’  or ‘Use 

With GPS Off’ mode when not 

navigating.  Alkaline batteries 

can last up to 18 hours.

Starting Up Your eTrex Legend

     To start up the eTrex Legend, take the unit outside 
and fi nd an open area where the built-in antenna has a 
clear view of the sky.  Hold the unit at a comfortable height 
with the antenna pointing up. Press and hold the 

POWER 

button to turn the unit on. You will see the Welcome Page.   
Press the 

PAGE

 button to acknowledge the copyright and 

warning messages and move to the Satellite Page.

F

NOTE: 

When you use the unit for the fi rst 

time. It may take up to fi ve minutes to fi nd 
your location.  After that, it will take about 
15 to 45 seconds to locate your position.

Battery 

Installation

Getting Started

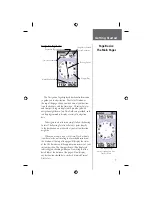
      When a suffi cient number of satellites have been 
located the window at the top of the page will display a 
“Ready to Navigate” message. If you experience diffi culty 
in tracking  satellites, refer to pages 13 for information 
about satellite reception and remedies.

 GPS Receiver Status Message 

Satellites       Signal Strength    

Satellite Page 

Summary of Contents for Etrex Legend - GPS Receiver

Page 1: ...owner s manual and reference guide eTrexLegend TM personal navigator...

Page 2: ...ium to be viewed for personal use provided that such electronic or printed copy of this manual contains the complete text of this copyright notice and provided further that any unauthorized commercial...

Page 3: ...t using the features of the eTrex Legend according to topic The explanations for each feature in this section are divided into 1 An overview that discusses the feature and how it functions and 2 A det...

Page 4: ...nce received including interference that may cause undesired operation The eTrex Legend does not contain any user serviceable parts Repairs should be made only by an authorized GARMIN service center U...

Page 5: ...bjects in their path toward the driver or passengers causing pos sible injury Refer to air bag safety precautions contained in the vehicle owner s manual Do not mount the eTrex Legend in a place where...

Page 6: ...MainMenu 26 Marking Your Location 27 Creating a Waypoint 27 28 Moving a Waypoint 28 Projecting a Waypoint 29 Editing Waypoints 29 Saving as a Waypoint 29 The Find Menu 30 36 Finding a Waypoint 31 Find...

Page 7: ...h storage for 20 Routes with 50 Waypoints each A Trip Computer for displaying a variety of navigation data such as speed ETA ETE heading odometer etc A Find Feature for locating Waypoints Cities Inter...

Page 8: ...The CLICK STICKTM Five Position Switch Press In and Release to enter highlighted options and to con rm messages Press In and Hold to mark your current location as a waypoint Move Up Down or Right Left...

Page 9: ...Follow the battery manufactur er s instructions for proper care and disposal of used batteries Extensive use of backlighting will reduce battery life Using Battery Saver or Use With GPS Off mode when...

Page 10: ...ed map data before beginning use to provide your unit with max imum Find features and mapping capability The eTrex Legend will accept up to 8 MB of transferred map data which could include any one Met...

Page 11: ...features like Option Menus and a Main Page Menu both of which are accessed by on screen buttons To display these menus simply highlight the on screen button and press in on the CLICK STICK Satellite...

Page 12: ...ata has been downloaded to the unit using a CD ROM mapping program To allow you to view the map from different perspec tives the scale can be changed from 20 feet to 500 miles The ZOOM IN and OUT butt...

Page 13: ...matter what your current location might be When you are not on an active Goto Track or Route in other words not traveling to a recorded destination the window at the top of the page will display the...

Page 14: ...a information options By selecting the information options that you prefer and arranging them in a desired order on the page you can customize the Trip Computer Page to meet your navigation needs The...

Page 15: ...options select interfaces to compatible external devices and select system operating modes Accessories Page Provides Sun Moon position data a Calendar with date and note capability and best times for...

Page 16: ...it more recognizable when viewed on the map To change the waypoint name 1 Use the CLICK STICK to highlight the waypoint name eld 001 and then press it in to display the data entry keyboard 2 Use the C...

Page 17: ...es that help you navigate the Map Page and the Navigation Page Press the PAGE button repeatedly until the Map Page is displayed You will see the new waypoint in the center of the map If you renamed it...

Page 18: ...ove to the left When it points straight up you are on course to your destination The Goto will provide you with a direct route back to the waypoint and will not necessarily follow the track you create...

Page 19: ...If the unit cannot initially when rst turned on determine its location it will display a Poor Satellite Reception message with four options Each offers a brief explanation when highlighted to guide y...

Page 20: ...Options Menu 2 Highlight New Elevation and then press in on the CLICK STICK Observe the highlighted rst character in the elevation eld and the numerical keyboard at the bottom of the Satellite Page 3...

Page 21: ...ing the eTrex Legend and each is graphically displayed on the Map Page Goto A direct path to a map location waypoint city address etc Track A previous path of travel that has been stored logged in the...

Page 22: ...ion information refer to the Satellite Page When using the Pan Map feature a small outline arrow Map Pointer can be moved about the page to highlight and identify map items or to scroll the map to vie...

Page 23: ...Stops navigating to a destination Hide Nav Status Show Nav Status Removes the navigation status window to expand the map area or inserts the navigation status window Hide Data Fields Show Data Fields...

Page 24: ...the arrow location or the map item information page An option menu allows you to add it to the Favorites list add it to a route project a waypoint from it save it as a waypoint or view the sun and moo...

Page 25: ...vigation Status Show Navigation Status The Hide Nav Status Show Nav Status option allows you to view GPS navigation data in a window at the top of the page that lists the status of satellite tracking...

Page 26: ...distance to your nal destination Final ETA The estimated time of day you will reach your nal destination Final ETE The estimated time needed to reach your nal destination Heading The direction in whi...

Page 27: ...ill be displayed When Auto is selected the maximum scale will be determined by the Detail setting Selecting Lock On Road will place the Position Icon on the nearest road to compensate for mapping and...

Page 28: ...of the Unit Setup Page not to be confused with the Map Setup Page It is possible to zoom in so far that the resolution of the map data is exceeded and the appearance of the map will no longer be accur...

Page 29: ...only when you are moving The Navigation Page also displays a Waypoint eld above the compass or highway with the name of the next waypoint on your route or of your nal destination The map coordinates f...

Page 30: ...ill be Big Numbers which displays information in two data elds in large sized numbers above and below the compass while displaying the compass in a smaller scale The last option on the list is Restore...

Page 31: ...am a data eld 1 Use the CLICK STICK to highlight the desired data eld and then press it in to open the data eld options menu 2 Use the CLICK STICK to move Up or Down the menu to highlight a desired da...

Page 32: ...etup Page Allows tailoring of items such as time format units of measure display backlighting timeout and contrast adjustment interface Setups heading selection and system software information Accesso...

Page 33: ...eld 3 To assign an identifying symbol to a waypoint use the CLICK STICK to highlight the symbol block just above the waypoint name 4 To save the waypoint highlight OK and press in on the CLICK STICK 5...

Page 34: ...the new coordinates using the numerical key board Highlight and press OK when nished 3 You may also change the waypoint name and or symbol To move a waypoint by dragging it on the map 1 Use the Find...

Page 35: ...t a waypoint 1 Use the Find Menu to display the desired waypoint 2 Make changes as desired to the waypoint map symbol name location coordinates and elevation elds Highlight the desired eld and press i...

Page 36: ...Other weight stations etc Points of Interest A list of restaurants museums hospitals etc Addresses A page with data entry elds for address number street name city and postal code used to de ne an add...

Page 37: ...ypoints List 2 Use the CLICK STICK to select the desired waypoint from the list and then press it in to display the Information Page for that waypoint 3 With the Information Page displayed you can sel...

Page 38: ...he selected city displays the city name the size by population and distance from you location You can view it on the map or create a Goto direct route to the city from your current location or from a...

Page 39: ...e highway which is served by the exits Two elds at the bottom of the page indicate distance and bearing to the exit currently highlighted 5 Scroll through the list to highlight the desired exit 6 Pres...

Page 40: ...se and many more When you select a restaurant that is part of a national chain for example McDonalds the name will appear only once However when you highlight it and press in on the CLICK STICK a list...

Page 41: ...a otherwise this option will not be available Step by Step Instructions To locate an address 1 Press the FIND button to display the Find Menu 2 Use the CLICK STICK to highlight Address and press it in...

Page 42: ...kely intersection If no match is found it is likely that no such intersection exists 6 Highlight the best match and then press in on the CLICK STICK to display the Information Page for the intersectio...

Page 43: ...on the CLICK STICK to display the Find Menu 4 Use the Find Menu to select a route waypoint from one of the Find Menu categories and display the Information Page for selected waypoint city exit point...

Page 44: ...ton from the Route Page and press the CLICK STICK In to access the options menu 2 Highlight the Copy Route option and then press in on the CLICK STICK to copy The copied route will appear on the Route...

Page 45: ...y the Information Page for the new waypoint and then select the on screen OK button to add it the route To remove a waypoint from the route list 1 Select the waypoint that you want to remove from the...

Page 46: ...elect the Route from the Routes List and press the CLICK STICK in to display the Route Page 2 Highlight the on screen Map button at the bottom of the page and press in on the CLICK STICK to display th...

Page 47: ...ing Pointer Reference Routes 3 Next drag the line to a map item or other location where you want to establish a new waypoint and then press in on the CLICK STICK to place the new waypoint A waypoint i...

Page 48: ...time required to travel from a route waypoint to the next ETA To Point Estimated Time of Arrival at a route waypoint in sequence ETE To Point Estimated Time Enroute to a route waypoint Sunrise At Poin...

Page 49: ...you clear the Track Log before you start traveling The percentage of memory used by the current track log is displayed in a window at the top of the page After the Track Log is Cleared it will show z...

Page 50: ...e the Tracback feature highlight the Tracback button and then press in on the CLICK STICK This will display the Tracback Menu with two options To Beginning and To End Highlight the desired option and...

Page 51: ...es or 24 International Time Zones nearest city or geographical region When selecting Other you can enter the UTC Time Offset for any other time zone Refer to the instructions for setting the UTC Time...

Page 52: ...her reference The default datum is WGS 84 World Geodetic Survey 1984 and should only be changed when using maps or charts specifying a different datum If a map does specify a datum use the options lis...

Page 53: ...ght the contrast slider and then press in on the CLICK STICK to activate 2 Move the CLICK STICK Up or Down to move the contrast slider until the desired contrast has been set Heading Page Overview You...

Page 54: ...lows DGPS input using a standard RTCM SC 104 format and supports the output of standard NMEA 0183 version 2 3 data RTCM In Text Out Allows DGPS input using a standard RTCM SC 104 format and simple ASC...

Page 55: ...mode this feature searches for a WAAS satellite near your location and then receives data for correcting dif ferentials in the GPS satellite signals When WAAS has been enabled you will see WAAS satell...

Page 56: ...s of the moon by pressing the center button and then the far right stop button when the desired date appears Step by Step Instructions To set the date and time 1 For the Date and Current Time highligh...

Page 57: ...he year and then press in on the CLICK STICK to begin entering the year using the data entry keyboard Or 3 Choose Set To Current Date from the Options Menu To create a reference note for a selected da...

Page 58: ...ion eld and then press in on the CLICK STICK to display the New Location options list 2 Highlight the option desired and then press in on the CLICK STICK to activate If you choose Current Location the...

Page 59: ...In patch Power Input Two 1 5 volt AA batteries3 Power Consumption 0 5 watts max Battery Life Up to 18 hours of typical use in Battery Saver mode4 Speci cations subject to change without notice 1 With...

Page 60: ...l west Offsets for Continental U S would be EST 5 EDT 4 CST 6 CDT 5 MST 7 MDT 6 PST 8 PDT 7 Longitudinal Zone Offset W180 0 to W172 5 12 00 W172 5 to W157 5 11 00 W157 5 to W142 5 10 00 W142 5 to W127...

Page 61: ...tput Not shown PC Interface Cable Cigarette Lighter Power Adapter Allows transfer of waypoints and routes from a PC to the eTrex Legend and provides unit operation from an automobile cigarette lighter...

Page 62: ...rror PGRMZ altitude PSLIB beacon receiver control DGPS Differential GPS corrections are accepted in RTCM SC 104 version 2 0 format through the Data In line The GARMIN GBR 21 is the recommended beacon...

Page 63: ...is turned Off There is too much map clutter or the scale is such that map features are too densely displayed Some menus and pages have an X Exit on screen button in the upper right corner Replace bat...

Page 64: ...e 10 27 Max Speed 25 Measuring Between Waypoints 12 17 42 Moving a Waypoint 28 A Accessories 55 Activate a Route 37 Altitude Elevation 14 20 Altitude Elevation Entry 14 Antenna 2 3 Arrow Panning 16 18...

Page 65: ...g a Page 5 Serial Number External Inside Back Cover Serial Number Unit i d 49 Set Course 23 37 Software Version Operating 49 Speci cations 53 T Time Format 45 Time Offset Chart 54 Time Zone 45 54 Trac...

Page 66: ...IC LEGAL RIGHTS WHICH MAY VARY FROM STATE TO STATE IN NO EVENT SHALL GARMIN BE LIABLE FOR ANY INCIDENTAL SPECIAL INDIRECT OR CONSEQUENTIAL DAMAGES WHETHER RESULTING FROM THE USE MISUSE OR INABILITY TO...

Page 67: ...battery compartment in case it is lost stolen or needs service Be sure to keep your original sales receipt in a safe place or attach a photocopy to the inside of the manual I Serial Number Product Reg...

Page 68: ...l Inc 1200 E 151st Street Olathe KS 66062 U S A GARMIN Europe Ltd Unit 5 The Quadrangle Abbey Park Industrial Estate Romsey SO51 9AQ U K GARMIN Corp No 68 Jangshu 2nd Road Shijr Taipei County Taiwan w...

Reviews: