10
To begin learning how to use your eTrex Mariner,
begin by using some basic navigation techniques such as
marking your current location as a waypoint, then travel
a short distance and allow yourself to be guided back to
where you started.
Marking your Current Location as a Waypoint
The fi rst step in most navigation exercises is to mark
your current location as a waypoint so you can return
to it later.
To Mark a Waypoint:
1. Press in and hold the
CLICK STICK
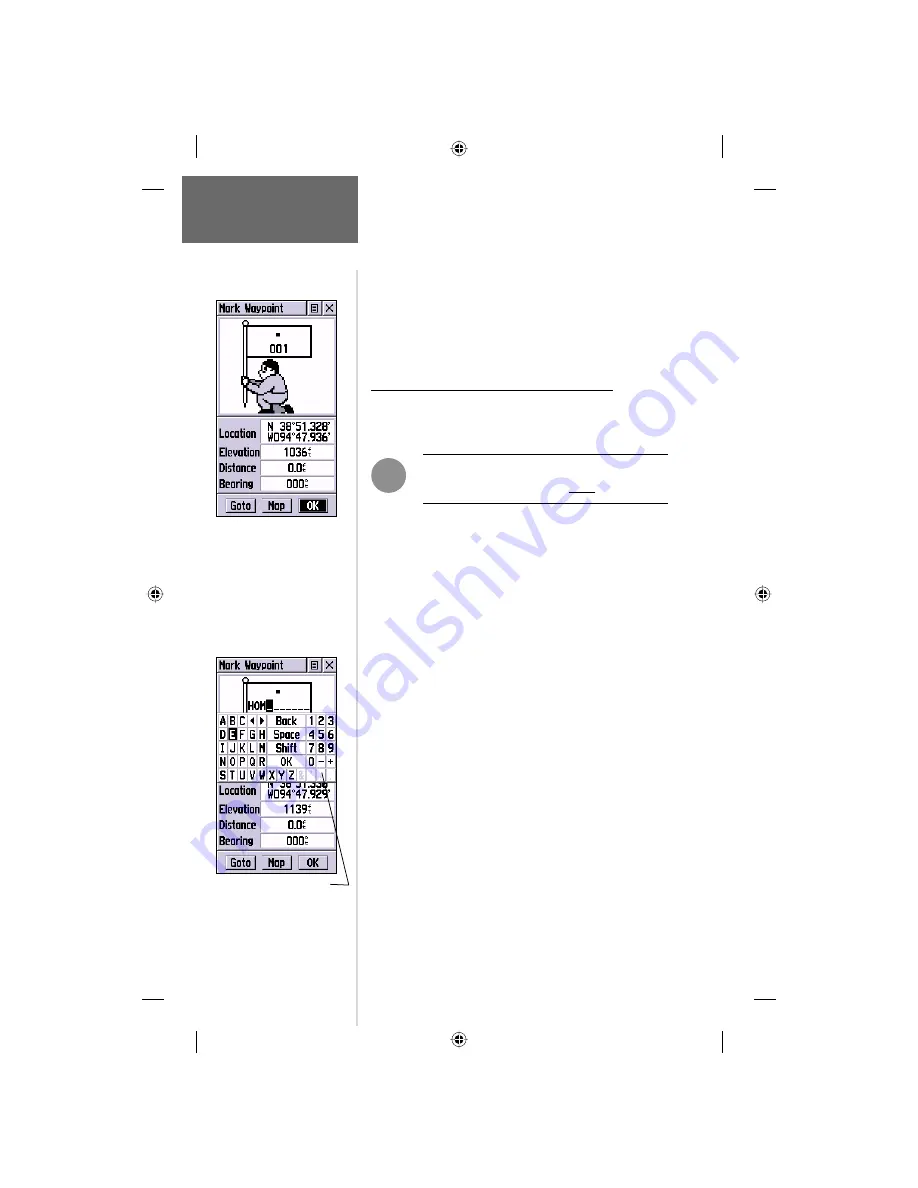
until the ‘Mark
Waypoint’ Page is displayed. Whenever you hold in on the
CLICK STICK
,
your current location will be marked as a
new waypoint with a three-digit number assigned.
Before saving it, you can personalize the newly marked
waypoint by changing the numeric designation to a more
meaningful name. You can also give it a map symbol to make it
more recognizable when viewed on the map.
To change the waypoint name:
1. Use the
CLICK STICK
to highlight the waypoint
name fi eld (001) and then press it in to display
the data entry keyboard.
2. Use the
CLICK STICK
to highlight the desired charac-
ters for your new name and then press it in to
place a character in the data fi eld. The fi eld will automati-
cally move to the next character position.
3. Repeat the process until you have completed the new
name or have reached the character limit for the fi eld.
Then highlight ‘OK’ on the keyboard and then press in on
the
CLICK STICK
to complete the name entry and close
the keyboard.
F
NOTE:
The eTrex Mariner must be “READY TO
NAVIGATE” before you can Mark a waypoint.
Getting Started
Basic Navigation
The Mark Waypoint Page dis-
playing your Marked Waypoint,
along with the latitude and lon-
gitude and approx. elevation.
On-screen buttons can create
a Direct path (Goto) to the
waypoint, show it on the map
(Map), and confi rm your selec-
tion as a waypoint (OK).
The Data Entry Keyboard


