3
Set the walk time for each interval.
4
Go for a run.
After you turn on the run/walk feature, it is used every time you
go for a run unless you turn it off or enable Virtual Pacer™
Virtual Pacer
Virtual Pacer is a training tool designed to help you improve
your performance by encouraging you to run at the pace you
set.
Running With Virtual Pacer
NOTE:
You must set up Virtual Pacer before starting a run.
After you start the run timer, you cannot change the settings.
1
Select >
Run Options
>
Virtual Pacer
.
2
Select
Turn On
or
Edit Pace
to set the pace.
3
Enter your pace.
After you turn on Virtual Pacer, it is used every time you go for a
run unless you turn it off or enable run/walk (
Using Auto Lap®
You can set your device to use Auto Lap, which automatically
marks a lap at every mile (kilometer), or you can mark laps
manually. This feature is helpful for comparing your
performance over different parts of an activity.
1
Select >
Run Options
>
Laps
.
2
Select an option:
• Select
Auto Lap
>
Turn On
to use Auto Lap.
• Select
Lap Key
>
Turn On
to use
to mark a lap during
an activity.
3
Pausing Your Run Automatically
You can use Auto Pause® to pause the timer automatically
when you stop moving. This feature is helpful if your run
includes stop lights or other places where you need to stop.
NOTE:
The paused time is not saved with your history data.
Select >
Run Options
>
Auto Pause
>
Turn On
.
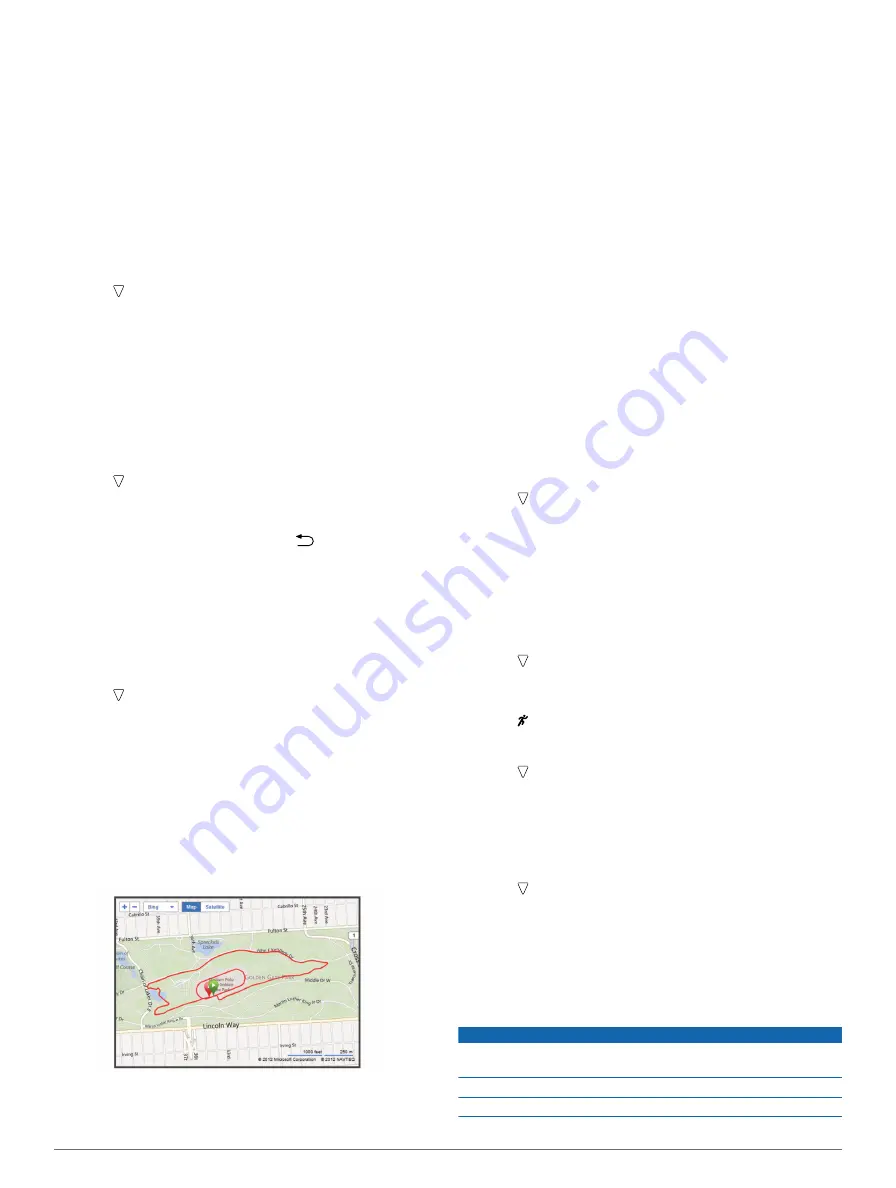
Garmin Connect
Garmin Connect gives you a simple way to store and track your
activities, analyze your data, and share with others. To sign up
.
Store your activities
: After you complete and save an activity
with your device, you can upload that activity to Garmin
Connect and keep it as long as you want.
Analyze your data
: You can view more detailed information
about your activity, including an overhead map view, pace
and speed charts, and customizable reports.
Share your activities
: You can email your activities to others,
or post links to your activities on your favorite social
networking sites.
Using Garmin Connect
1
Connect the device to your computer using the USB cable
(
).
2
3
Select
Getting Started
.
4
Follow the on-screen instructions.
History
You can view your last seven running sessions on your
Forerunner, but you can upload and view unlimited running
sessions to Garmin Connect. When the memory is full, your
oldest data is overwritten.
NOTE:
History is not recorded while the timer is stopped or
paused.
Personal Records
When you complete a run, the device displays any new
personal records you achieved during that run. Personal
records include your fastest time over several typical race
distances and longest run.
Viewing History and Personal Records
Run history displays the date, time, distance, pace, calories,
and lap data. The device also displays your personal record
time, distance, and pace over various distances.
1
Select >
History
.
2
Select an option:
• Select
Runs
to view information about your saved running
sessions.
• Select
Records
to view your personal records.
Deleting a Run from History
NOTE:
Deleting a run from your device history does not delete it
from Garmin Connect.
1
Select >
History
.
2
Select
Runs
.
3
Select a run.
4
Select >
Discard
>
Yes
.
Deleting Personal Records
1
Select >
History
>
Records
.
2
Select a record to delete.
3
Select
Clear
>
Yes
.
Restoring a Personal Record
You can set each personal record back to the one previously
recorded.
1
Select >
History
>
Records
.
2
Select a record to restore.
3
Select
Use Previous
>
Use Record
.
Appendix
Device Care
NOTICE
Avoid extreme shock and harsh treatment, because it can
degrade the life of the product.
Avoid pressing the keys under water.
Do not use a sharp object to clean the device.
2
History
Summary of Contents for Forerunner 10
Page 1: ...Forerunner 10 Owner s Manual August 2012 190 01472 00_0A Printed in Taiwan ...
Page 4: ......
Page 6: ... Bö ÝflÕˆÞfi_lLB hZB_ òp Ñ h nàØ ...
Page 8: ... Yö ÝflÕˆÞfi_lFB fZ___ò UíPÞop H b ÓÑVâd na3Eõê ÃÛ S h ª tàÜ fl ...
Page 14: ...ã W yVzŠÄÙ Ý ÚžÙô G 2pA ž rIPÇ 8È õTÜã WÃXï C é DÿV ya e Ö Úja ZøÞð6a Š ËûfiÖ ïƒ...
Page 16: ... AE 3âà S ÖT W ygzflÄß Ý ÚÌÙà I 23A žÿ rXPŁ lÈ ùTıã GÃDïUC éÎ QÿE aQe ÖÎÚpa ˇøÞð6aÄ Ž Ë fiÜ Eï ...
Page 17: ... 2A...
Page 22: ...é UÿE ya eœÖ Ú a Jø ð9aŒ š ãË fiÜ Gï ...
Page 25: ......
Page 27: ...ˇ 8A...
Page 29: ...R F 2 History ...
Page 33: ...þ Ê ŠTS osØ ÕG ßå30 Ä Ðˇf ì BÓ úÖ ž ൠòƒ5 sé Z ÊÉô é y6 F çé _ GP ...
Page 34: ... x CâÌ cðä Õy Weightòƒ5ös p JÊšôR À ù 16 F çù N G x ...
Page 40: ......


