


10
Pulzustartományok
Zóna
Maximá-
lis pulzus
%-a
Érzékelhető
igénybevétel
Eredmény
1
50%–60% Nyugodt, könnyű tempó;
ütemes légzés
Szabályzott légzést
igénylő edzés kezdő
szintje; stressz csökkentő
2
60%–70%
Kényelmes tempó; eny
-
hén mélyebb légzés, tár
-
salgás lehetséges
Alap szív- és érrendszeri
edzés; jó bemelegítési,
rekreációs tempó
3
70%–80%
Mérsékelt temó;
társalgás nehezebben
folytatható
Fokozott légzőrendszeri
terhelés; optimális
szívrendszeri edzés
4
80%–90%
A tempó gyors és kicsit
kényelmetlen;
erőteljes légzés
Fokozott anaerob teljesít
-
mény és küszöb, fokozott
sebesség
5
90%–100%
A tempó sprintre vált,
hosszú ideig nem tartha
-
tó; nehéz légzés
Anaerob és izomzati álló
-
képesség, erő növekedés
Kerékpáros teljesítménytartományok beállítása
A tartományok nem, súly és átlagos teljesítmény szerint kerültek felosztás
-
ra, ezért előfordulhat, hogy egyéni képességeinket nem fedik le megfelelő
-
en. Amennyiben ismerjük funkcionális küszöbteljesítményünket (FTP), meg
-
adhatjuk azt; ekkor a készülék automatikusan kiszámolja a zónákat. Egye
-
di teljesítménytartományt állíthatunk fel akár a készüléken, akár a Garmin
Connect fiókunkban.
1.
Nyomjuk meg hosszan a
Introduction
WARNING
See the
Important Safety and Product Information
guide in the
product box for product warnings and other important
information.
Always consult your physician before you begin or modify any
exercise program.
Keys
À
LIGHT
Hold to turn the device on.
Hold to view the controls menu.
Select to turn the backlight on and off.
Á
START
STOP
Select to start and stop the timer.
Select to choose an option or to acknowledge a message.
Â
BACK
Select to record a lap, rest, or transition during an activity.
Select to return to the previous screen.
Ã
DOWN Select to scroll through the widgets, data screens, options,
and settings.
Hold to manually change sports during an activity.
Ä
UP
Select to scroll through the widgets, data screens, options,
and settings.
Hold to view the menu.
GPS Status and Status Icons
The GPS status ring and icons temporarily overlay each data
screen. For outdoor activities, the status ring turns green when
GPS is ready. A flashing icon means the device is searching for
a signal. A solid icon means the signal was found or the sensor
is connected.
GPS
GPS status
Battery status
Smartphone connection status
Wi
‑
Fi
®
technology status
Heart rate status
Foot pod status
Running Dynamics Pod status
Speed and cadence sensor status
Power meter status
tempe
™
sensor status
VIRB
®
camera status
Going for a Run
The first fitness activity you record on your device can be a run,
ride, or any outdoor activity. You may need to charge the device
before starting the activity (
Charging the Device
, page 26
).
1
Select
START
, and select an activity.
2
Go outside, and wait while the device locates satellites.
4
Go for a run.
5
After you complete your run, select
STOP
to stop the timer.
6
Select an option:
•
Select
Resume
to restart the timer.
•
Select
Save
to save the run and reset the timer. You can
select the run to view a summary.
•
Select
Resume Later
to suspend the run and continue
recording later.
•
Select
Lap
to mark a lap.
•
Select
Discard
>
Yes
to delete the run.
Activities
Your device can be used for indoor, outdoor, athletic, and fitness
activities. When you start an activity, the device displays and
records sensor data. You can save activities and share them
with the Garmin Connect
™
community.
You can also add Connect IQ
™
activity apps to your device using
your Garmin Connect account (
Connect IQ Features
,
page 17
).
For more information about activity tracking and fitness metric
accuracy, go to
garmin.com/ataccuracy
.
Starting an Activity
When you start an activity, GPS turns on automatically (if
required). When you stop the activity, the device returns to
watch mode.
1
From the watch face, select
START
.
2
Select an activity.
3
If necessary, follow the on-screen instructions to enter
additional information.
4
If necessary, wait while the device connects to your ANT+
®
sensors.
5
If the activity requires GPS, go outside, and wait while the
device locates satellites.
6
Select
START
to start the timer.
NOTE:
The device does not record your activity data until
you start the timer.
Tips for Recording Activities
•
Charge the device before starting an activity (
Charging the
Device
, page 26
).
•
Select
to record laps.
•
Select
UP
or
to view additional data pages.
Introduction
1
-t.
2.
Válasszuk a
Beállítások
>
Felhasználói profil
>
Teljesítménytart.
>
Ez
alapján
pontot.
3.
Válasszunk az alábbiak közül:
• A
Watt
opcióval wattban tekinthetjük meg és szerkeszthetjük a tarto
-
mányokat.
•
FTP %
opció esetén FTP-értékünk százalékában látjuk az értékeket.
4.
Válasszuk az
FTP
pontot, majd adjuk meg FTP értékünket.
5.
Válasszuk ki a tartományt, majd adjuk meg az egyes tartományok ér
-
tékét.
6.
Amennyiben szükséges, válasszuk a
Minimum
pontot, és adjunk meg
egy minimális teljesítmény értéket.
Edzési állapot szüneteltetése
Amennyiben sérülést szenvedünk vagy megbetegszünk, szüneteltethetjük
az edzési állapotunkat. A fitnesz tevékenységeket továbbra is rögzíthetjük,
azonban az edzési állapot, az edzési terhelés fókusz, a regenerálódási visz
-
szajelző adatok és az edzési javaslatok ideiglenesen szünetelnek.
Válasszunk az alábbi lehetőségek közül:
• Az edzési állapot widgetből nyomjuk le hosszan a
Introduction
WARNING
See the
Important Safety and Product Information
guide in the
product box for product warnings and other important
information.
Always consult your physician before you begin or modify any
exercise program.
Keys
À
LIGHT
Hold to turn the device on.
Hold to view the controls menu.
Select to turn the backlight on and off.
Á
START
STOP
Select to start and stop the timer.
Select to choose an option or to acknowledge a message.
Â
BACK
Select to record a lap, rest, or transition during an activity.
Select to return to the previous screen.
Ã
DOWN Select to scroll through the widgets, data screens, options,
and settings.
Hold to manually change sports during an activity.
Ä
UP
Select to scroll through the widgets, data screens, options,
and settings.
Hold to view the menu.
GPS Status and Status Icons
The GPS status ring and icons temporarily overlay each data
screen. For outdoor activities, the status ring turns green when
GPS is ready. A flashing icon means the device is searching for
a signal. A solid icon means the signal was found or the sensor
is connected.
GPS
GPS status
Battery status
Smartphone connection status
Wi
‑
Fi
®
technology status
Heart rate status
Foot pod status
Running Dynamics Pod status
Speed and cadence sensor status
Power meter status
tempe
™
sensor status
VIRB
®
Going for a Run
The first fitness activity you record on your device can be a run,
ride, or any outdoor activity. You may need to charge the device
before starting the activity (
Charging the Device
, page 26
).
1
Select
START
, and select an activity.
2
Go outside, and wait while the device locates satellites.
3
Select
START
to start the timer.
4
Go for a run.
5
After you complete your run, select
STOP
to stop the timer.
6
Select an option:
•
Select
Resume
to restart the timer.
•
Select
Save
to save the run and reset the timer. You can
select the run to view a summary.
•
Select
Resume Later
to suspend the run and continue
recording later.
•
Select
Lap
to mark a lap.
•
Select
Discard
>
Yes
to delete the run.
Activities
Your device can be used for indoor, outdoor, athletic, and fitness
activities. When you start an activity, the device displays and
records sensor data. You can save activities and share them
with the Garmin Connect
™
community.
You can also add Connect IQ
™
activity apps to your device using
your Garmin Connect account (
Connect IQ Features
,
page 17
).
For more information about activity tracking and fitness metric
.
Starting an Activity
When you start an activity, GPS turns on automatically (if
required). When you stop the activity, the device returns to
watch mode.
START
.
2
Select an activity.
3
If necessary, follow the on-screen instructions to enter
additional information.
4
If necessary, wait while the device connects to your ANT+
®
sensors.
5
If the activity requires GPS, go outside, and wait while the
device locates satellites.
6
Select
START
NOTE:
The device does not record your activity data until
you start the timer.
Tips for Recording Activities
•
Charge the device before starting an activity (
Charging the
Device
, page 26
).
•
Select
to record laps.
•
Select
UP
or
DOWN
to view additional data pages.
Introduction
1
-t, majd válasz
-
szuk a
Beállítások
>
Edzési állapot szünet.
pontot.
• A Garmin Connect beállításokból válasszuk a
Teljesítmény statiszti-
ka
>
Edzési állapot
>
Heart Rate Zone Calculations
Zone % of
Maximum
Heart Rate
Perceived Exertion
Benefits
1
50–60%
Relaxed, easy pace,
rhythmic breathing
Beginning-level
aerobic training,
reduces stress
2
60–70%
Comfortable pace,
slightly deeper
breathing, conversation
possible
Basic cardiovascular
training, good
recovery pace
3
70–80%
Moderate pace, more
difficult to hold
conversation
Improved aerobic
capacity, optimal
cardiovascular training
4
80–90%
Fast pace and a bit
uncomfortable, breathing
forceful
Improved anaerobic
capacity and
threshold, improved
speed
5
90–100%
Sprinting pace,
unsustainable for long
period of time, labored
breathing
Anaerobic and
muscular endurance,
increased power
Setting Your Cycling Power Zones
The values for the zones are default values based on gender,
weight, and average ability, and may not match your personal
abilities. If you know your functional threshold power (FTP)
value, you can enter it and allow the software to calculate your
zones automatically. You can manually adjust your zones on the
device or using your Garmin Connect account.
1
Hold .
2
Select
Settings
>
User Profile
>
Power Zones
>
Based On
.
3
Select an option:
• Select
Watts
to view and edit the zones in watts.
• Select
%FTP
to view and edit the zones as a percentage
of your functional threshold power.
4
Select
FTP
, and enter your FTP value.
5
Select a zone, and enter a value for each zone.
6
If necessary, select
Minimum
, and enter a minimum power
value.
Pausing Your Training Status
If you are injured or sick, you can pause your training status.
You can continue to record fitness activities, but your training
status, training load focus, recovery feedback, and workout
recommendations are temporarily disabled.
Select an option:
• From the training status widget, hold , and select
Options
>
Pause Training Status
.
• From your Garmin Connect settings, select
Performance
Stats
>
Training Status
> >
Pause Training Status
.
TIP:
You should sync your device with your Garmin Connect
account.
Resuming Your Paused Training Status
You can resume your training status when you are ready to start
training again. For best results, you need at least two VO2 max.
measurements each week (
About VO2 Max. Estimates
,
page 16
).
Select an option:
• From the training status widget, hold , and select
Options
>
Resume Training Status
.
• From your Garmin Connect settings, select
Performance
Stats
>
Training Status
> >
Resume Training Status
.
TIP:
You should sync your device with your Garmin Connect
account.
Activity Tracking
The activity tracking feature records your daily step count,
distance traveled, intensity minutes, floors climbed, calories
burned, and sleep statistics for each recorded day. Your calories
burned includes your base metabolism plus activity calories.
The number of steps taken during the day appears on the steps
widget. The step count is updated periodically.
For more information about activity tracking and fitness metric
accuracy, go to
garmin.com/ataccuracy
.
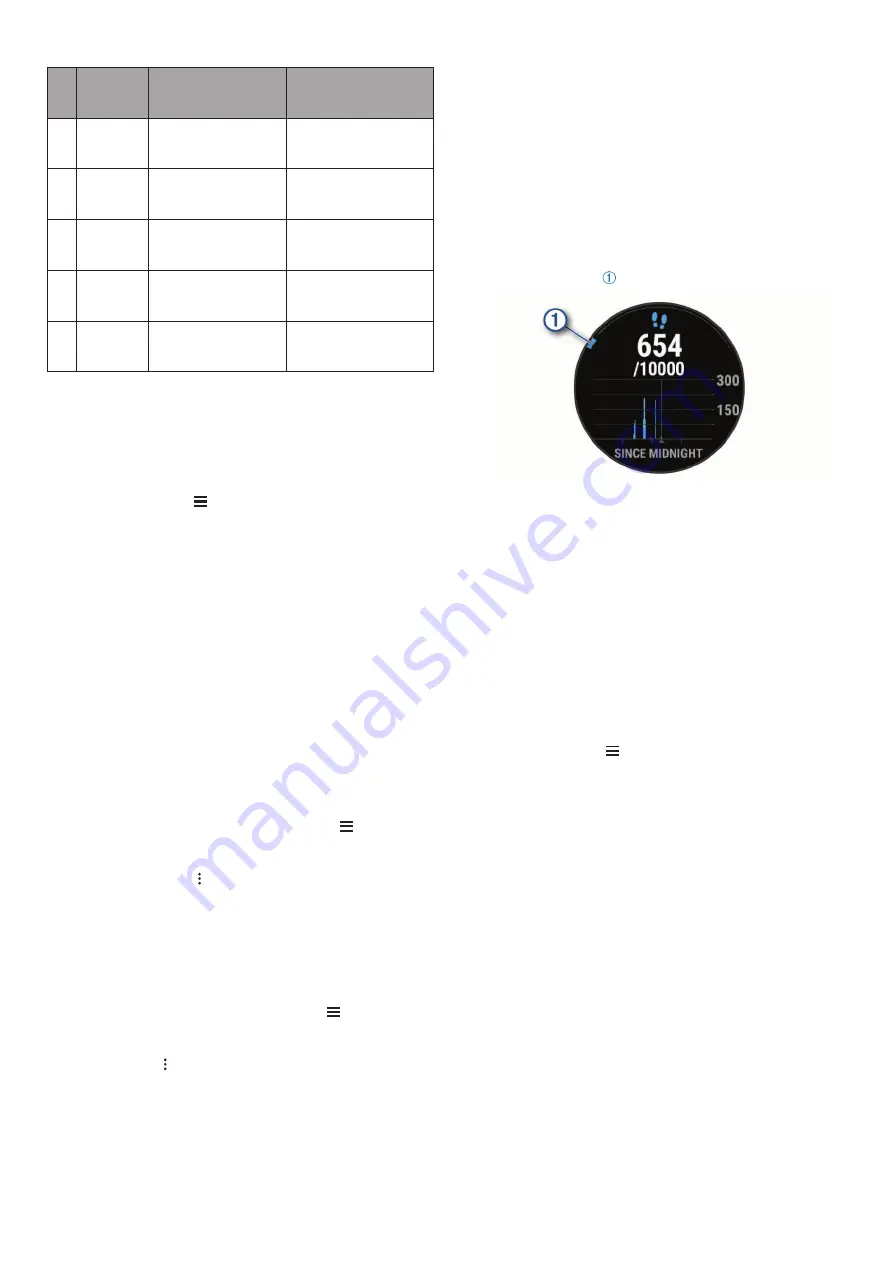
Auto Goal
Your device creates a daily step goal automatically, based on
your previous activity levels. As you move during the day, the
device shows your progress toward your daily goal .
If you choose not to use the auto goal feature, you can set a
personalized step goal on your Garmin Connect account.
Using the Move Alert
Sitting for prolonged periods of time can trigger undesirable
metabolic state changes. The move alert reminds you to keep
moving. After one hour of inactivity, Move! and the red bar
appear. Additional segments appear after every 15 minutes of
inactivity. The device also beeps or vibrates if audible tones are
turned on (
System Settings
, page 34
).
Go for a short walk (at least a couple of minutes) to reset the
move alert.
Turning on the Move Alert
1
Hold .
2
Select
Settings
>
Activity Tracking
>
Move Alert
>
On
.
Sleep Tracking
While you are sleeping, the device automatically detects your
sleep and monitors your movement during your normal sleep
hours. You can set your normal sleep hours in the user settings
on your Garmin Connect account. Sleep statistics include total
hours of sleep, sleep levels, and sleep movement. You can view
your sleep statistics on your Garmin Connect account.
NOTE:
Naps are not added to your sleep statistics. You can use
do not disturb mode to turn off notifications and alerts, with the
exception of alarms (
Using Do Not Disturb Mode
, page 10
).
Using Automated Sleep Tracking
1
Wear your device while sleeping.
2
Upload your sleep tracking data to the Garmin Connect site
(
Manually Syncing Data with Garmin Connect
You can view your sleep statistics on your Garmin Connect
account.
Using Do Not Disturb Mode
You can use do not disturb mode to turn off the backlight, tone
alerts, and vibration alerts. For example, you can use this mode
while sleeping or watching a movie.
NOTE:
You can set your normal sleep hours in the user settings
on your Garmin Connect account. You can enable the During
Sleep option in the system settings to automatically enter do not
disturb mode during your normal sleep hours (
System Settings
,
page 34
).
10
Activity Tracking
>
Edzési állapot szünet.
pontot.
TIPP!
Ésszerű a készüléket szinkronizálni a Garmin Connect fiókunkkal.
Szünetelő edzési állapot visszaállítása
Ha újból készen állunk az edzésre, visszaállíthatjuk az edzési állapotot. A
legjobb eredmények érdekében hetente legalább két VO2 max. mérésre van
).
Válasszunk az alábbiak közül:
• Az edzési állapot widgetből nyomjuk le hosszan a
Introduction
WARNING
See the
Important Safety and Product Information
guide in the
product box for product warnings and other important
information.
Always consult your physician before you begin or modify any
exercise program.
Keys
À
LIGHT
Hold to turn the device on.
Hold to view the controls menu.
Select to turn the backlight on and off.
Á
START
STOP
Select to start and stop the timer.
Select to choose an option or to acknowledge a message.
Â
BACK
Select to record a lap, rest, or transition during an activity.
Select to return to the previous screen.
Ã
DOWN Select to scroll through the widgets, data screens, options,
and settings.
Hold to manually change sports during an activity.
Ä
UP
Select to scroll through the widgets, data screens, options,
and settings.
Hold to view the menu.
GPS Status and Status Icons
The GPS status ring and icons temporarily overlay each data
screen. For outdoor activities, the status ring turns green when
GPS is ready. A flashing icon means the device is searching for
a signal. A solid icon means the signal was found or the sensor
is connected.
GPS
GPS status
Battery status
Smartphone connection status
Wi
‑
Fi
®
technology status
Heart rate status
Foot pod status
Running Dynamics Pod status
Speed and cadence sensor status
Power meter status
tempe
™
sensor status
VIRB
®
camera status
Going for a Run
The first fitness activity you record on your device can be a run,
ride, or any outdoor activity. You may need to charge the device
before starting the activity (
Charging the Device
, page 26
).
1
Select
START
, and select an activity.
2
Go outside, and wait while the device locates satellites.
3
Select
START
to start the timer.
4
Go for a run.
5
After you complete your run, select
STOP
to stop the timer.
6
Select an option:
•
Select
Resume
to restart the timer.
•
Select
Save
to save the run and reset the timer. You can
select the run to view a summary.
•
Select
Resume Later
to suspend the run and continue
recording later.
•
Select
Lap
to mark a lap.
Activities
Your device can be used for indoor, outdoor, athletic, and fitness
activities. When you start an activity, the device displays and
records sensor data. You can save activities and share them
with the Garmin Connect
™
community.
You can also add Connect IQ
™
activity apps to your device using
your Garmin Connect account (
Connect IQ Features
,
page 17
).
For more information about activity tracking and fitness metric
accuracy, go to
garmin.com/ataccuracy
.
When you start an activity, GPS turns on automatically (if
required). When you stop the activity, the device returns to
watch mode.
1
From the watch face, select
START
.
2
Select an activity.
3
If necessary, follow the on-screen instructions to enter
additional information.
4
If necessary, wait while the device connects to your ANT+
®
sensors.
5
If the activity requires GPS, go outside, and wait while the
device locates satellites.
6
Select
START
to start the timer.
NOTE:
The device does not record your activity data until
you start the timer.
Tips for Recording Activities
•
Charge the device before starting an activity (
Charging the
Device
, page 26
).
•
Select
to record laps.
•
Select
UP
or
DOWN
to view additional data pages.
Introduction
1
-t, majd válasszuk
a
Beállítások
>
Edzési állapot
visszaáll.
pontot.
• Garmin Connect beállításokból válasszuk a
Teljesítmény statisztika
>
Edzési állapot
>
Heart Rate Zone Calculations
Zone % of
Maximum
Heart Rate
Perceived Exertion
Benefits
1
50–60%
Relaxed, easy pace,
rhythmic breathing
Beginning-level
aerobic training,
reduces stress
2
60–70%
Comfortable pace,
slightly deeper
breathing, conversation
possible
Basic cardiovascular
training, good
recovery pace
3
70–80%
Moderate pace, more
difficult to hold
conversation
Improved aerobic
capacity, optimal
cardiovascular training
4
80–90%
Fast pace and a bit
uncomfortable, breathing
forceful
Improved anaerobic
capacity and
threshold, improved
speed
5
90–100%
Sprinting pace,
unsustainable for long
period of time, labored
breathing
Anaerobic and
muscular endurance,
increased power
Setting Your Cycling Power Zones
The values for the zones are default values based on gender,
weight, and average ability, and may not match your personal
abilities. If you know your functional threshold power (FTP)
value, you can enter it and allow the software to calculate your
zones automatically. You can manually adjust your zones on the
device or using your Garmin Connect account.
1
Hold .
2
Select
Settings
>
User Profile
>
Power Zones
>
Based On
.
3
Select an option:
• Select
Watts
to view and edit the zones in watts.
• Select
%FTP
to view and edit the zones as a percentage
of your functional threshold power.
4
Select
FTP
, and enter your FTP value.
5
Select a zone, and enter a value for each zone.
6
If necessary, select
Minimum
, and enter a minimum power
value.
Pausing Your Training Status
If you are injured or sick, you can pause your training status.
You can continue to record fitness activities, but your training
status, training load focus, recovery feedback, and workout
recommendations are temporarily disabled.
Select an option:
• From the training status widget, hold , and select
Options
>
Pause Training Status
.
• From your Garmin Connect settings, select
Performance
Stats
>
Training Status
> >
Pause Training Status
.
TIP:
You should sync your device with your Garmin Connect
account.
Resuming Your Paused Training Status
You can resume your training status when you are ready to start
training again. For best results, you need at least two VO2 max.
measurements each week (
About VO2 Max. Estimates
,
page 16
).
Select an option:
• From the training status widget, hold , and select
Options
>
Resume Training Status
.
• From your Garmin Connect settings, select
Performance
Stats
>
Training Status
> >
Resume Training Status
.
TIP:
You should sync your device with your Garmin Connect
account.
Activity Tracking
The activity tracking feature records your daily step count,
distance traveled, intensity minutes, floors climbed, calories
burned, and sleep statistics for each recorded day. Your calories
burned includes your base metabolism plus activity calories.
The number of steps taken during the day appears on the steps
widget. The step count is updated periodically.
For more information about activity tracking and fitness metric
accuracy, go to
garmin.com/ataccuracy
.
Auto Goal
Your device creates a daily step goal automatically, based on
your previous activity levels. As you move during the day, the
device shows your progress toward your daily goal .
If you choose not to use the auto goal feature, you can set a
personalized step goal on your Garmin Connect account.
Using the Move Alert
Sitting for prolonged periods of time can trigger undesirable
metabolic state changes. The move alert reminds you to keep
moving. After one hour of inactivity, Move! and the red bar
appear. Additional segments appear after every 15 minutes of
inactivity. The device also beeps or vibrates if audible tones are
turned on (
System Settings
, page 34
).
Go for a short walk (at least a couple of minutes) to reset the
move alert.
Turning on the Move Alert
1
Hold .
2
Select
Settings
>
Activity Tracking
>
Move Alert
>
On
.
Sleep Tracking
While you are sleeping, the device automatically detects your
sleep and monitors your movement during your normal sleep
hours. You can set your normal sleep hours in the user settings
on your Garmin Connect account. Sleep statistics include total
hours of sleep, sleep levels, and sleep movement. You can view
your sleep statistics on your Garmin Connect account.
NOTE:
Naps are not added to your sleep statistics. You can use
do not disturb mode to turn off notifications and alerts, with the
exception of alarms (
Using Do Not Disturb Mode
, page 10
).
Using Automated Sleep Tracking
1
Wear your device while sleeping.
2
Upload your sleep tracking data to the Garmin Connect site
(
Manually Syncing Data with Garmin Connect
, page 22
).
You can view your sleep statistics on your Garmin Connect
account.
Using Do Not Disturb Mode
You can use do not disturb mode to turn off the backlight, tone
alerts, and vibration alerts. For example, you can use this mode
while sleeping or watching a movie.
NOTE:
You can set your normal sleep hours in the user settings
on your Garmin Connect account. You can enable the During
Sleep option in the system settings to automatically enter do not
disturb mode during your normal sleep hours (
System Settings
,
page 34
).
10
Activity Tracking
>
Edzési állapot visszaáll.
pontot.
TIPP!
Ésszerű a készüléket szinkronizálni a Garmin Connect fiókunkkal.
Tevékenység figyelés
A tevékenység figyelő funkció egy adott napra vonatkozóan rögzíti a napi lé
-
pésszámot, a megtett távolságot, az intenzitás perceket, a megmászott eme
-
leteket, az elégetett kalóriát, valamint az alvási statisztikát. Az elégetett kalória
tartalmazza az alapvető anyagcserére jellemző kalória értéket, valamint a te
-
vékenység során elégetett kalóriát.
A nap folyamán megtett lépések összesített száma a lépésszám figyelés
widgetben látható. A lépésszám időről időre frissítésre kerül.
További információkért a tevékenység figyelésről és a fitnesz metrikus pon
-
tosságról lásd a garmin.com/ataccuracy oldalt.
Automatikus cél funkció
Korábbi tevékenységünk alapján a készülék minden nap automatikusan be
-
állít egy aznapra vonatkozó célt. Amikor elkezdünk sétálni vagy futni, a ké
-
szülék mutatja a kitűzött cél teljesítésének folyamatát.
Heart Rate Zone Calculations
Zone % of
Maximum
Heart Rate
Perceived Exertion
Benefits
1
50–60%
Relaxed, easy pace,
rhythmic breathing
Beginning-level
aerobic training,
reduces stress
2
60–70%
Comfortable pace,
slightly deeper
breathing, conversation
possible
Basic cardiovascular
training, good
recovery pace
3
70–80%
Moderate pace, more
difficult to hold
conversation
Improved aerobic
capacity, optimal
cardiovascular training
4
80–90%
Fast pace and a bit
uncomfortable, breathing
forceful
Improved anaerobic
capacity and
threshold, improved
speed
5
90–100%
Sprinting pace,
unsustainable for long
period of time, labored
breathing
Anaerobic and
muscular endurance,
increased power
Setting Your Cycling Power Zones
The values for the zones are default values based on gender,
weight, and average ability, and may not match your personal
abilities. If you know your functional threshold power (FTP)
value, you can enter it and allow the software to calculate your
zones automatically. You can manually adjust your zones on the
device or using your Garmin Connect account.
1
Hold .
2
Select
Settings
>
User Profile
>
Power Zones
>
Based On
.
3
Select an option:
• Select
Watts
to view and edit the zones in watts.
• Select
%FTP
to view and edit the zones as a percentage
of your functional threshold power.
4
Select
FTP
, and enter your FTP value.
5
Select a zone, and enter a value for each zone.
6
If necessary, select
Minimum
, and enter a minimum power
value.
Pausing Your Training Status
If you are injured or sick, you can pause your training status.
You can continue to record fitness activities, but your training
status, training load focus, recovery feedback, and workout
recommendations are temporarily disabled.
Select an option:
• From the training status widget, hold , and select
Options
>
Pause Training Status
.
• From your Garmin Connect settings, select
Performance
Stats
>
Training Status
> >
Pause Training Status
.
TIP:
You should sync your device with your Garmin Connect
account.
Resuming Your Paused Training Status
You can resume your training status when you are ready to start
training again. For best results, you need at least two VO2 max.
measurements each week (
About VO2 Max. Estimates
,
page 16
).
Select an option:
• From the training status widget, hold , and select
Options
>
Resume Training Status
.
• From your Garmin Connect settings, select
Performance
Stats
>
Training Status
> >
Resume Training Status
.
TIP:
You should sync your device with your Garmin Connect
account.
Activity Tracking
The activity tracking feature records your daily step count,
distance traveled, intensity minutes, floors climbed, calories
burned, and sleep statistics for each recorded day. Your calories
burned includes your base metabolism plus activity calories.
The number of steps taken during the day appears on the steps
widget. The step count is updated periodically.
For more information about activity tracking and fitness metric
accuracy, go to
garmin.com/ataccuracy
.
Auto Goal
Your device creates a daily step goal automatically, based on
your previous activity levels. As you move during the day, the
device shows your progress toward your daily goal .
If you choose not to use the auto goal feature, you can set a
personalized step goal on your Garmin Connect account.
Using the Move Alert
Sitting for prolonged periods of time can trigger undesirable
metabolic state changes. The move alert reminds you to keep
moving. After one hour of inactivity, Move! and the red bar
appear. Additional segments appear after every 15 minutes of
inactivity. The device also beeps or vibrates if audible tones are
turned on (
System Settings
, page 34
).
Go for a short walk (at least a couple of minutes) to reset the
move alert.
Turning on the Move Alert
1
Hold .
2
Select
Settings
>
Activity Tracking
>
Move Alert
>
On
.
Sleep Tracking
While you are sleeping, the device automatically detects your
sleep and monitors your movement during your normal sleep
hours. You can set your normal sleep hours in the user settings
on your Garmin Connect account. Sleep statistics include total
hours of sleep, sleep levels, and sleep movement. You can view
your sleep statistics on your Garmin Connect account.
NOTE:
Naps are not added to your sleep statistics. You can use
do not disturb mode to turn off notifications and alerts, with the
exception of alarms (
Using Do Not Disturb Mode
, page 10
).
Using Automated Sleep Tracking
1
Wear your device while sleeping.
2
Upload your sleep tracking data to the Garmin Connect site
(
Manually Syncing Data with Garmin Connect
, page 22
).
You can view your sleep statistics on your Garmin Connect
account.
Using Do Not Disturb Mode
You can use do not disturb mode to turn off the backlight, tone
alerts, and vibration alerts. For example, you can use this mode
while sleeping or watching a movie.
NOTE:
You can set your normal sleep hours in the user settings
on your Garmin Connect account. You can enable the During
Sleep option in the system settings to automatically enter do not
disturb mode during your normal sleep hours (
System Settings
,
page 34
).
10
Activity Tracking
A napi cél funkciót kikapcsolva a Garmin Connect felületen egyéni célt hatá
-
rozhatunk meg.
Mozgáshiányra figyelmeztető folyamatjelző sáv
Hosszú időn át egy helyben ülve a szervezetben káros anyagcsere-folyama
-
tok indulnak be. A folyamatjelző sáv figyelmeztet, hogy némi mozgás idősze
-
rűvé vált. Egy órányi mozgás nélkül töltött időszak után a folyamatjelző sáv
első piros szegmense megjelenik, a készülék rezegni kezd vagy hangjelzést
ad (amennyiben a hangjelzések engedélyezve vannak), valamint a
Mozogj!
felirat villan fel. Újabb 15 perc mozgás nélküli időszak után a sáv egy újabb
szegmenssel bővül ki.
Tegyünk meg egy rövid távolságot (pár percet sétáljunk), és azonnal eltű
-
nik a folyamatjelző sáv.
Mozgáshiányra figyelmeztető folyamatjelző sáv
bekapcsolása
1.
Nyomjuk meg hosszan a
Introduction
WARNING
See the
Important Safety and Product Information
guide in the
product box for product warnings and other important
information.
Always consult your physician before you begin or modify any
exercise program.
Keys
À
LIGHT
Hold to turn the device on.
Hold to view the controls menu.
Select to turn the backlight on and off.
Á
START
STOP
Select to start and stop the timer.
Select to choose an option or to acknowledge a message.
Â
BACK
Select to record a lap, rest, or transition during an activity.
Select to return to the previous screen.
Ã
DOWN Select to scroll through the widgets, data screens, options,
and settings.
Hold to manually change sports during an activity.
Ä
UP
Select to scroll through the widgets, data screens, options,
and settings.
Hold to view the menu.
GPS Status and Status Icons
The GPS status ring and icons temporarily overlay each data
screen. For outdoor activities, the status ring turns green when
GPS is ready. A flashing icon means the device is searching for
a signal. A solid icon means the signal was found or the sensor
is connected.
GPS
GPS status
Battery status
Smartphone connection status
Wi
Fi
®
technology status
Heart rate status
Foot pod status
Running Dynamics Pod status
Speed and cadence sensor status
Power meter status
tempe
™
sensor status
VIRB
®
camera status
Going for a Run
The first fitness activity you record on your device can be a run,
ride, or any outdoor activity. You may need to charge the device
before starting the activity (
Charging the Device
, page 26
).
1
Select
START
, and select an activity.
2
Go outside, and wait while the device locates satellites.
3
Select
START
to start the timer.
4
Go for a run.
5
After you complete your run, select
STOP
to stop the timer.
6
Select an option:
•
Select
Resume
to restart the timer.
•
Select
Save
to save the run and reset the timer. You can
select the run to view a summary.
•
Select
Resume Later
to suspend the run and continue
recording later.
•
Select
Lap
to mark a lap.
•
Select
Discard
>
Yes
to delete the run.
Activities
Your device can be used for indoor, outdoor, athletic, and fitness
activities. When you start an activity, the device displays and
records sensor data. You can save activities and share them
with the Garmin Connect
™
community.
You can also add Connect IQ
™
activity apps to your device using
your Garmin Connect account (
Connect IQ Features
,
page 17
).
For more information about activity tracking and fitness metric
accuracy, go to
garmin.com/ataccuracy
.
Starting an Activity
When you start an activity, GPS turns on automatically (if
required). When you stop the activity, the device returns to
watch mode.
1
From the watch face, select
START
.
2
Select an activity.
3
If necessary, follow the on-screen instructions to enter
additional information.
4
If necessary, wait while the device connects to your ANT+
®
sensors.
5
If the activity requires GPS, go outside, and wait while the
device locates satellites.
6
Select
START
to start the timer.
NOTE:
The device does not record your activity data until
you start the timer.
Tips for Recording Activities
•
Charge the device before starting an activity (
Charging the
Device
, page 26
).
•
Select
to record laps.
•
Select
UP
or
DOWN
to view additional data pages.
Introduction
1
-t.
2.
Válasszuk a
Beállítások
>
Tevékenység figyelés
>
Mozgás riasztás
>
Be
pontot.
Alvás figyelés mód
Alvás módban a készülék figyeli pihenésünk minőségét, mozgásunk inten
-
zitását. Garmin Connect fiókunk felhasználói beállításaiban megadhatjuk a
normál alvási időnket. A mért alvási adatok: az átaludt órák teljes száma,
mozgásos (nyugtalanabb) időszakok, valamint nyugalmas alvással telt idő
-
szakok. Az alvási statisztikát a Garmin Connect fiókunkban tekinthetjük meg.
MEGJEGYZÉS!
A szundításokat a készülék nem számolja bele az alvási
statisztikába. A
Ne zavarj!
üzemmóddal kikapcsolhatjuk az értesítéseket és
riasztásokat, kivéve az ébresztőket (
„Ne zavarj!” mód használata, 10. oldal
).
Automatikus alvás figyelő mód használata
1.
Alvás közben viseljük az órát.
2.
Töltsük fel az alvási statisztikai adatokat a Garmin Connect fiókba (
tok manuális feltöltése a Garmin Connect alkalmazásra,
Az alvási statisztikát a Garmin Connect fiókunkban tekinthetjük meg.
„Ne zavarj!” mód használata
A „Ne zavarj!” móddal kikapcsolhatjuk a háttérvilágítást, a hangjelzéseket és
a rezgő riasztásokat. Például TV-nézés vagy alvás során hasznos lehet ez
a funkció.
MEGJEGYZÉS!
A Garmin Connect fiókban módunkban áll egy normál alvás
időszakot megadni. A rendszerbeállítások között az
Alvásidő
) funkciót aktiválva a készülék ezen alvási időtartamban au
-
tomatikusan „ne zavarj” módba vált.


