


190-01115-01
G3X/G3X Touch Install Manual - GDU 4XX Config and Post Install Checkout
Rev. AC
Page 34-148
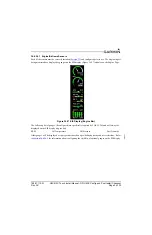
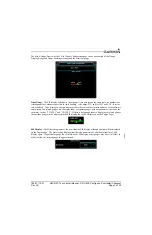
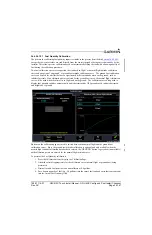
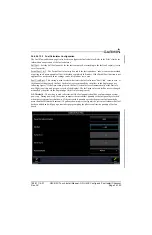
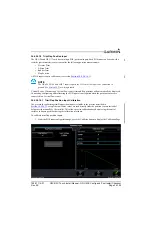
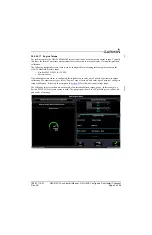
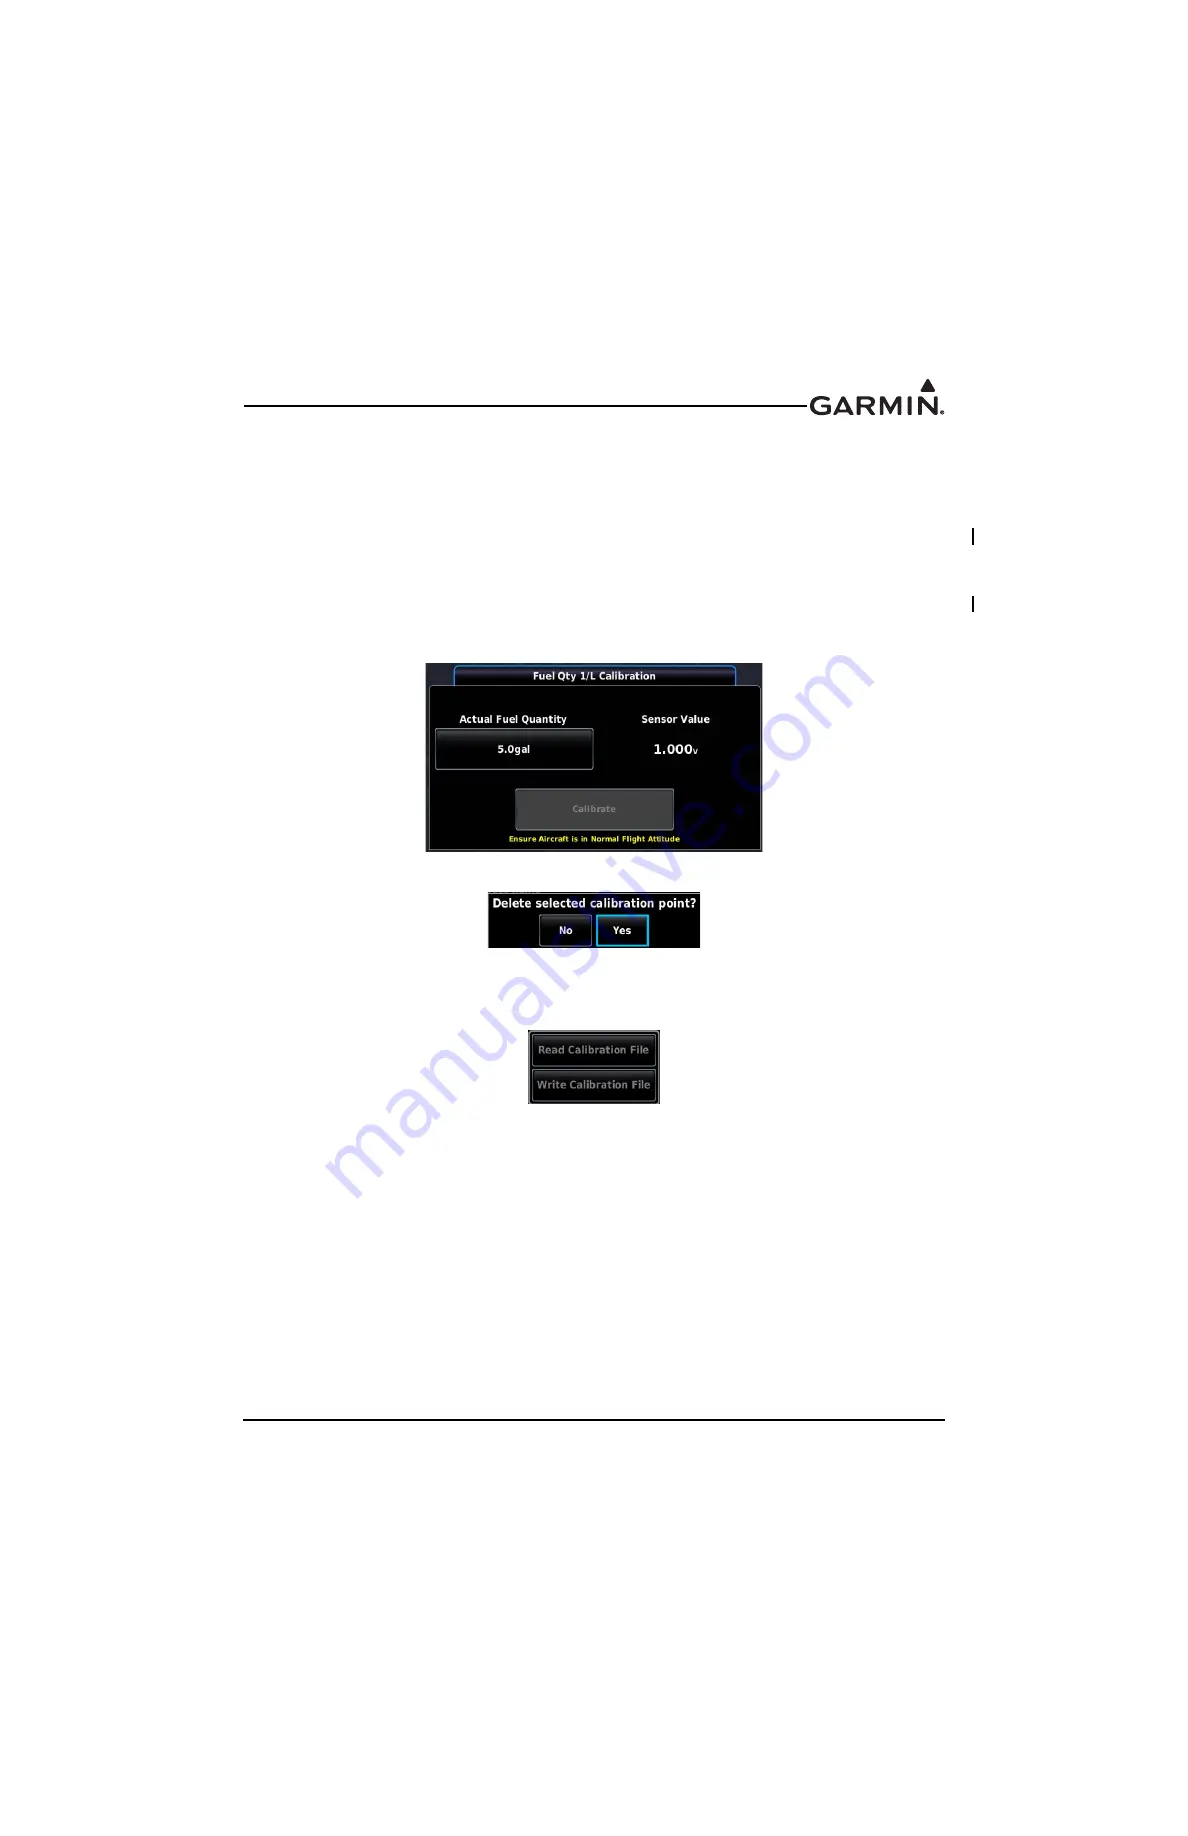
5. Note the resulting sensor value displayed in the Sensor Value field (the sensor value should change
with each added amount of fuel), wait at least 2 minutes for the reading to stabilize.
6. Press the Calibrate button.
7. Repeat this process until the fuel tank is full.
The installer determines the best interval values of fuel to most accurately calibrate the full range of the
tank. The greater number of calibration points that are used (maximum of 50 points), the more accurate the
calibration will be. A yellow line on the graph indicates potentially incorrect/invalid info.
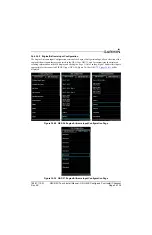
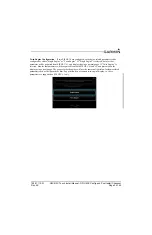
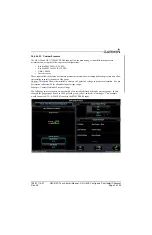
Fuel quantity inputs configured for digital sensing are calibrated in the same manner except that the
resulting frequency (in kHz) from the sensor is displayed instead of the voltage. Frequencies up to 50 kHz
are supported.
To delete a calibration value, highlight the desired data point in the list and press the Delete Button.
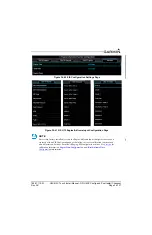
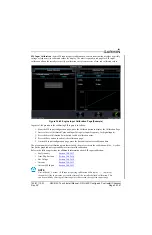
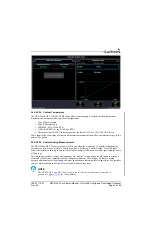
Fuel Quantity Calibration Data Backup
– This option allows the user to back up fuel calibration data to
an SD card placed in the SD card slot of the PFD. Access the Read/Write Calibration File menu by
pressing the Menu key when displaying the Fuel Quantity Calibration Page
Write Calibration File
– Stores fuel quantity calibration data to a file on the SD card. Calibration data is
saved to the /Garmin/cal/ directory on the card. This data storage must be repeated for each calibrated tank
(if backup is desired).
Read Calibration File
– Reads the stored fuel quantity calibration data from the SD card.


